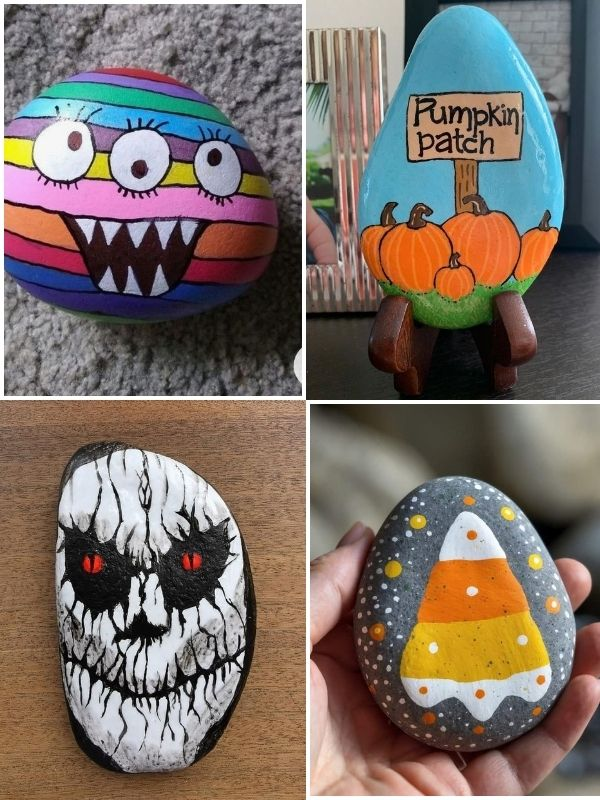
Looking for fun Halloween rock painting ideas to make this spooky season more creative? Painting ordinary stones into cute ghosts, spooky pumpkins, black cats, and funny monsters is an easy Halloween craft that kids and adults can enjoy together.
Halloween stone painting is perfect for families, classroom activities, Halloween parties, or a relaxing afternoon at home. You only need a few smooth stones, some paint, and a little creativity to turn simple rocks into colorful Halloween decorations. You do not have to be an experienced artist either. There are plenty of easy designs that beginners and children can try.
From adorable ghost rocks and smiling pumpkin stones to creepy eyeballs and glow-in-the-dark designs, you will find plenty of inspiration for your next craft project. You can display your finished rocks around the house, use them to decorate your porch, or give them as handmade Halloween gifts.
In this guide, you will discover easy Halloween rock painting ideas for kids, beginners, and adults, along with the supplies you need and simple tips for creating beautiful painted stones.
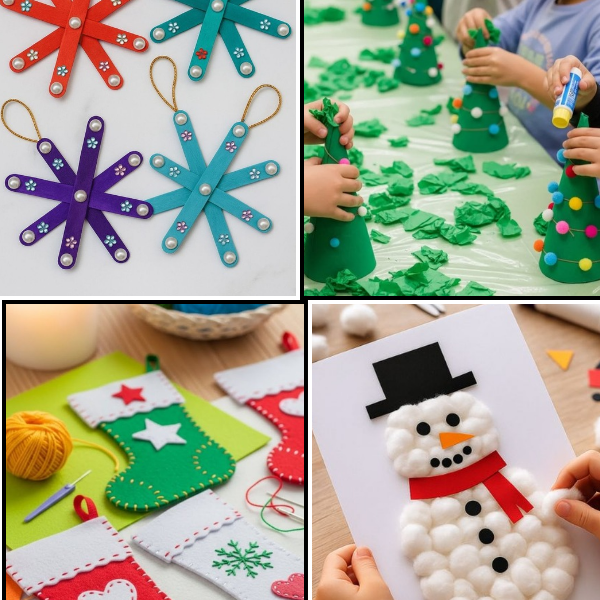
See Halloween crafts ideas kids can do
What You Need for Halloween Rock Painting
Before trying these Halloween rock painting ideas, gather a few basic supplies. You do not need expensive materials or special artistic skills to create cute ghosts, pumpkins, spiders, and other spooky designs. A few simple tools will help you turn ordinary stones into fun Halloween decorations.
1. Smooth Stones and Rocks
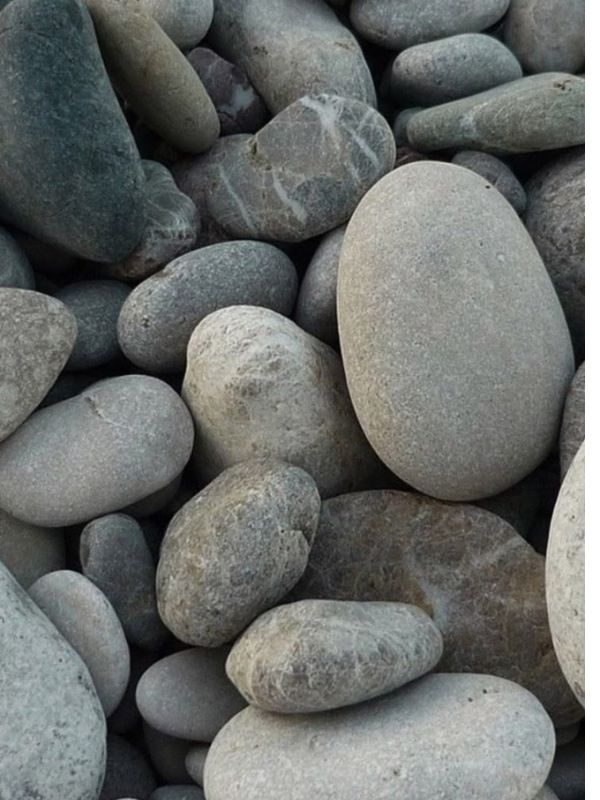
Smooth, flat stones are ideal for Halloween rock painting because they provide an easier surface for drawing faces and painting small details. You can collect suitable stones outdoors or purchase craft stones from a craft store.
Choose rocks in different shapes and sizes to match your designs. Round stones work well for pumpkins and monster faces, while longer stones can be used for ghosts, mummies, or other characters.
Wash the stones to remove dirt and let them dry completely before painting.
2. Acrylic Paint
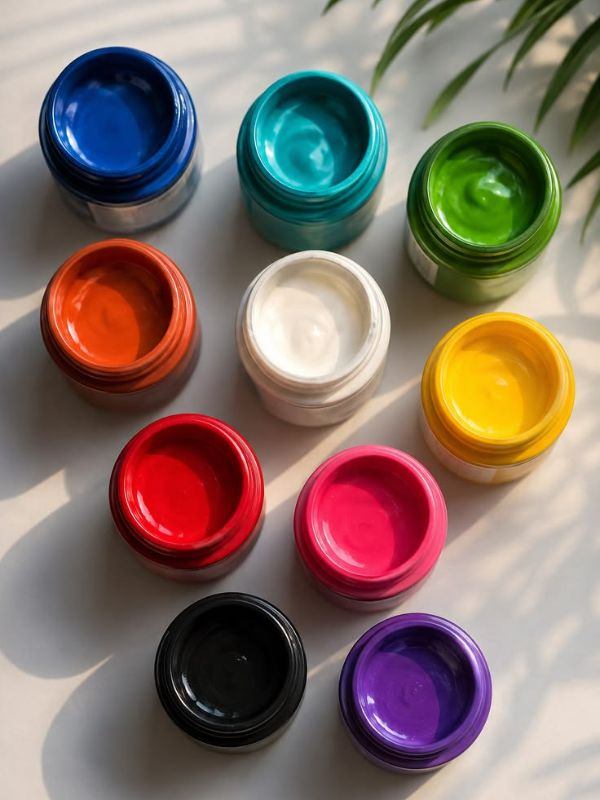
Acrylic paint is a popular choice for rock painting because it comes in many colors and works well on prepared stone surfaces.
For Halloween designs, consider getting these colors:
- Orange for pumpkins and candy corn
- Black for cats, bats, and spiderwebs
- White for ghosts, skulls, and mummies
- Green for Frankenstein monsters and spooky creatures
- Purple for witches and magical designs
- Red for vampire details and Halloween accents
You can start with a small set of basic colors and mix them to create additional shades.
3. Paintbrushes in Different Sizes
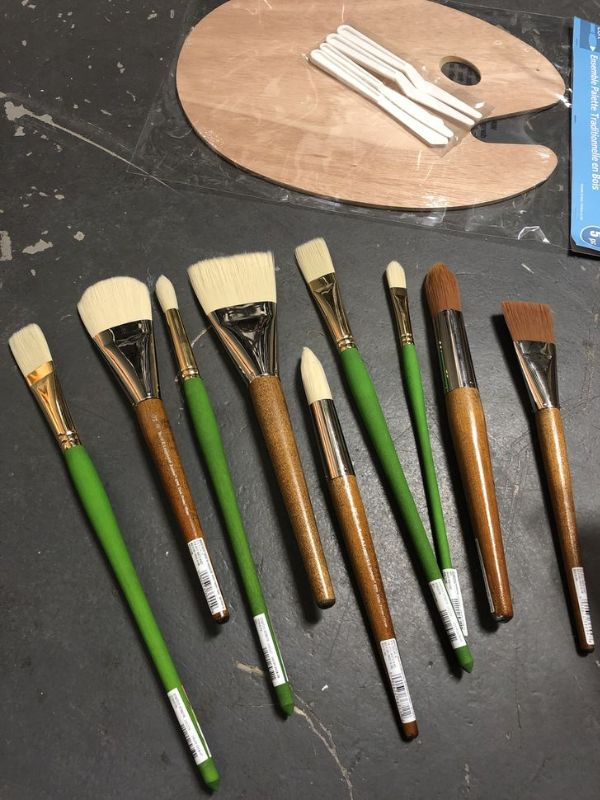
A selection of paintbrushes makes it easier to cover the stones and add details. Use a wider brush for the base coat and smaller brushes for eyes, mouths, spiderwebs, and other fine designs.
If you are crafting with young children, choose brushes with comfortable handles that are easy to grip.
4. Paint Pens and Permanent Markers
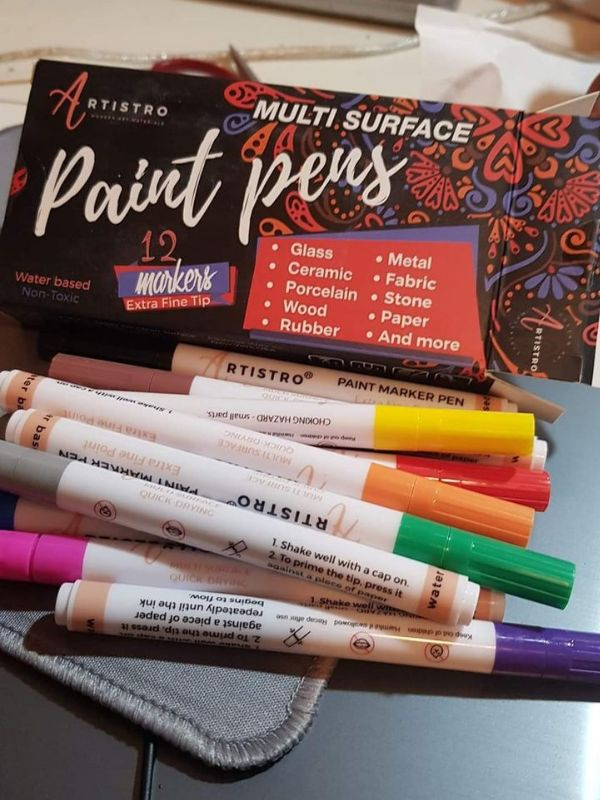
Paint pens can make Halloween stone painting easier, especially when you need to draw thin lines or small details. They are useful for creating ghost faces, pumpkin smiles, spiderwebs, and monster expressions.
Choose pens that are suitable for your painted surface and follow the manufacturer’s instructions. Test them on a spare stone first.
5. Pencils for Sketching Designs
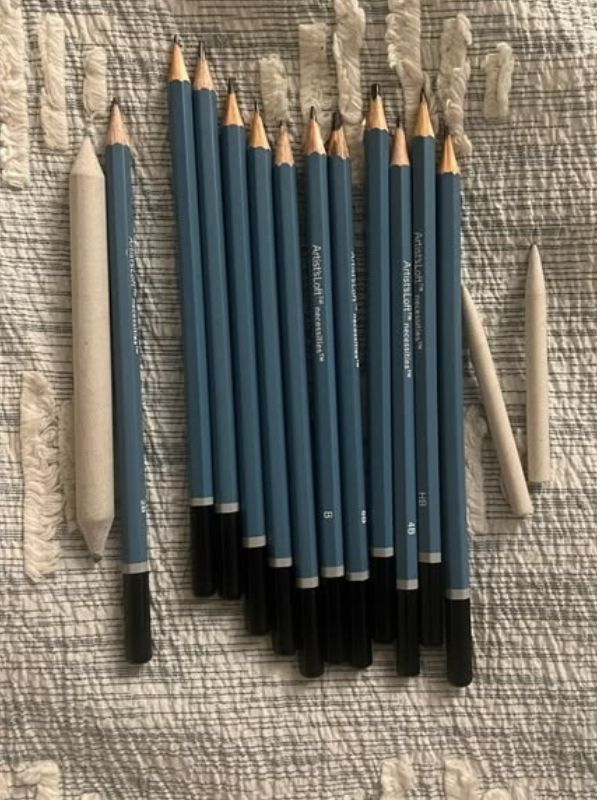
A pencil can help you sketch your design before applying paint. Lightly outline a ghost, pumpkin, bat, or other Halloween character so you have a guide to follow.
This is especially helpful for beginners who want to plan the design before painting.
6. Black and White Paint for Details
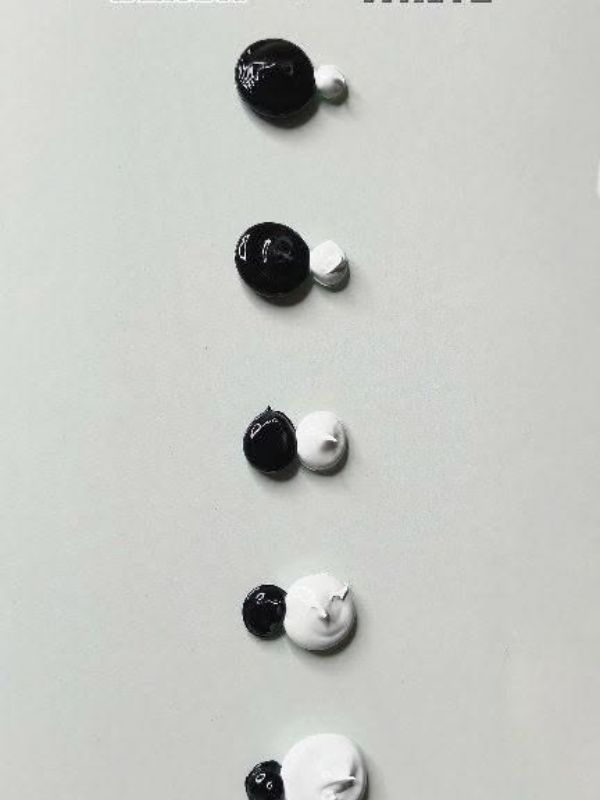
Black and white paint are particularly useful because they help bring Halloween characters to life. Use black to create eyes, mouths, outlines, and spiderwebs. White works well for ghost bodies, highlights, teeth, and mummy bandages.
Keeping these two colors nearby makes it easier to finish many different designs.
7. A Protective Work Surface
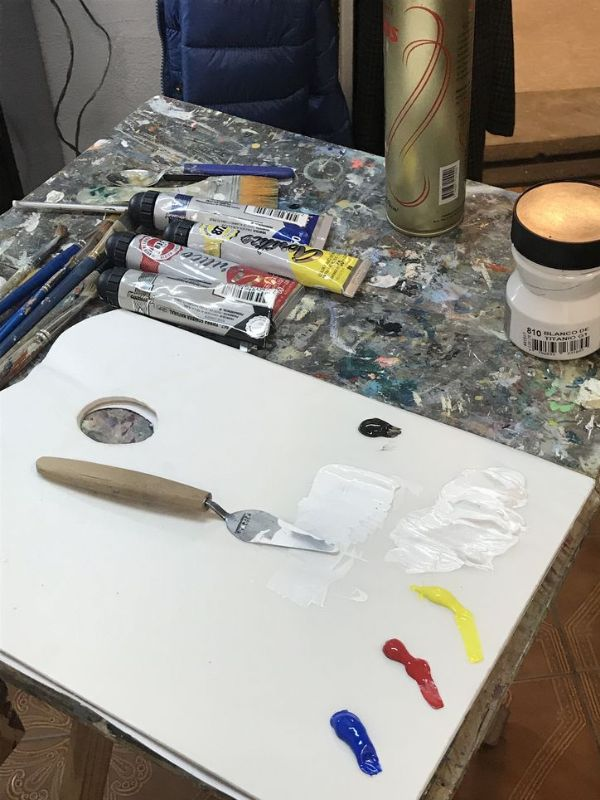
Painting can get messy, especially when children are involved. Cover your table with newspaper, an old tablecloth, or a reusable craft mat before you begin.
Keep water for rinsing brushes, paper towels, and a small container for used brushes nearby.
8. A Suitable Sealant
If you want your Halloween painted rocks to last longer, consider applying a clear sealant once the paint has dried completely. Choose a product that is compatible with your paint and suitable for your intended use, whether indoors or outdoors.
Follow the product instructions and allow it to cure fully. Adults should handle spray sealants in a well-ventilated area, away from children.
9. Optional Halloween Decorations
You can keep your designs simple or add extra details with suitable craft materials. Glitter, glow-in-the-dark paint, and small decorative accents can make your stones more interesting.
For children’s projects, avoid small loose decorations that could pose a choking risk. Paint alone is enough to create plenty of cute and spooky designs
If you are new to Halloween stone painting, start with a few smooth rocks, acrylic paint, and small brushes. You can create beautiful designs without buying every supply on the list.
See Halloween activities for adults and kids
Easy Halloween Rock Painting Ideas
With a few basic supplies, you can paint spooky ghosts, smiling pumpkins, creepy spiders, and funny monsters that look great on a Halloween table, porch, or craft display.
These easy Halloween rock painting ideas are suitable for beginners, families, and children with adult supervision. Each idea includes a short materials list and simple painting instructions so you can recreate the designs at home.
1. Cute Ghost Painted Rocks
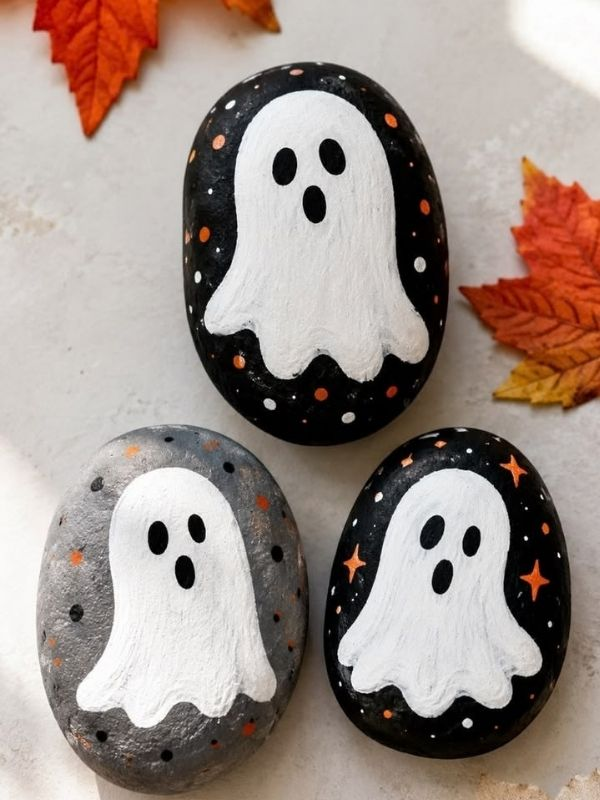
Ghost-painted rocks are among the easiest Halloween stone painting ideas to try. Their simple shapes and expressive faces make them perfect for beginners and kids.
Materials needed
- Smooth, flat stones
- White acrylic paint
- Black acrylic paint or a suitable paint pen
- Small paintbrush
How to paint them
- Wash your stone and let it dry completely.
- Paint the front white, creating a rounded ghost shape with a slightly wavy bottom.
- Allow the paint to dry, then add two black eyes and a small mouth.
- Add tiny cheek details or a little pink blush if you want a cute expression.
- Let the design dry completely before displaying it.
Creative tip: Paint several ghosts with different facial expressions to create a cute Halloween ghost collection.
2. Pumpkin Halloween Rocks
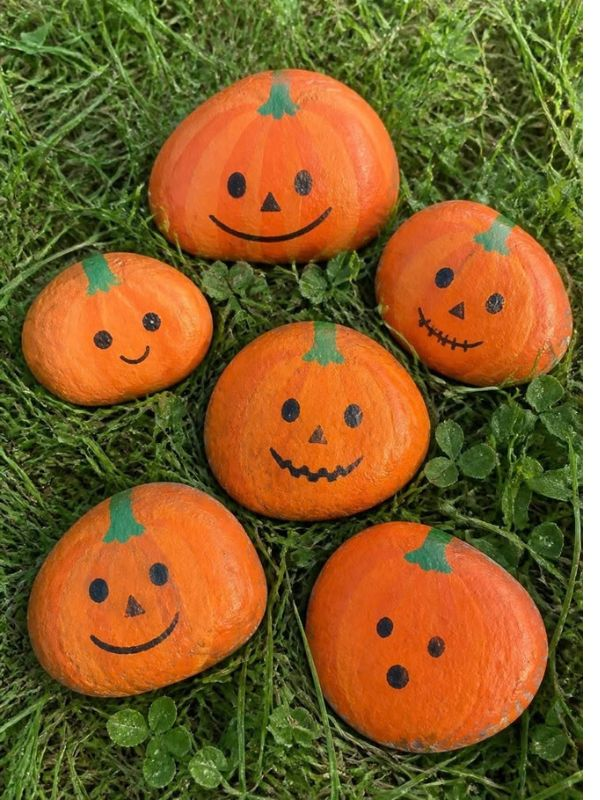
Pumpkin-painted rocks are perfect for adding traditional Halloween colors to your decorations. You can make them cheerful, spooky, or funny depending on the faces you paint.
Materials needed
- Round or oval stones
- Orange acrylic paint
- Green and black acrylic paint
- Small paintbrushes
How to paint them
- Paint the stone orange and allow it to dry.
- Use a slightly darker orange to add curved lines that resemble pumpkin ridges.
- Paint a small green stem at the top.
- Add black triangular eyes and a smiling or spooky mouth.
- Let all the paint dry before handling the finished rock.
Creative tip: Try different expressions, from friendly smiles to silly monster faces, to make every pumpkin unique.
3. Black Cat Painted Stones
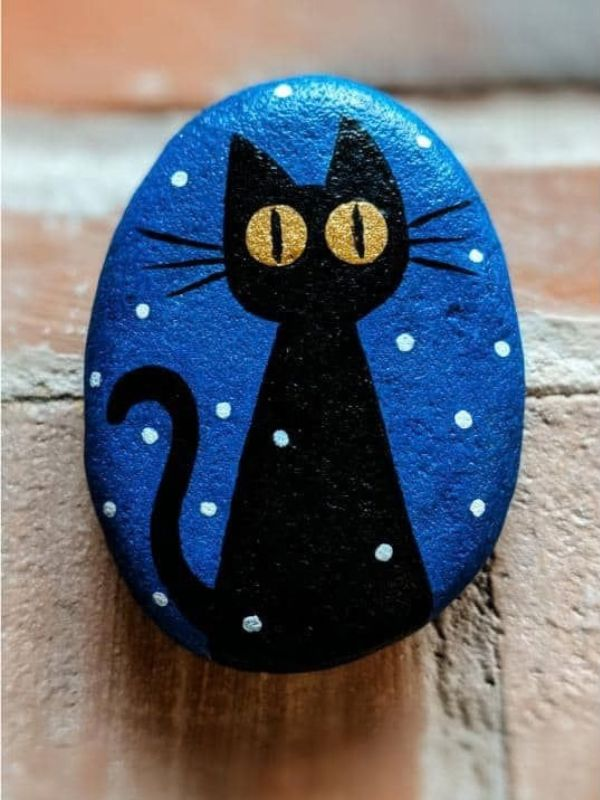
Black cat rocks are a fun choice for anyone who loves classic Halloween symbols. A dark background, pointed ears, and bright eyes can make a simple stone look like a little cat.
Materials needed
- Oval or rounded stones
- Black acrylic paint
- White and yellow acrylic paint
- Fine paintbrush
How to paint them
- Paint the stone black and let it dry.
- Add two pointed ears at the top using black paint.
- Paint two yellow or white eyes.
- Use white paint to add a small nose, whiskers, and a mouth.
- Add a few highlights to make the cat’s face stand out.
Creative tip: Paint a tiny orange collar or a purple bow for an extra Halloween touch.
4. Spider Halloween Rocks
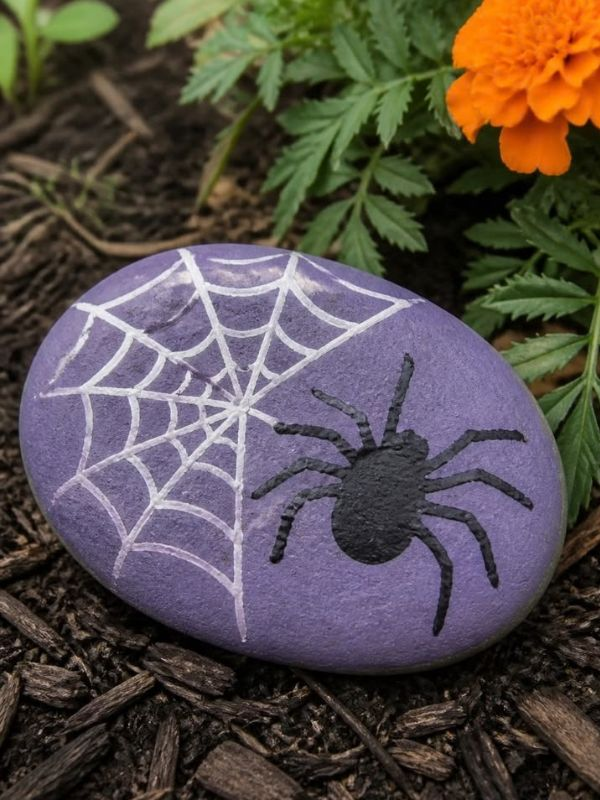
Spider-painted rocks are ideal if you want a slightly spooky design that is still simple to create. They also work well for classroom craft activities and Halloween party decorations.
Materials needed
- Round stones
- Black acrylic paint
- White paint
- Fine paintbrush
How to paint them
- Paint the entire stone black and let it dry.
- Add a round spider body in the center if the shape of your stone needs more definition.
- Paint eight thin legs extending from the body.
- Add two small white eyes.
- Use a fine brush to draw a spiderweb beside the spider if you want a more detailed design.
Creative tip: Place several spider rocks together on a tray to create a spooky Halloween display.
5. Frankenstein Monster Rocks
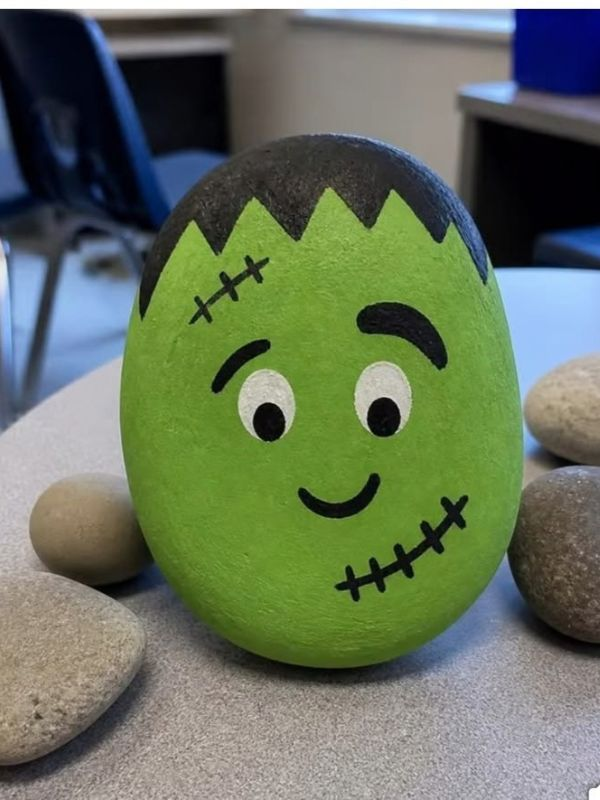
Frankenstein monster rocks are easy to recognize and fun to paint. Their green faces, dark hair, and simple expressions make them a great project for children and beginners.
Materials needed
- Square or oval stones
- Green, black, and white acrylic paint
- Small paintbrushes
How to paint them
- Paint the stone green and allow it to dry.
- Add a black hairline across the top.
- Paint two white eyes with black pupils.
- Add thick black eyebrows and a straight or zigzag mouth.
- Paint small black bolts on the sides of the face.
Creative tip: Give each monster a different hairstyle or expression to create a collection of funny Frankenstein rocks.
6. Mummy Painted Rocks
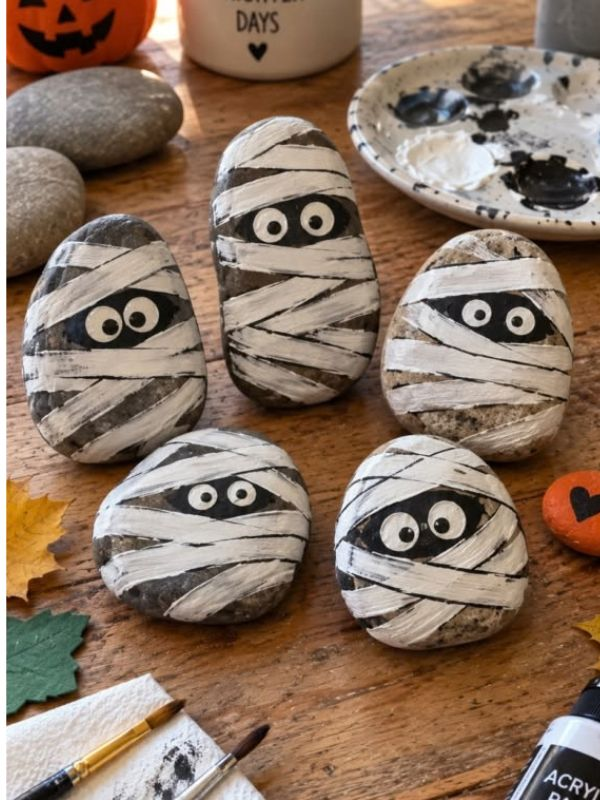
Mummy rocks are perfect for beginners because the bandage effect does not need to look perfectly straight. A few white lines and a pair of eyes are enough to create the design.
Materials needed
- Oval stones
- White acrylic paint
- Black paint or a suitable paint pen
- Fine paintbrush
How to paint them
- Paint the stone white and allow it to dry.
- Add uneven horizontal and diagonal lines across the stone to resemble mummy bandages.
- Leave a small space for the eyes.
- Paint two black eyes in the open area.
- Add a tiny mouth if you want a funny or surprised expression.
Creative tip: Use slightly wavy lines rather than perfectly straight ones to give your mummy a wrapped appearance.
7. Bat Halloween Rocks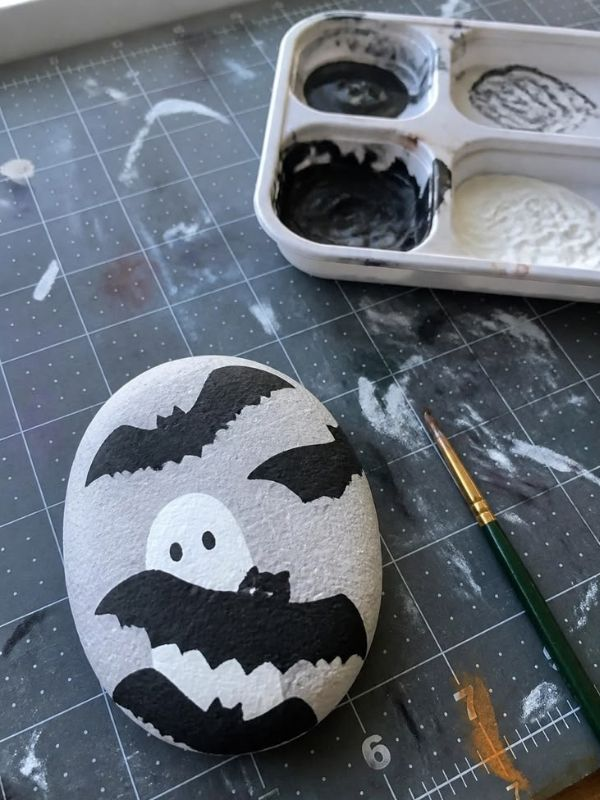
Bat-painted rocks bring a spooky touch to your Halloween decorations. Their dark color and pointed wings make them recognizable even when the design is simple.
Materials needed
- Flat, oval stones
- Black acrylic paint
- White paint
- Fine paintbrush
How to paint them
- Paint the stone black and let it dry.
- Paint two pointed wings extending from the sides.
- Add two small ears at the top.
- Paint tiny white eyes and a small mouth.
- Add a few gray highlights to make the wings more visible.
Creative tip: Use flat stones to create bat silhouettes that can be arranged along a windowsill or Halloween display.
8. Witch Hat Painted Stones
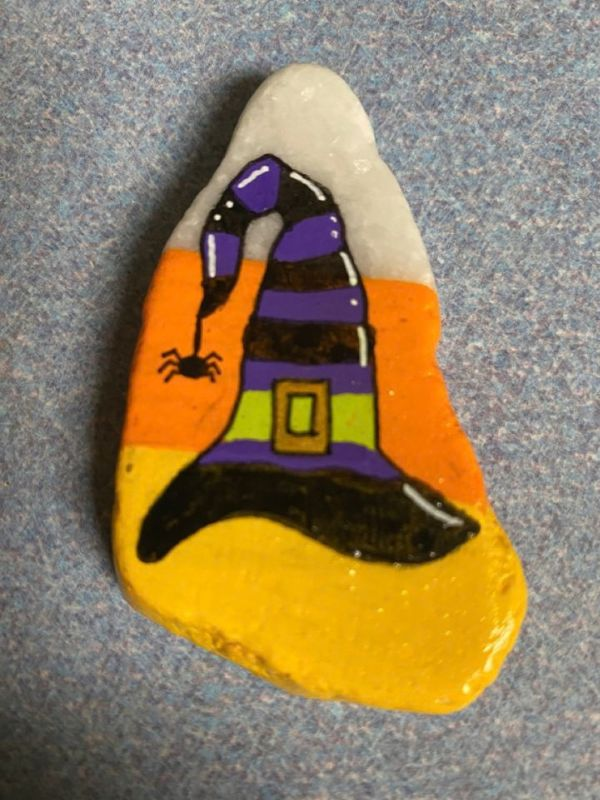
Witch hat rocks are a simple way to add a little Halloween magic to your painted stone collection. They work well on both light and dark stones.
Materials needed
- Flat or oval stones
- Black and purple acrylic paint
- Orange or yellow paint
- Small paintbrush
How to paint them
- Paint the stone a background color of your choice and let it dry.
- Paint a large black triangle for the witch’s hat.
- Add a horizontal brim at the bottom of the triangle.
- Paint a purple hatband and a small orange or yellow buckle.
- Add stars or tiny dots around the hat for decoration.
Creative tip: Try a purple background with black stars for a magical Halloween look.
9. Skeleton Face Rocks
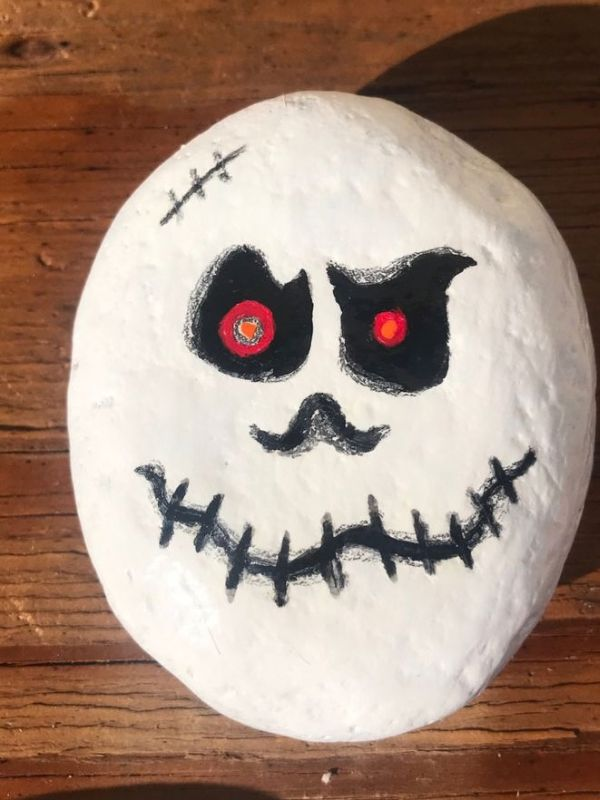
Skeleton rocks are a good choice if you want a classic spooky design. The black and white contrast makes the face stand out, and you can keep the details as simple as you like.
Materials needed
- Oval stones
- White and black acrylic paint
- Fine paintbrush
How to paint them
- Paint the stone white and allow it to dry.
- Add two large black eye sockets.
- Paint a small triangular nose.
- Draw a simple row of black lines for the teeth.
- Add light gray shading around the face if you want more detail.
Creative tip: Make some skeleton faces smile and others look surprised to give your collection more personality.
10. Candy Corn Painted Rocks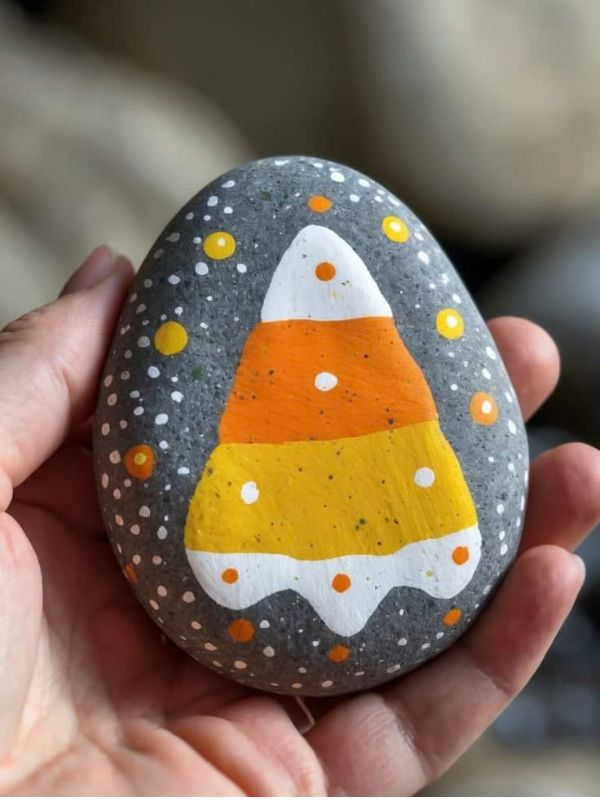
Candy corn rocks are bright, colorful, and easy for beginners to paint. Their three-part color pattern is simple enough for children to follow with help.
Materials needed
- Oval or triangular stones
- White, orange, and yellow acrylic paint
- Paintbrushes
How to paint them
- Paint the stone white at one end.
- Add an orange band through the middle.
- Paint the remaining end yellow.
- Let each section dry before adding the next color to keep the bands neat.
- Add a thin outline if you want the shape to stand out.
Creative tip: Paint several candy corn stones in different sizes and arrange them in a small bowl as Halloween decorations.
11. Halloween Eyeball Rocks
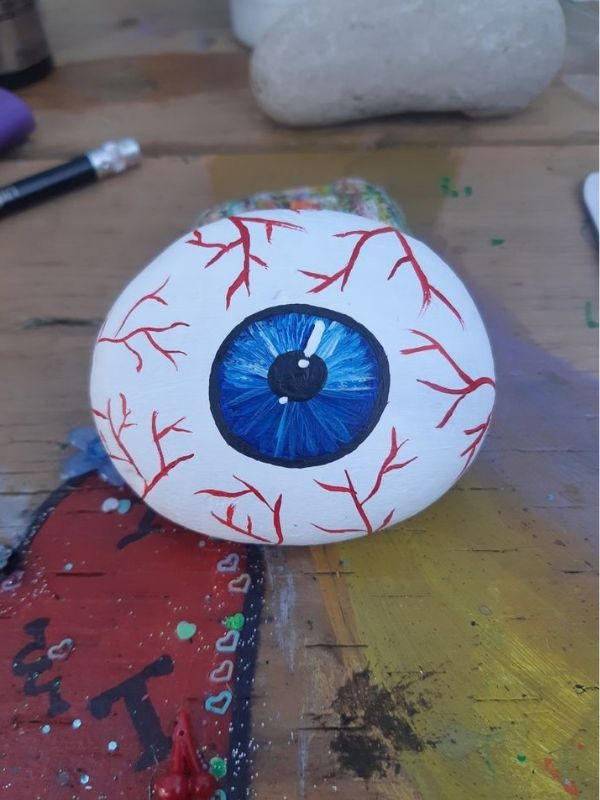
Eyeball rocks are great for anyone who wants a creepy design without complicated painting. The round shapes and bright colors make them stand out in a Halloween display.
Materials needed
- Round, smooth stones
- White acrylic paint
- Blue, green, or brown paint
- Black and red paint
- Small paintbrushes
How to paint them
- Paint the stone white and let it dry.
- Add a large blue, green, or brown circle in the center.
- Paint a smaller black circle inside it for the pupil.
- Add a few thin red lines around the white area for a bloodshot effect, if desired.
- Let the design dry completely.
Creative tip: Paint several eyeballs in different colors for a funny, slightly spooky collection.
12. Cute Monster Painted Stones
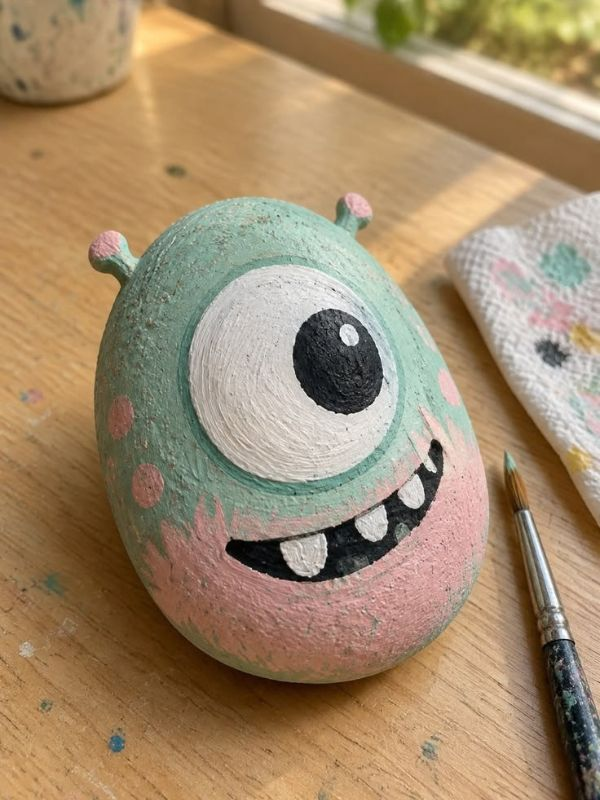
Monster rocks allow you to experiment with different colors and facial expressions. You can create friendly monsters for kids or spooky characters for a Halloween party.
Materials needed
- Stones in different shapes
- Green, purple, orange, or blue acrylic paint
- Black and white paint
- Small paintbrushes
How to paint them
- Paint each stone a bright monster color and let it dry.
- Add one, two, or three large eyes.
- Paint a mouth with funny teeth or a silly tongue.
- Add eyebrows, spots, horns, or tiny arms if desired.
- Allow the finished design to dry before displaying it.
Creative tip: Use stones with unusual shapes to inspire different monster designs instead of trying to make every rock look the same.
13. Skull Halloween Rocks
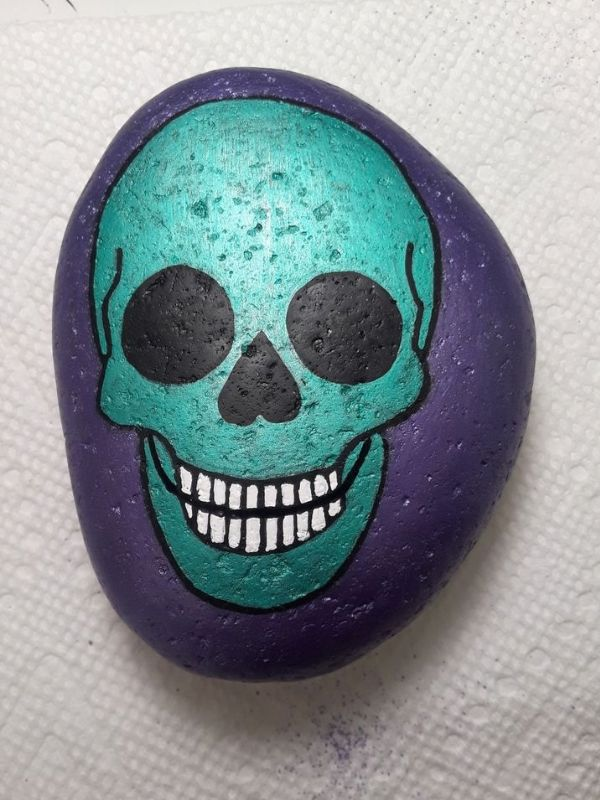
Skull-painted rocks can look spooky or decorative depending on the details. A simple white skull on a dark background is an easy design for beginners.
Materials needed
- Oval or rounded stones
- White, black, and gray acrylic paint
- Fine paintbrush
How to paint them
- Paint the stone black or another dark background color.
- Add a white skull shape in the center.
- Paint two large black eye sockets and a small nose.
- Add short lines to suggest teeth.
- Use gray paint to add subtle shading around the edges.
Creative tip: Add tiny flowers or colorful patterns around the skull for a decorative sugar-skull-inspired look.
14. Haunted House Painted Rocks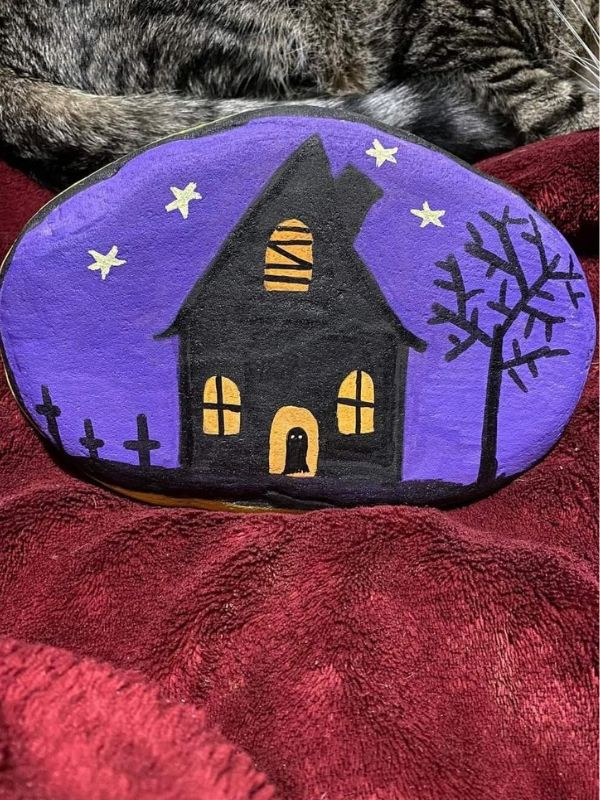
Haunted house rocks let you create a miniature Halloween scene. This design works especially well on flat stones because they provide room for windows, doors, and a spooky sky.
Materials needed
- Large, flat stones
- Black, purple, white, and yellow acrylic paint
- Fine paintbrushes
How to paint them
- Paint the stone a dark purple or black background and allow it to dry.
- Paint a simple house shape in the center.
- Add a pointed roof, small windows, and a door.
- Use yellow paint to make the windows appear lit.
- Add a moon, bats, or tiny stars around the house.
Creative tip: Create a series of haunted house stones with different roofs, windows, and spooky backgrounds.
15. Vampire Halloween Rocks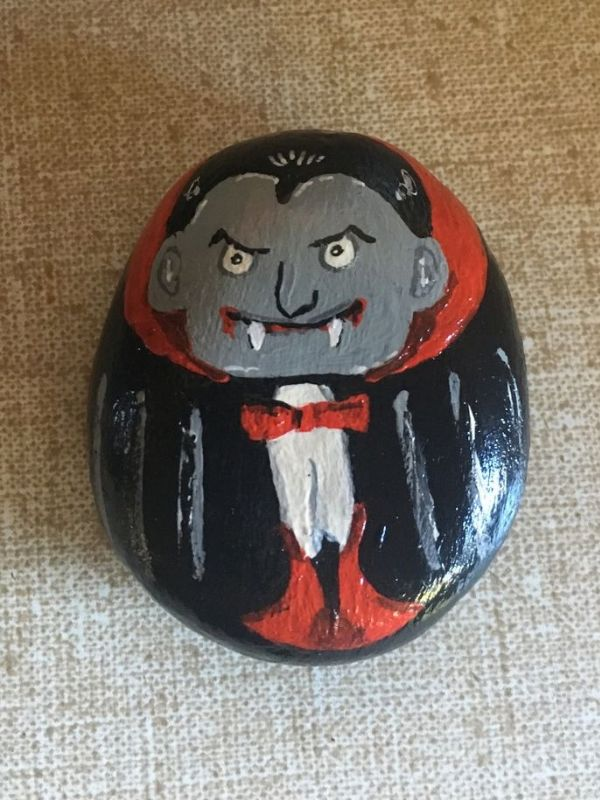
Vampire rocks are a fun choice if you enjoy painting Halloween characters with dramatic expressions. A pale face, dark hair, and pointed teeth create the classic vampire look.
Materials needed
- Oval stones
- White, black, and red acrylic paint
- Fine paintbrush
How to paint them
- Paint the stone white or pale gray.
- Add black hair around the top and sides of the face.
- Paint two dark eyes and a small nose.
- Add a red mouth with two tiny white fangs.
- Outline the features with black paint if needed.
Creative tip: Give your vampire a purple collar or a tiny red bow tie to make the design more playful.
16. Spiderweb Painted Stones
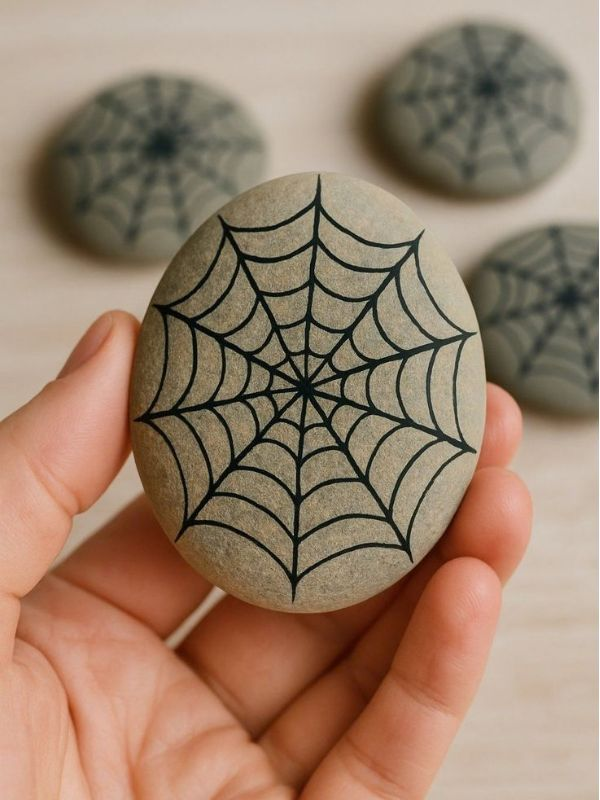
Spiderweb rocks are a good option when you want a simple pattern rather than a character. The design can be created with just two colors and a steady hand.
Materials needed
- Flat, dark-colored stones
- White acrylic paint or a white paint pen
- Fine paintbrush
How to paint them
- Clean and dry the stone.
- Paint it black if it is not already dark, then let it dry.
- Draw several thin lines that spread outward from one point.
- Connect the lines with small curved sections to form a web.
- Add a tiny spider in one corner if you want extra detail.
Creative tip: Use white paint on black stones or black paint on white stones for a strong contrast.
17. Black and Orange Halloween Rocks
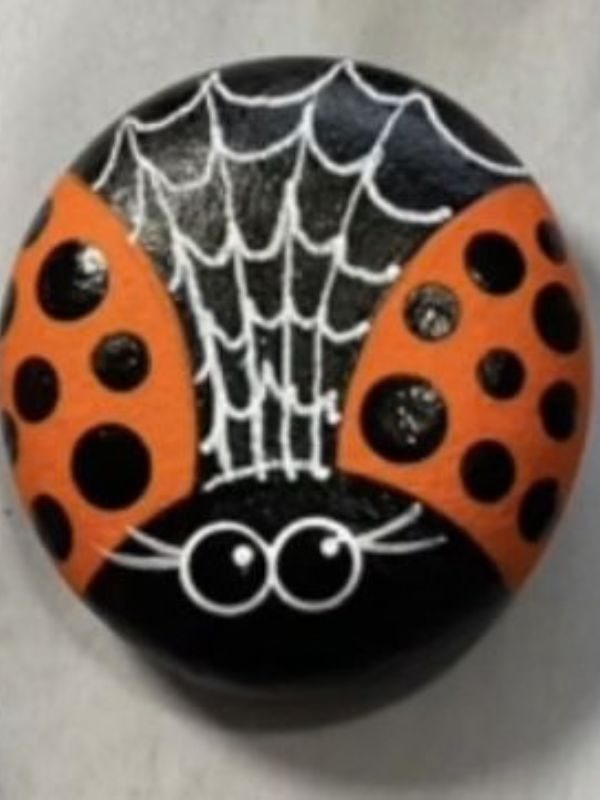
If you prefer simple designs, black and orange painted rocks can look festive without detailed characters. They are ideal for beginners who want a coordinated set of Halloween decorations.
Materials needed
- Smooth stones
- Black and orange acrylic paint
- Small paintbrushes
- White paint for optional details
How to paint them
- Paint some stones black and others orange.
- Allow the base coats to dry.
- Add simple patterns such as stripes, dots, stars, or zigzags.
- Paint tiny ghosts, pumpkins, or bats on a few stones.
- Let everything dry before arranging the rocks together.
Creative tip: Use the same color palette across several stones to create a matching Halloween display.
18. Glow-in-the-Dark Halloween Rocks
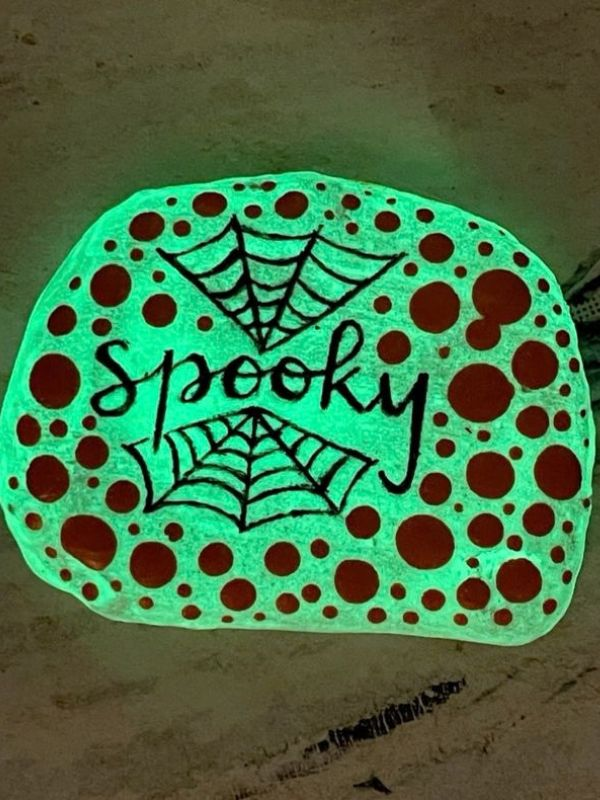
Glow-in-the-dark rocks can make Halloween decorations more exciting, especially in a dimly lit room or sheltered outdoor display. Use a glow-in-the-dark paint designed for your chosen surface.
Materials needed
- Smooth stones
- Glow-in-the-dark craft paint
- Black or white acrylic paint
- Small paintbrushes
How to paint them
- Clean and dry the stones.
- Paint a simple ghost, pumpkin, eyeball, or monster design.
- Apply the glow-in-the-dark paint according to the product instructions.
- Let the paint dry fully.
- Charge the design under the light source recommended by the manufacturer before viewing it in the dark.
Creative tip: Ghosts and eyeballs are especially effective because their bright shapes are easy to recognize in low light.
19. Funny Halloween Face Rocks
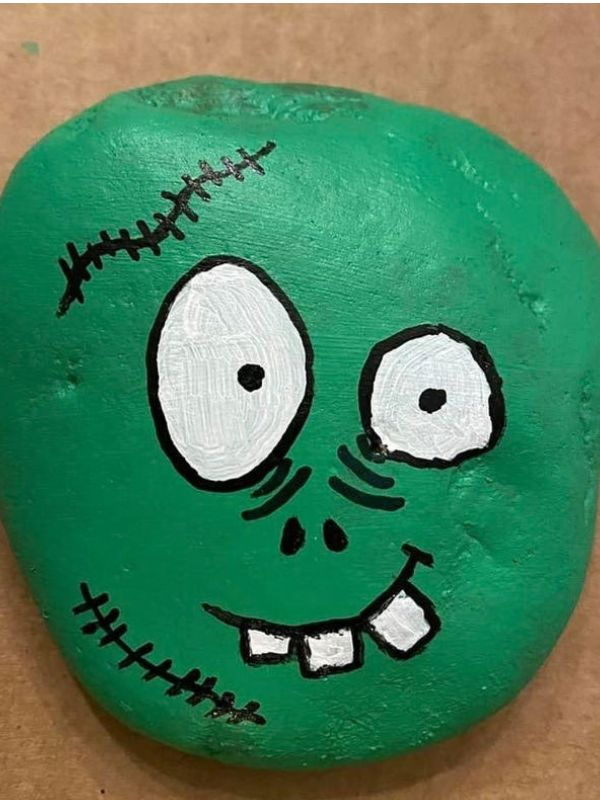
Funny face rocks are perfect for children who enjoy creating their own characters. There is no need to follow a complicated design because every stone can have a different expression.
Materials needed
- Stones in different shapes
- Acrylic paint in several colors
- Black and white paint
- Small paintbrushes
How to paint them
- Choose a stone and paint it your favorite color.
- Add two eyes, making them large, tiny, crossed, or uneven.
- Paint a funny mouth, crooked smile, or surprised expression.
- Add eyebrows, freckles, or colorful spots.
- Let the finished rock dry completely.
Creative tip: Give each rock a name or personality and display the collection together as a group of Halloween characters.
20. Halloween Character Rocks
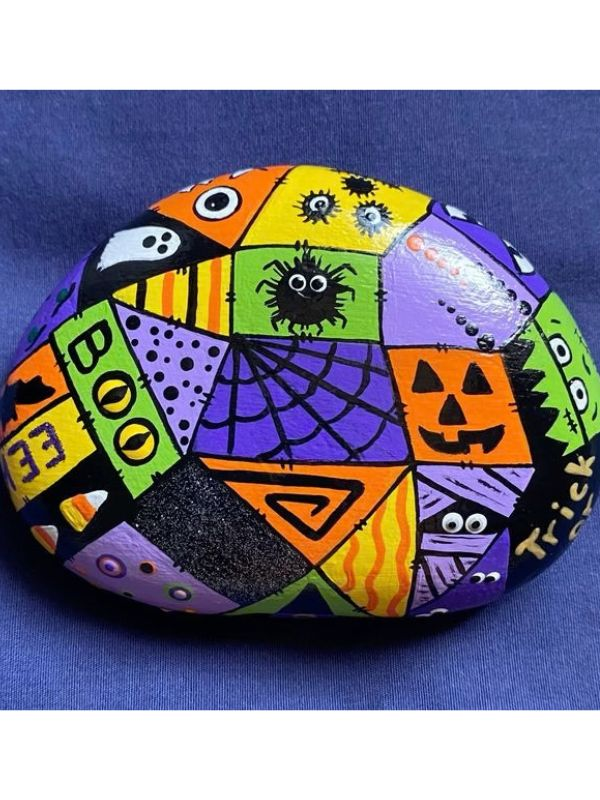
If you want to try several designs at once, create a collection of Halloween character rocks. You can combine ghosts, pumpkins, witches, bats, black cats, and monsters into one colorful set.
Materials needed
- Smooth stones in different shapes
- Acrylic paint in your preferred Halloween colors
- Small and fine paintbrushes
- Paint pens for details
How to paint them
- Select stones that suit the characters you want to create.
- Apply the main color to each stone and let it dry.
- Add the character’s basic shape and features.
- Use paint pens or small brushes for details such as eyes, mouths, hats, and whiskers.
- Allow each rock to dry before arranging the collection.
Creative tip: Make a matching set for a Halloween party table, classroom display, or seasonal craft corner.
Tips for Getting Better Results
- Start with simple shapes: Ghosts, pumpkins, and candy corn are easier for beginners than detailed scenes.
- Let each layer dry: This helps prevent colors from smearing into each other.
- Use a fine brush for details: Small eyes, mouths, and outlines look neater with a smaller brush.
- Test your paint first: Different stones absorb paint differently, so try your colors on a spare stone.
- Protect your finished work: If the rocks will be outdoors, choose a compatible outdoor sealant and follow its directions.
- Keep safety in mind: Adults should supervise children using paint and craft supplies, and young children should not handle small decorations that could be swallowed.
Cute Halloween Rock Painting Ideas for Kids
Cute Halloween rock painting ideas for kids are a fun way to keep little ones entertained while helping them explore their creativity. Instead of making every design scary, children can paint friendly ghosts, smiling pumpkins, colorful monsters, and adorable black cats on smooth stones. These simple crafts are perfect for Halloween classroom activities, family craft afternoons, or parties at home.
The best designs for children use basic shapes, bright colors, and easy-to-draw faces. Younger kids can paint simple patterns, while older children can add extra details to make each rock unique. Here are some cute and easy Halloween rock painting ideas children can enjoy.
1. Simple Ghost Rocks
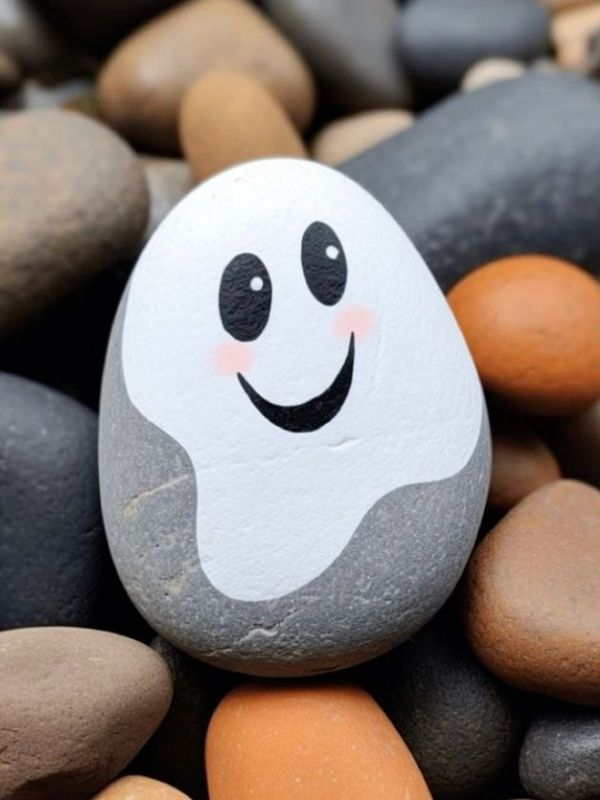
Ghost rocks are among the easiest Halloween crafts for kids because the design requires only white paint and a few black details.
Materials needed:
- Smooth, flat stones
- White acrylic paint
- Black paint or a black paint pen
- Small paintbrush
How to paint them:
- Clean the stones and allow them to dry.
- Paint each stone white and let the paint dry completely.
- Add two black eyes and a small smiling mouth.
- Draw tiny arms or rosy cheeks to make the ghosts look extra cute.
2. Smiling Pumpkin Stones
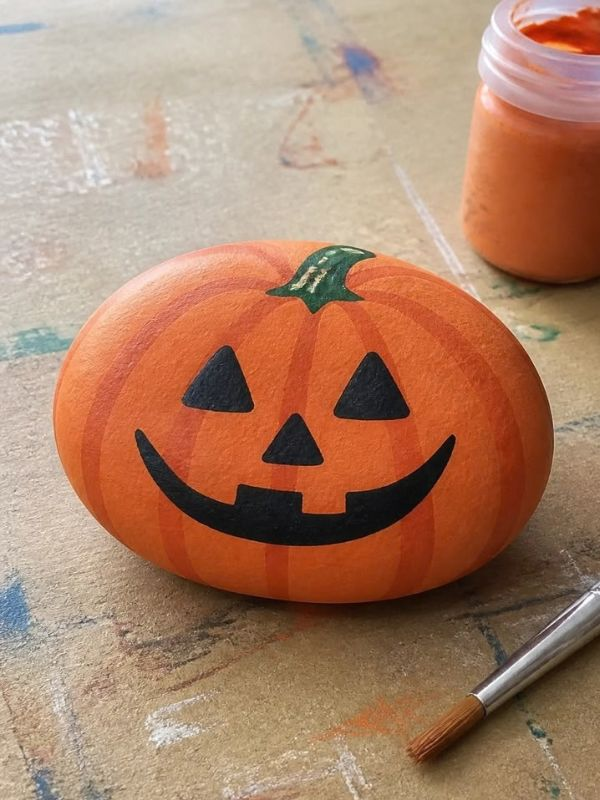
Turn ordinary stones into mini pumpkins with orange paint and cheerful faces. These colorful rocks look lovely on a Halloween craft table.
Materials needed:
- Smooth stones
- Orange and green acrylic paint
- Black paint or paint pen
- Small paintbrushes
How to paint them:
- Paint the stone orange and let it dry.
- Add curved lines down the front to create pumpkin sections.
- Paint a small green stem at the top.
- Finish with a happy face using black paint.
3. Friendly Monster Rocks
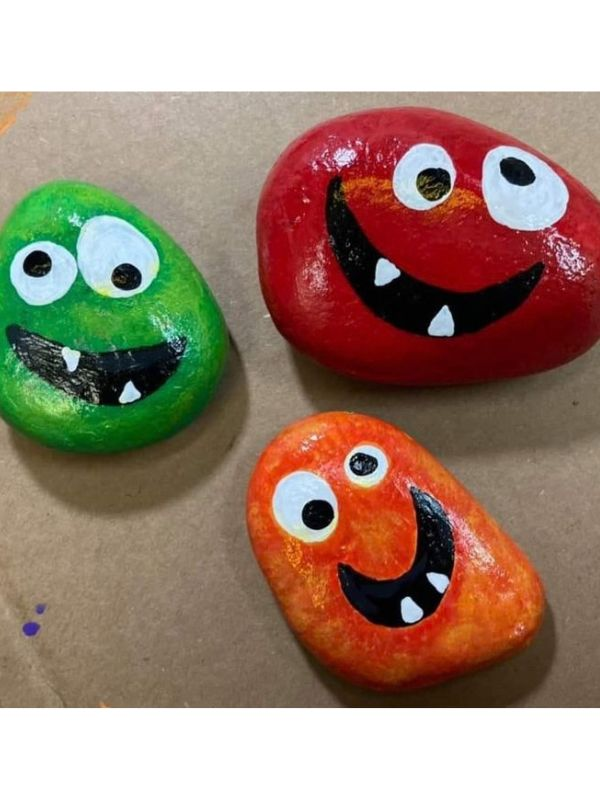
Let children invent their own Halloween monsters using bright colors and silly facial expressions. There is no single correct design, so kids can experiment freely.
Materials needed:
- Smooth stones
- Purple, green, blue, or pink paint
- Black and white paint
- Paintbrushes
How to paint them:
- Cover each stone with a bright base color.
- Once dry, paint one large eye or two small eyes.
- Add a funny mouth, teeth, or tiny horns.
- Use different colors to give each monster its own personality.
4. Colorful Halloween Pattern Rocks
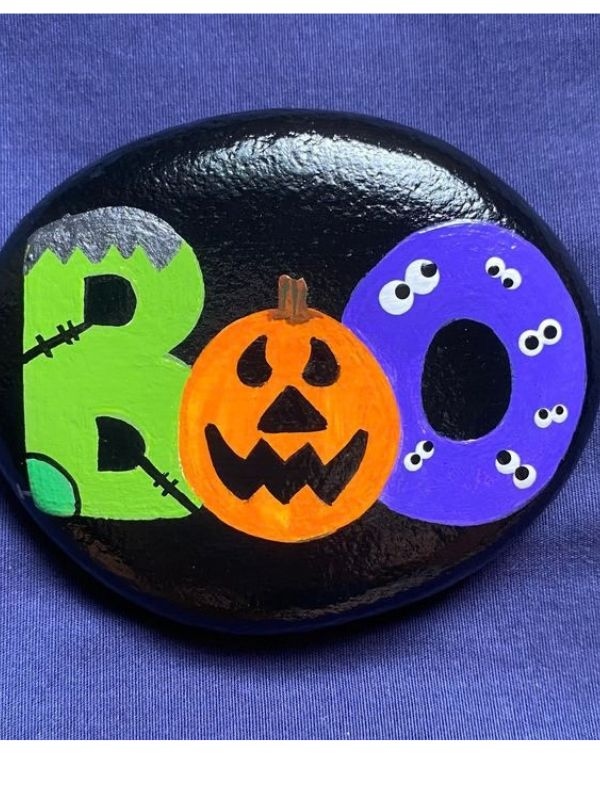
Not every Halloween rock needs a character. Patterned stones are a great option for younger children who are still learning to control a paintbrush.
Materials needed:
- Smooth stones
- Orange, purple, black, white, and green paint
- Small paintbrushes or cotton swabs
How to paint them:
- Choose one base color and paint the stone.
- Allow it to dry before adding another color.
- Create dots, stripes, stars, or zigzag patterns.
- Mix and match Halloween colors to make a collection of cheerful rocks.
5. Easy Black Cat Stones
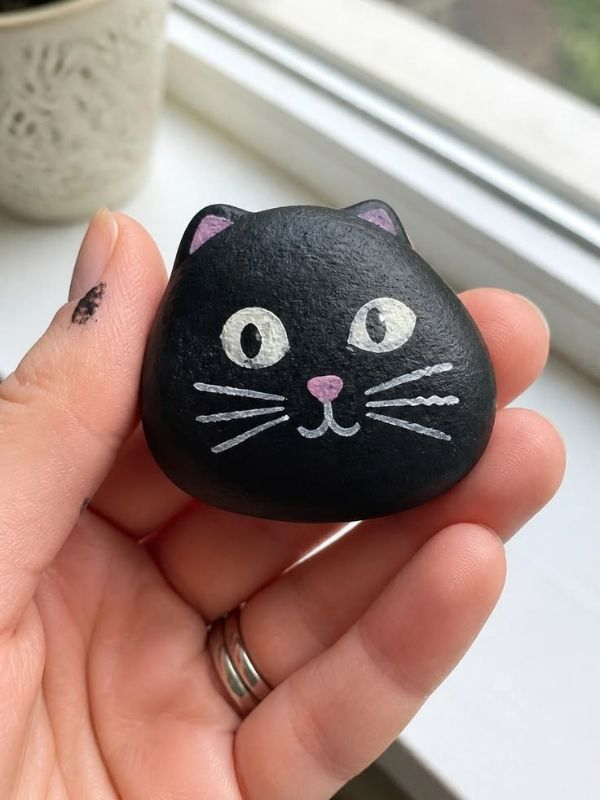
Black cat rocks are perfect for children who love cats and cute Halloween decorations. The shape can be as simple as a round face with two pointed ears.
Materials needed:
- Flat stones
- Black acrylic paint
- White and pink paint
- Small paintbrush
How to paint them:
- Paint the stone black and let it dry.
- Add two pointed ears at the top using black paint.
- Paint two white or yellow eyes.
- Add a small pink nose, whiskers, and a curved smile.
6. Fingerprint Halloween Rock Art
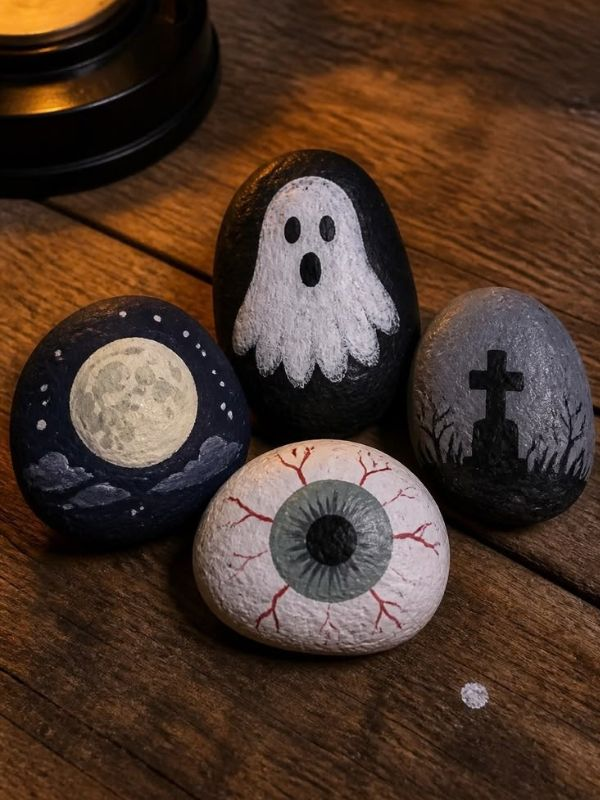
Fingerprint painting is a fun choice for toddlers and younger children who enjoy making art with their hands. An adult can help with the finishing details.
Materials needed:
- Smooth stones
- Washable, child-safe paint
- A shallow paint tray
- Black paint pen for adult-added details
How to paint them:
- Apply a small amount of paint to a tray.
- Let children gently press a fingertip into the paint.
- Make fingerprints on the stones to form tiny ghosts, pumpkins, or colorful monsters.
- After the prints dry, an adult can add eyes, mouths, stems, or other details.
7. Cute Bat Rocks
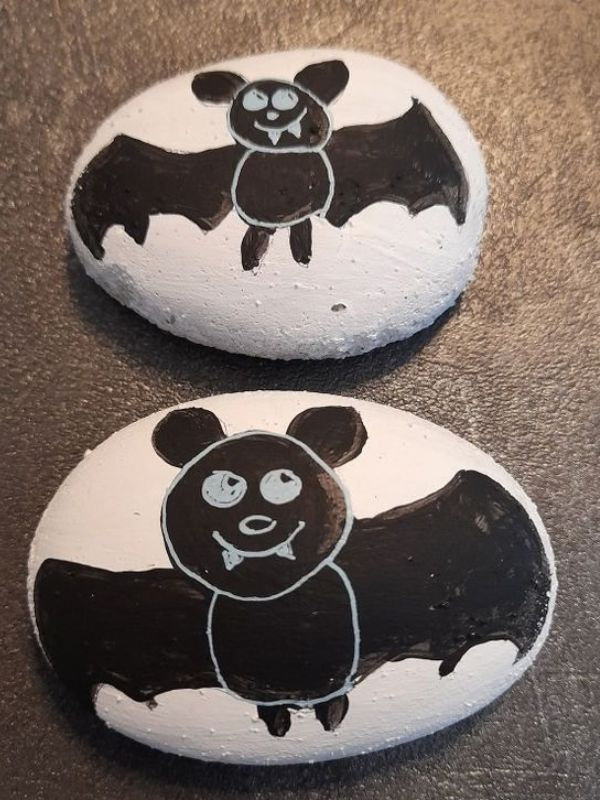
Bat rocks bring a little spooky fun without looking too frightening. Kids can make simple bats with black paint and small white eyes.
Materials needed:
- Smooth stones
- Black acrylic paint
- White paint
- Small paintbrush
How to paint them:
- Paint the stone black and leave it to dry.
- Add two simple pointed wings on the sides.
- Paint two small white eyes.
- Add tiny fangs or a smiling mouth for a friendly finish.
8. Candy Corn Painted Rocks
Candy corn rocks are bright, recognizable, and easy for children to paint using three main colors.
Materials needed:
- Triangular or oval stones
- White, orange, and yellow acrylic paint
- Small paintbrushes
How to paint them:
- Paint the top section white.
- Paint the middle section orange.
- Paint the bottom section yellow.
- Let each section dry before adding the next color to keep the stripes neat.
9. Cute Mummy Rocks
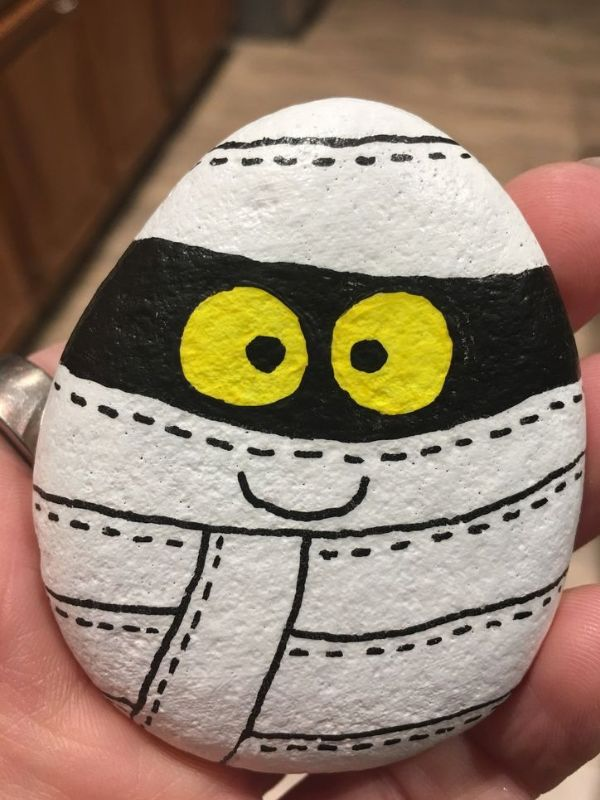
Mummy rocks are ideal for children who enjoy Halloween characters but prefer simple designs. The wrapped-bandage effect is easy to create with white lines.
Materials needed:
- Smooth stones
- White and black paint
- Thin paintbrush
How to paint them:
- Paint the stone white and let it dry.
- Add uneven white or light-gray lines across the stone to resemble bandages.
- Leave a small space for the eyes.
- Paint two black eyes and add tiny white highlights if desired.
10. Rainbow Monster Rocks
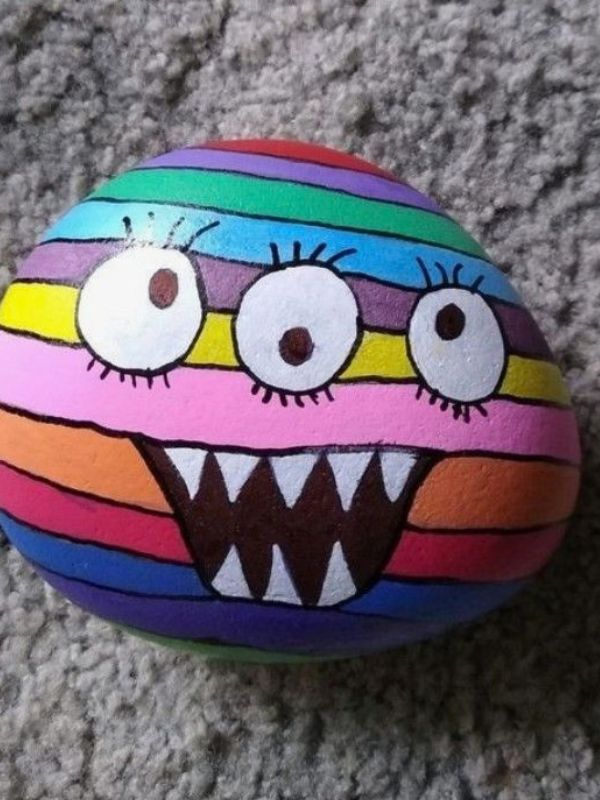
For children who love colorful crafts, rainbow monster rocks offer a playful alternative to traditional Halloween colors.
Materials needed:
- Smooth stones
- Several bright paint colors
- Black and white paint
- Paintbrushes
How to paint them:
- Paint the stone in a bright color, such as blue, pink, or purple.
- Let it dry before adding large eyes.
- Paint a silly mouth with teeth or a tongue.
- Add spots, stripes, or small horns to finish the monster.
Tips for Making Halloween Rock Painting Fun for Kids
- Keep the designs simple: Start with ghosts, pumpkins, dots, and smiling faces before trying detailed characters.
- Protect the work area: Cover the table with newspaper or a washable craft mat.
- Choose suitable supplies: Use child-safe paints and age-appropriate brushes. An adult should handle permanent markers, sealants, and other products that are not suitable for children.
- Allow enough drying time: Let one color dry before adding another to prevent smudges.
- Make it a group activity: Give each child a few stones and let them choose their favorite Halloween character.
- Display the finished rocks: Arrange the painted stones on a shelf, craft table, or indoor Halloween display.
Supervise young children throughout the activity, especially when using small stones, which can be choking hazards. Wash hands after painting, and do not use painted rocks as food decorations.
Halloween Rock Painting Ideas for Adults
Halloween rock painting ideas for adults offer a relaxing and creative way to celebrate the spooky season. Unlike simple designs for young children, adult rock painting can include intricate patterns, detailed characters, spooky landscapes, and elegant Halloween decorations. Whether you enjoy crafting as a hobby or want to make unique decorations for your home, painted stones are an affordable project to try.
You can use black, white, orange, purple, and metallic paints to create designs that look spooky, artistic, or even sophisticated. These painted rocks work well as porch decorations, table centerpieces, garden accents, or handmade Halloween gifts.
Here are some creative Halloween stone painting ideas for adults, from detailed sugar skulls to atmospheric haunted houses.
1. Detailed Sugar Skull Rocks
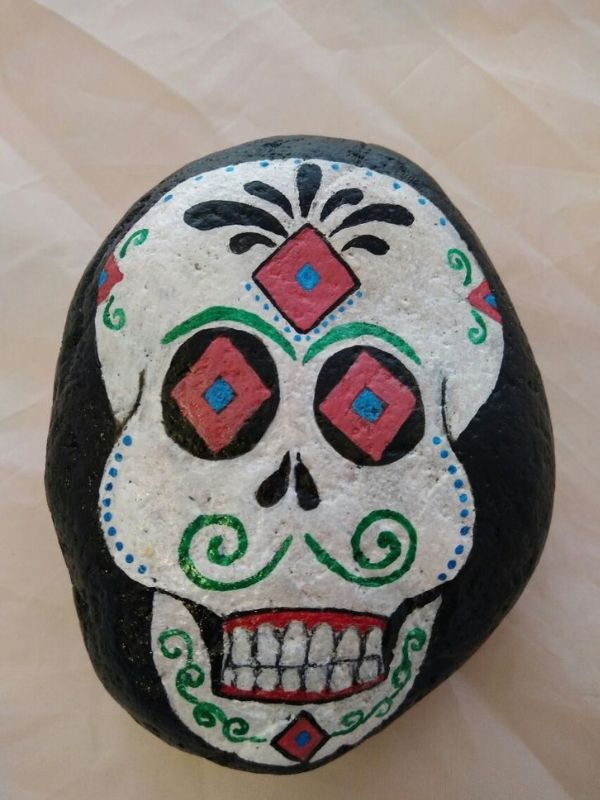
Sugar skull rocks are perfect for adults who enjoy detailed artwork and colorful patterns. Inspired by traditional Día de los Muertos sugar skull designs, these stones can feature flowers, dots, and decorative lines.
Materials needed:
- Smooth, rounded stones
- White, black, and brightly colored acrylic paints
- Fine-tip paintbrushes
- Pencil for sketching
How to paint them:
- Paint the stone white and allow it to dry.
- Lightly sketch a skull face onto the stone.
- Add dark eye sockets, a nose, and a mouth.
- Decorate the forehead and sides with colorful flowers, dots, and curved patterns.
2. Elegant Black Cat Stones
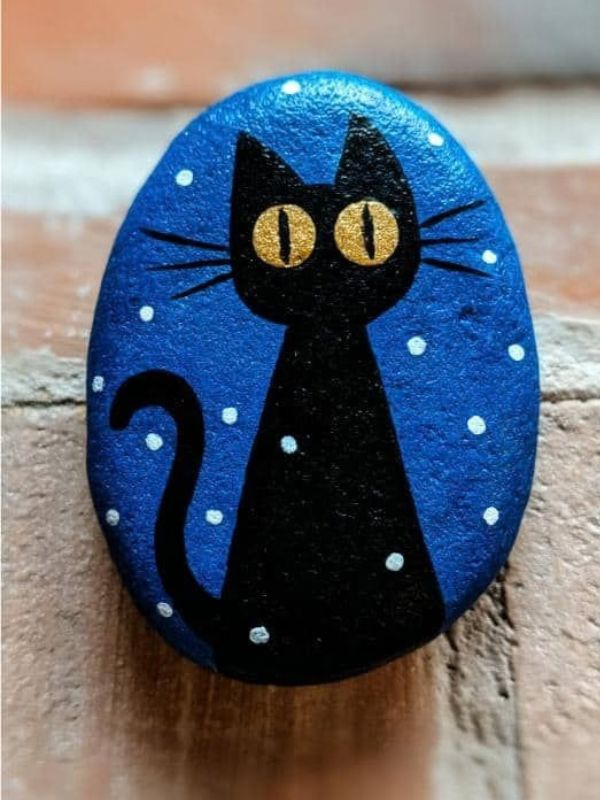
Black cat stones are a stylish choice for adults who prefer understated Halloween decorations. A black background with bright eyes and delicate whiskers creates a striking design.
Materials needed:
- Smooth stones
- Black acrylic paint
- Yellow, green, or white paint
- Fine paintbrush
How to paint them:
- Paint the stone black and let it dry completely.
- Add the cat’s ears and outline the face.
- Paint the eyes in yellow or green.
- Use a fine brush to add whiskers, a nose, and subtle facial details.
3. Intricate Spiderweb Rocks
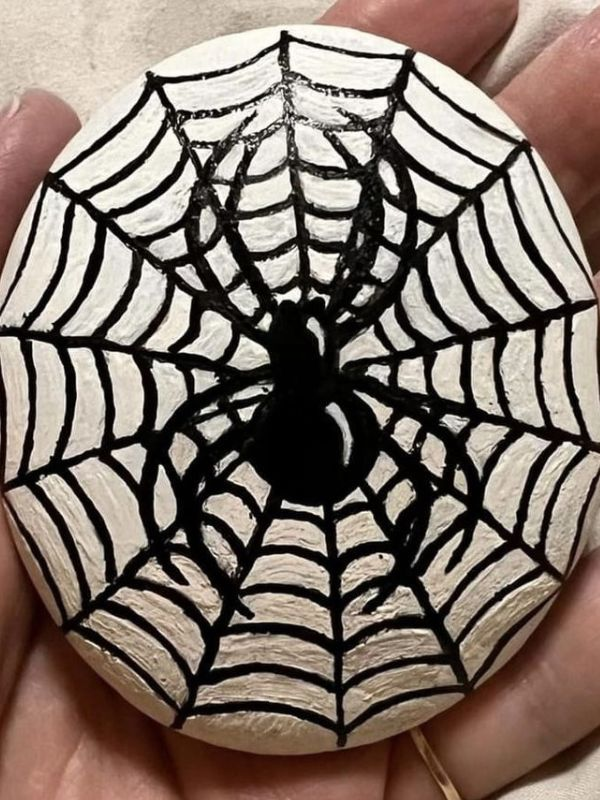
Spiderweb rocks create a spooky look without requiring a complicated character design. The contrast between a dark background and delicate web lines makes these stones especially attractive.
Materials needed:
- Flat stones
- Black acrylic paint
- White or silver paint
- Fine-tip brush or paint pen
How to paint them:
- Paint the stone black and allow it to dry.
- Draw several thin lines radiating from one point.
- Connect the lines with curved strokes to create a web.
- Add a tiny spider or silver highlights for extra detail.
4. Halloween Mandala Stones
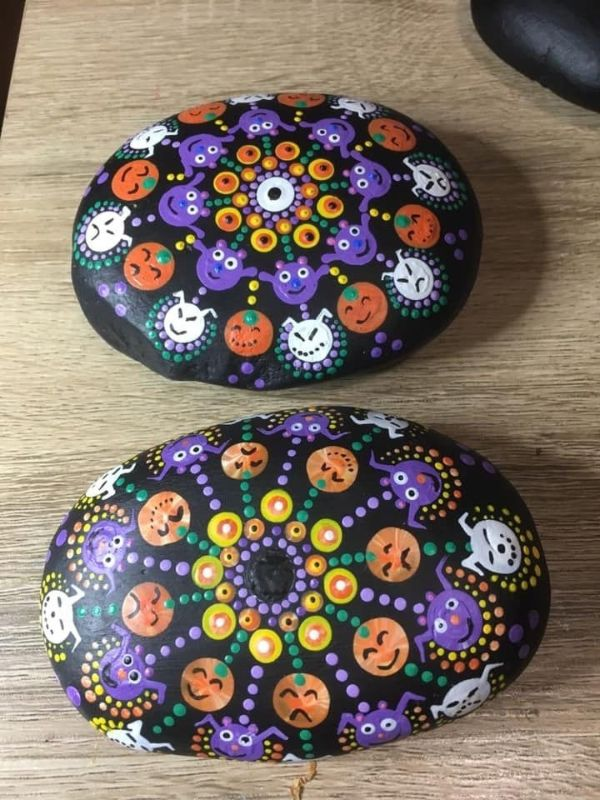
Halloween mandala stones combine decorative dot patterns with seasonal colors. They are ideal for adults who enjoy careful, repetitive painting as a calming creative activity.
Materials needed:
- Smooth, flat stones
- Black, orange, purple, and white paint
- Dotting tools or cotton swabs
- Pencil
How to paint them:
- Apply a dark base coat and let it dry.
- Mark the center of the stone with a pencil.
- Add circles of dots around the center, moving outward.
- Alternate Halloween colors and dot sizes to create a balanced pattern.
5. Haunted House Night Scenes
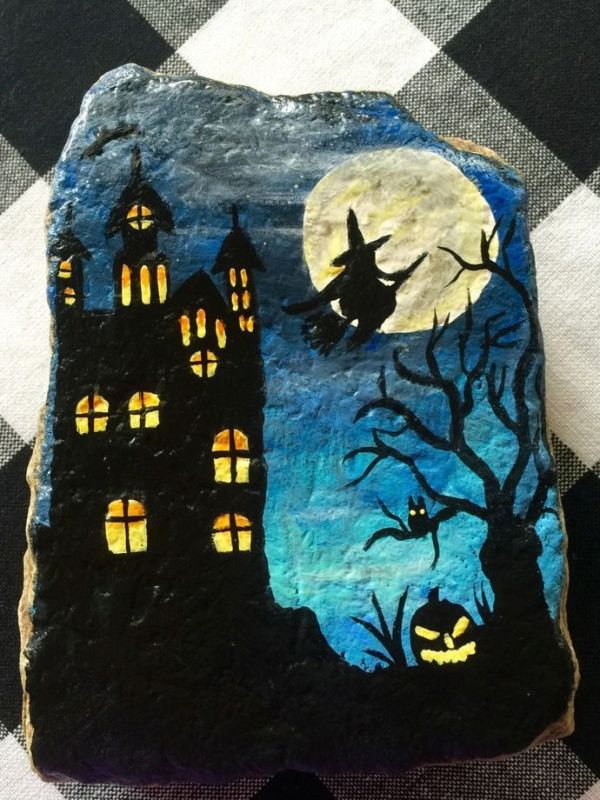
A miniature haunted house painted on a stone can look like a tiny piece of Halloween artwork. This idea works especially well on larger, flat stones that provide enough room for a detailed scene.
Materials needed:
- Large, flat stones
- Black, navy, purple, yellow, and white acrylic paint
- Fine and medium paintbrushes
- Pencil
How to paint them:
- Paint the background dark blue or purple to represent the night sky.
- Sketch a crooked house with pointed roofs.
- Paint the house black, adding yellow windows for a glowing effect.
- Add a moon, bats, bare trees, or tiny gravestones around the house.
6. Dark Gothic Halloween Designs
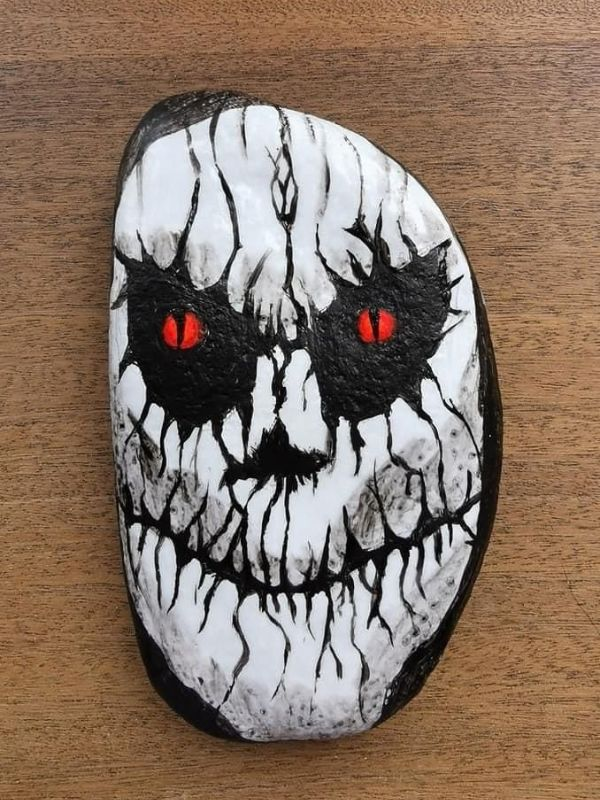
For a dramatic and moody look, try gothic Halloween stones with black backgrounds, silver details, dark flowers, or mysterious symbols.
Materials needed:
- Smooth stones
- Black, silver, deep purple, and burgundy paint
- Fine paintbrushes
- Metallic paint pen
How to paint them:
- Paint the stone black and let it dry.
- Sketch a gothic rose, crescent moon, raven, or ornamental design.
- Fill in the main shapes with deep purple or burgundy.
- Add silver outlines and small highlights to make the details stand out.
7. Realistic Eyeball Rocks
Eyeball rocks are a fun option for adults who enjoy slightly creepy Halloween artwork. A realistic iris and red veins can make the finished stone look surprisingly lifelike.
Materials needed:
- Round, smooth stones
- White, black, blue or green, and red paint
- Fine-tip paintbrushes
How to paint them:
- Paint the stone white and allow it to dry.
- Paint a large blue or green circle for the iris.
- Add a black pupil in the center and small white highlights.
- Use a very fine brush to paint thin red veins around the edges.
8. Witch Hat Painted Stones
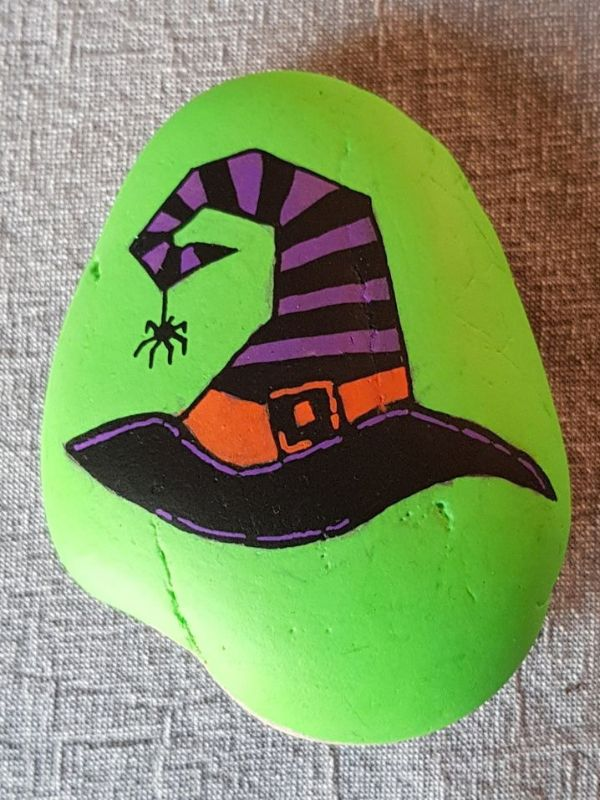
Witch hat stones are easy to customize with stripes, stars, moons, and decorative buckles. They work beautifully in a collection of Halloween-themed rocks.
Materials needed:
- Flat stones
- Black, purple, orange, and gold paint
- Fine paintbrush
How to paint them:
- Paint the stone in a dark background color.
- Sketch a pointed witch hat with a wide brim.
- Fill the hat with black or purple paint.
- Add an orange band, gold buckle, or tiny stars to complete the design.
9. Skeleton Face Rocks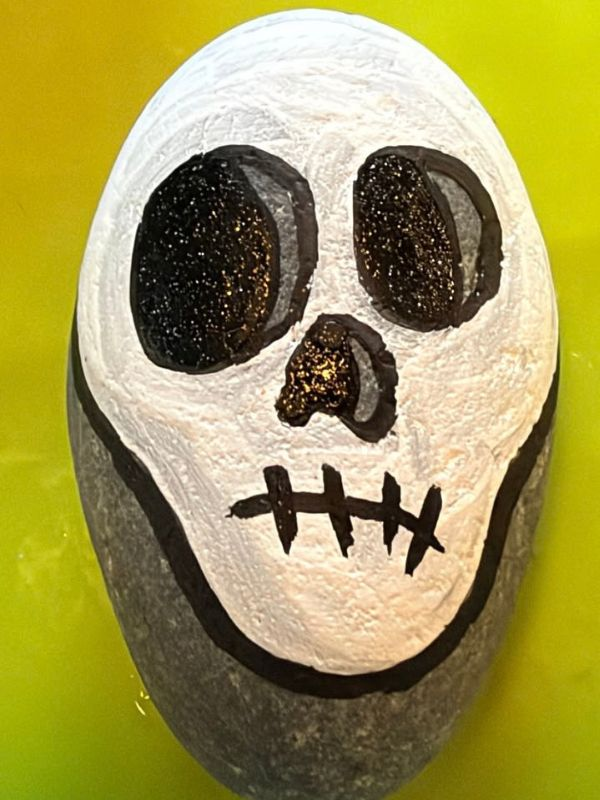
Skeleton face rocks offer room for more detailed shading and expressive features. You can make them spooky, funny, or inspired by cartoon skulls.
Materials needed:
- Smooth stones
- Black and white acrylic paint
- Fine-tip brushes
- Pencil
How to paint them:
- Paint the stone black or white, depending on your preferred style.
- Sketch the skull’s eye sockets, nose, and teeth.
- Use contrasting paint to fill in the features.
- Add gray shading or thin highlights to give the skull more depth.
10. Glow-in-the-Dark Halloween Rocks
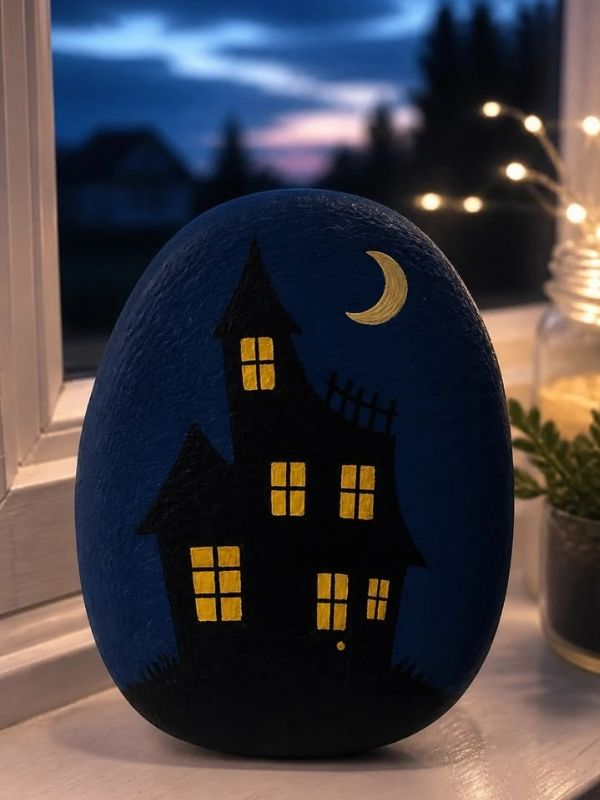
Glow-in-the-dark rocks add a fun surprise to Halloween decorations. They can feature ghosts, moons, pumpkins, or simple spooky symbols that become visible in low light after being charged according to the paint instructions.
Materials needed:
- Smooth stones
- Glow-in-the-dark craft paint
- Black and white acrylic paint
- Small paintbrushes
How to paint them:
- Apply a suitable base coat, often white, if recommended by the paint manufacturer.
- Paint a ghost, pumpkin, moon, or other Halloween design.
- Add black outlines and facial details after the main design dries.
- Apply the glow paint as directed and allow the stone to dry fully.
11. Pumpkin Patch Rock Art
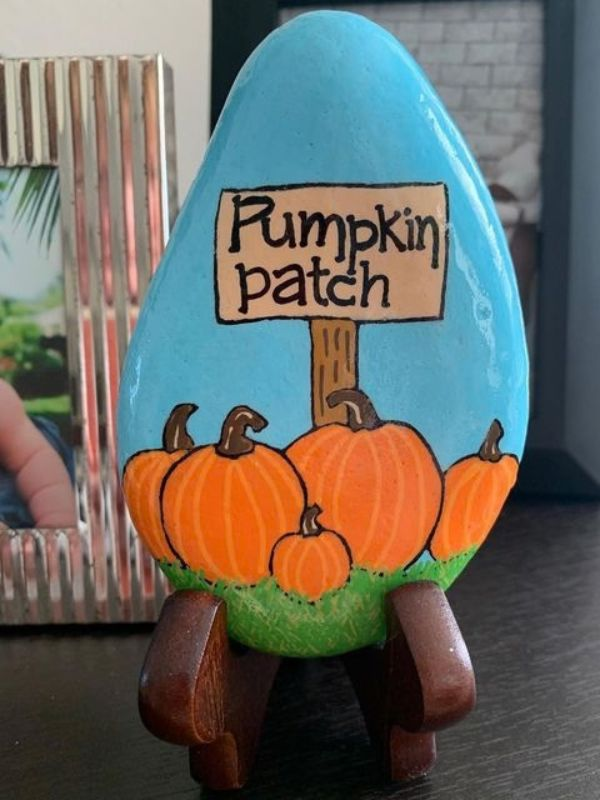
Create a miniature pumpkin patch across several stones. This design is especially attractive when the rocks are displayed together in a basket or along a porch ledge.
Materials needed:
- Small and medium stones
- Orange, green, brown, and black paint
- Small paintbrushes
How to paint them:
- Paint each stone orange.
- Add curved lines to suggest pumpkin ridges.
- Paint green stems and small brown vines.
- Give some pumpkins smiling faces while leaving others plain for variety.
12. Black Raven and Moon Stones
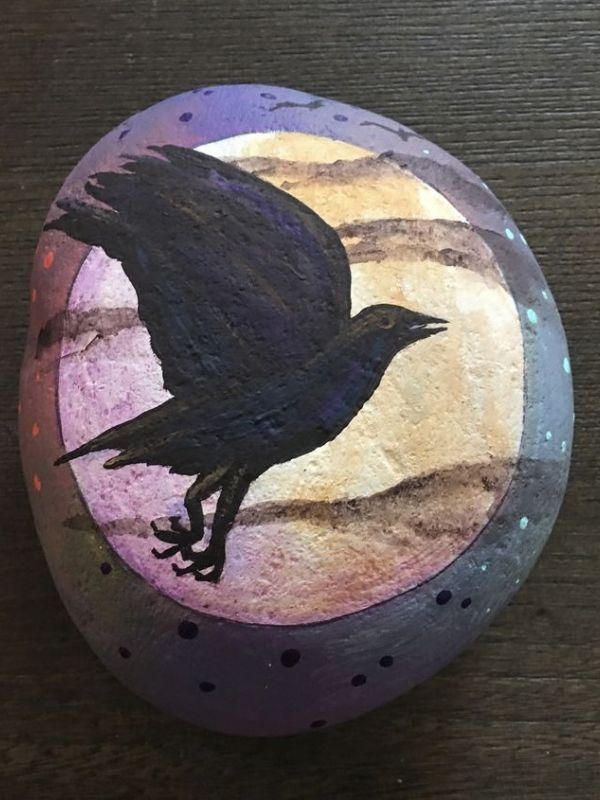
A black raven against a pale moon creates a mysterious Halloween design. This idea suits adults who enjoy darker artwork without painting a traditional monster or ghost.
Materials needed:
- Flat stones
- Black, white, gray, and navy paint
- Fine-tip brushes
How to paint them:
- Paint the background navy or dark gray.
- Add a white or pale-gray moon.
- Paint a black raven silhouette in front of the moon.
- Add delicate branches or distant bats to complete the scene.
Tips for Creating Beautiful Halloween Painted Rocks
- Choose smooth stones: Flat surfaces make detailed designs easier to paint.
- Use a limited color palette: Two to four complementary colors can make a design look polished.
- Sketch complicated artwork first: Light pencil guidelines help you plan the layout before painting.
- Use fine brushes for details: Thin lines and small features look neater with detail brushes or suitable paint pens.
- Let each layer dry: This helps prevent colors from smearing together.
- Protect finished artwork: Once the paint is fully dry, use a compatible clear sealant if needed. Follow the product instructions and use it in a well-ventilated area.
- Display your work creatively: Group several stones together on a tray, arrange them around a potted plant, or use them as part of a Halloween centerpiece.
Halloween rock painting is a wonderful way for adults to explore their creativity while making personalized seasonal decorations. Whether you choose intricate mandala patterns, realistic eyeballs, or a tiny haunted house, you can create beautiful painted stones that reflect your own style.
Easy Halloween Stone Painting Ideas for Beginners
Easy Halloween stone painting ideas for beginners are perfect for anyone who wants to enjoy Halloween crafts without needing advanced painting skills. With a few smooth stones, basic acrylic paints, and simple designs, you can transform ordinary rocks into cute ghosts, smiling pumpkins, spooky bats, and other festive decorations.
You do not need to be an experienced artist to create beautiful Halloween painted rocks. Start with basic shapes, use a small selection of seasonal colors, and add details only after the base paint has dried. These beginner-friendly designs are suitable for adults, older children with supervision, and anyone looking for an affordable Halloween DIY project.
Here are some easy Halloween stone painting ideas you can try at home.
1. Simple Halloween Polka Dot Rocks
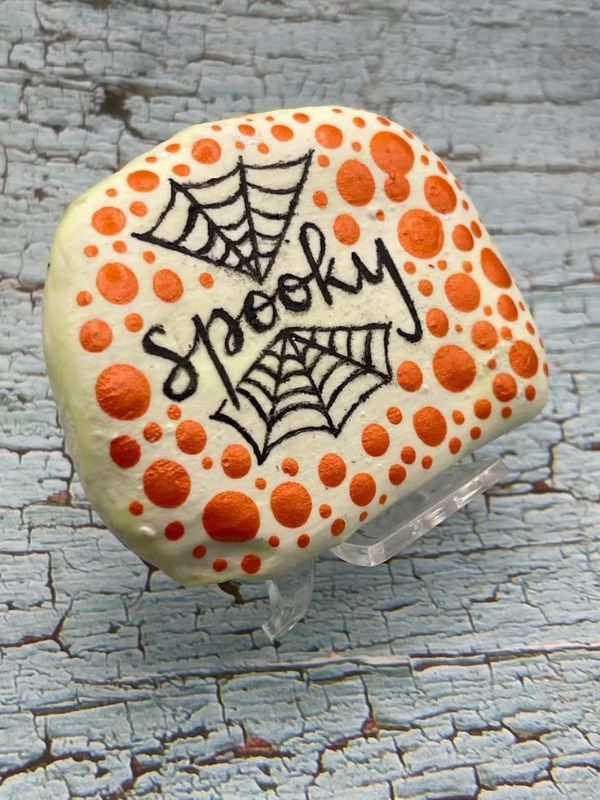
Polka dot rocks are among the easiest designs for beginners because they do not require drawing characters or complicated shapes. You can use Halloween colors to create a cheerful collection of decorative stones.
Materials needed:
- Smooth, flat stones
- Orange, black, purple, and white acrylic paint
- Cotton swabs or a small round paintbrush
How to paint them:
- Clean the stones and let them dry completely.
- Paint each stone with a solid base color.
- Dip a cotton swab or paintbrush handle into another color.
- Add dots across the stone in a random or repeating pattern.
- Let the paint dry before displaying your finished rocks.
2. Minimalist Ghost Stones
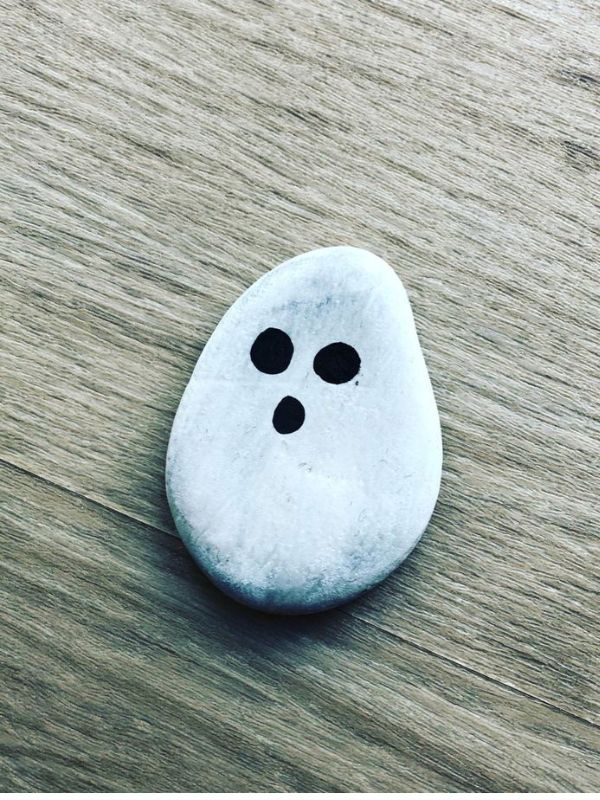
Ghost stones are a great first project because the design uses only a few simple shapes. You can make each ghost look happy, surprised, sleepy, or silly by changing its facial expression.
Materials needed:
- Smooth stones
- White and black acrylic paint
- Small paintbrush
How to paint them:
- Paint the stone white and allow it to dry.
- Add a simple ghost shape if the stone does not already have a suitable outline.
- Paint two black eyes and a small mouth.
- Add tiny arms or pink cheeks for a cute finish.
3. Easy Pumpkin Face Rocks
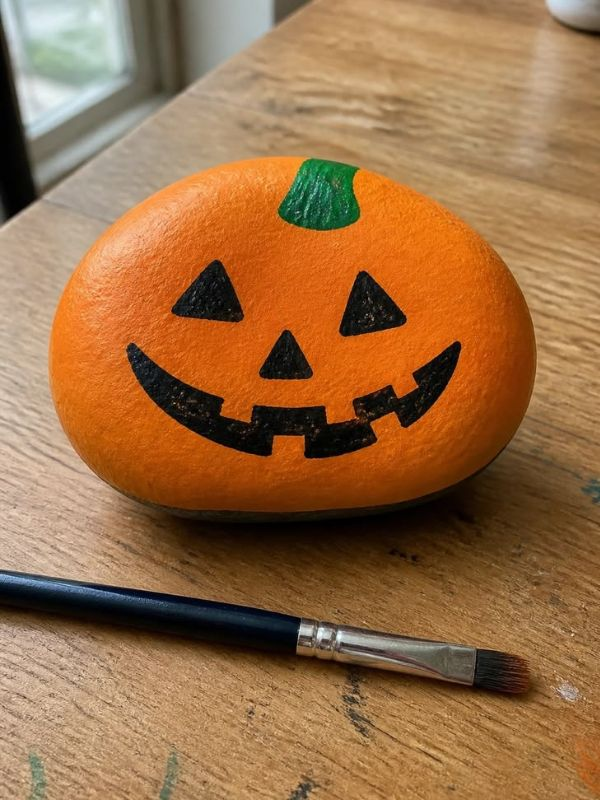
Pumpkin rocks are a classic Halloween craft that beginners can create with orange and green paint. Their simple shapes make them easy to customize.
Materials needed:
- Rounded stones
- Orange, green, and black acrylic paint
- Small paintbrushes
How to paint them:
- Cover the stone with orange paint and let it dry.
- Add a few curved lines to create pumpkin ridges.
- Paint a small green stem at the top.
- Finish with a simple smiling or spooky face using black paint.
4. Black and White Halloween Stones
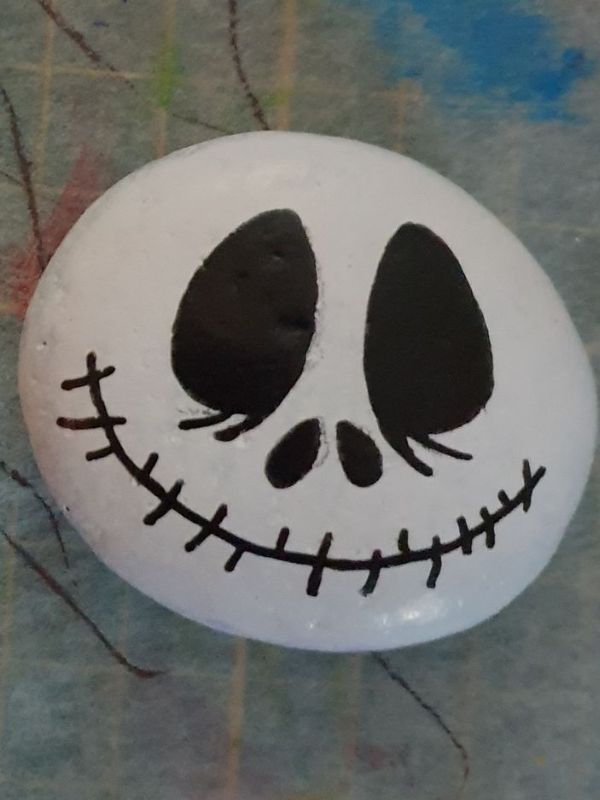
If you prefer a simple, coordinated look, try painting stones in black and white. These two colors work well for ghosts, skulls, spiderwebs, and other Halloween designs.
Materials needed:
- Smooth stones
- Black and white acrylic paint
- Fine-tip paintbrush
How to paint them:
- Paint some stones black and others white.
- Allow the base coats to dry completely.
- Add contrasting designs, such as white spiderwebs on black stones or black ghost faces on white stones.
- Arrange the finished rocks together for a matching display.
5. Simple Spiderweb Designs
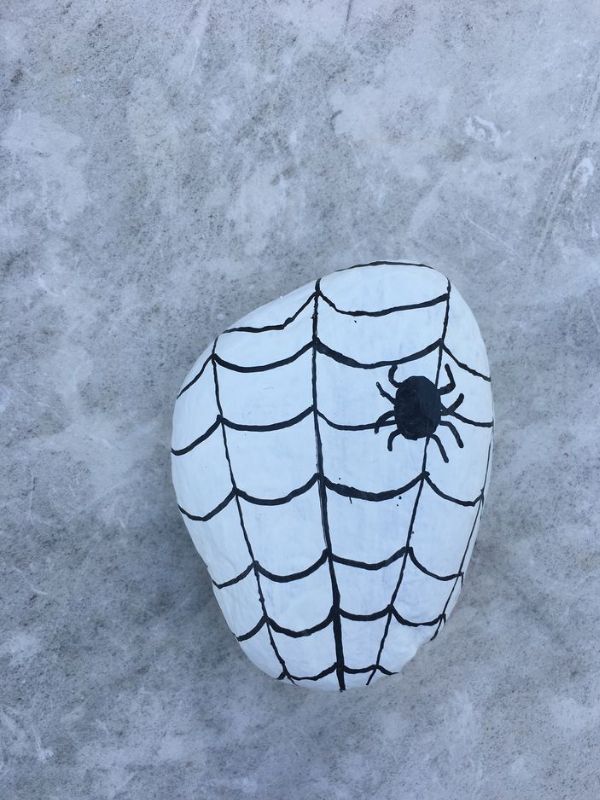
Spiderweb stones look detailed but are surprisingly easy to make when you break the design into a few straight and curved lines.
Materials needed:
- Flat stones
- Black acrylic paint
- White or silver paint
- Fine paintbrush or paint pen
How to paint them:
- Paint the stone black and let it dry.
- Draw three or four thin lines spreading outward from one point.
- Connect the lines with small curved strokes.
- Add a tiny spider if you want to make the design more playful.
6. Halloween Rocks With Basic Shapes
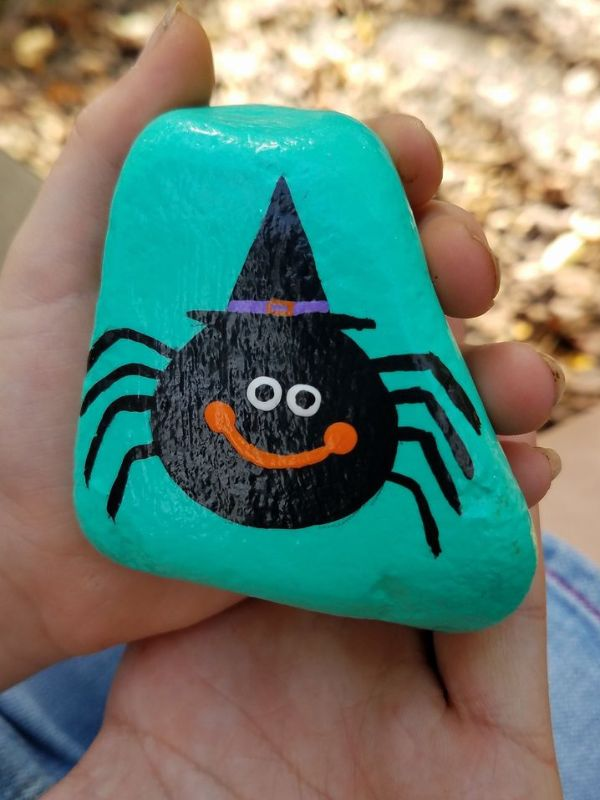
Basic shapes are ideal for beginners who are not comfortable drawing freehand. Circles, triangles, and curved lines can become pumpkins, bats, witch hats, and spooky faces.
Materials needed:
- Smooth stones
- Orange, black, purple, white, and green paint
- Pencil
- Small paintbrushes
How to paint them:
- Choose a simple Halloween character or object.
- Lightly sketch its main shapes onto the stone.
- Paint the larger shapes first, allowing each layer to dry.
- Add small details such as eyes, mouths, stems, or stars.
7. Candy Corn Stones
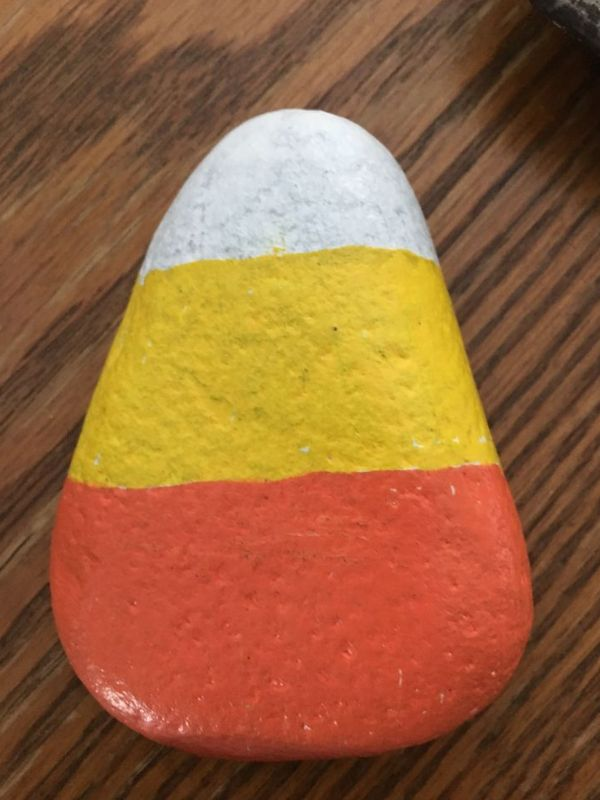
Candy corn stones are perfect for beginners who enjoy neat, colorful patterns. The design uses three familiar colors arranged in simple bands.
Materials needed:
- Oval or triangular stones
- Yellow, orange, and white acrylic paint
- Small paintbrush
How to paint them:
- Paint the top section white.
- Paint the middle section orange.
- Paint the bottom section yellow.
- Allow the colors to dry and touch up any uneven edges.
8. Easy Bat Silhouette Rocks
Bat silhouette rocks are a good option if you want a spooky design without painting facial details. The bat can be made using a simple central body and two pointed wings.
Materials needed:
- Flat stones
- Black and white acrylic paint
- Small paintbrush
- Pencil
How to paint them:
- Paint the stone a light color, such as white or pale gray.
- Sketch a small bat shape in the center.
- Fill the shape with black paint.
- Add tiny white eyes or a small moon in the background if desired.
9. Simple Halloween Striped Rocks
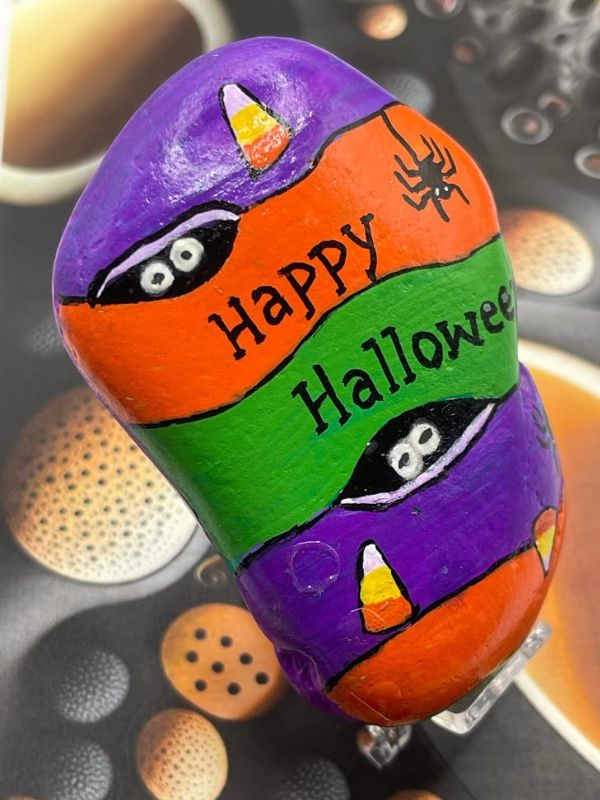
Striped stones are easy to customize and look attractive when displayed together. Try alternating orange and black stripes for a traditional Halloween appearance.
Materials needed:
- Smooth stones
- Orange and black acrylic paint
- Small paintbrush
- Masking tape, optional
How to paint them:
- Paint the stone with your first color.
- Let it dry completely.
- Add stripes using the second color, painting freehand or using masking tape for cleaner lines.
- Remove any tape carefully once the paint is dry enough according to the product instructions.
10. Cute Monster Face Rocks
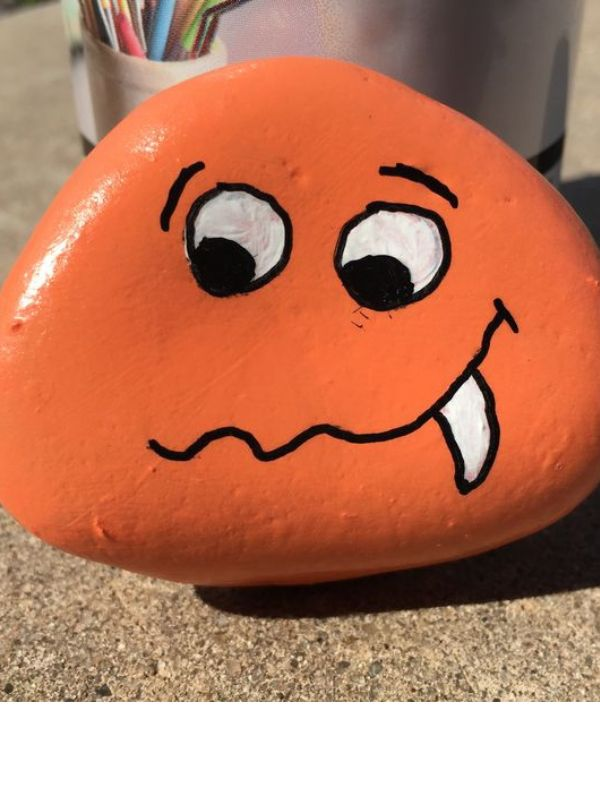
Monster face rocks allow beginners to experiment with bright colors and funny expressions. You can make each design different by changing the eyes, mouth, and decorations.
Materials needed:
- Smooth stones
- Green, purple, blue, or pink acrylic paint
- Black and white paint
- Small paintbrushes
How to paint them:
- Paint the stone with a bright color.
- Add one large eye or two smaller eyes.
- Paint a funny mouth, teeth, or a tongue.
- Finish with spots, tiny horns, or colorful stripes.
Beginner Tips for Better Halloween Stone Painting
- Start with smooth stones: Flat surfaces are easier to paint than rough or uneven rocks.
- Clean the stones first: Remove dirt and allow them to dry before applying paint.
- Use acrylic craft paint: It generally provides good coverage for decorative stones.
- Apply thin coats: Two thin coats often create a smoother finish than one thick coat.
- Let each layer dry: This prevents smudging and makes details easier to add.
- Keep your first designs simple: Dots, stripes, ghosts, and pumpkin faces are easier than intricate scenes.
- Protect your finished stones: If you want extra durability, apply a compatible clear sealant after the paint has dried, following the manufacturer’s instructions.
You do not have to create complicated artwork to make beautiful Halloween painted stones. Start with one or two simple designs, experiment with different colors, and gradually try more detailed patterns as your confidence grows.
These beginner-friendly Halloween stone painting ideas are an easy way to create handmade decorations for your home, porch, or Halloween craft display.
Halloween Rock Painting Ideas for Outdoor Decorations
Halloween rock painting ideas for outdoor decorations are a creative and affordable way to add spooky charm to your porch, garden, walkway, or front yard. With a few smooth stones, colorful acrylic paints, and simple Halloween designs, you can turn ordinary rocks into festive decorations that welcome trick-or-treaters and delight your guests.
From glowing ghost rocks and smiling pumpkins to creepy eyeballs and haunted house scenes, there are plenty of designs to suit different outdoor spaces. You can paint a few larger stones for your front porch or create a collection of smaller rocks to decorate flowerpots, garden borders, and outdoor displays.
For the best results, choose paint and protective finishes suitable for your intended display conditions. Even sealed painted rocks can fade or deteriorate if they are exposed to heavy rain, direct sunlight, or harsh weather for long periods.
1. Halloween Rocks for the Garden
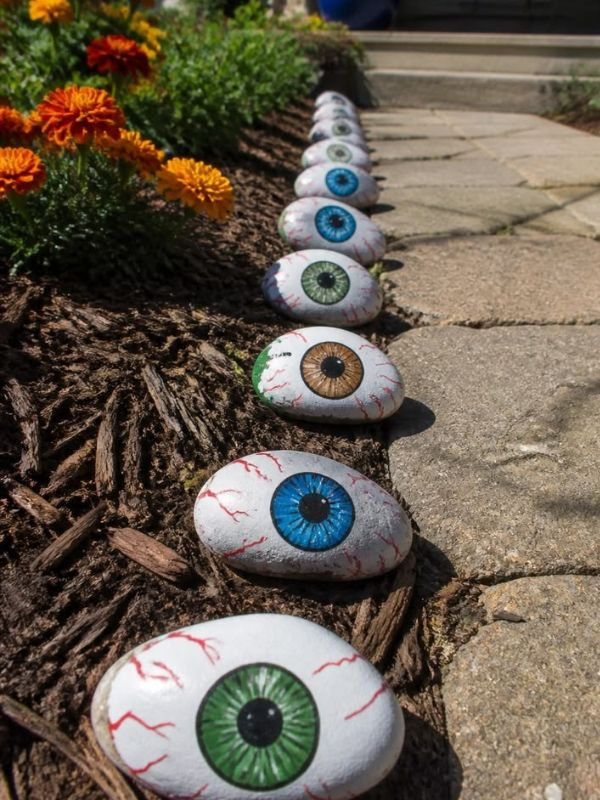
Turn your garden into a spooky little scene with painted stones featuring Halloween characters. Ghosts, pumpkins, bats, and monsters can add seasonal color among your plants.
Materials needed:
- Smooth garden stones
- Orange, black, white, and green acrylic paint
- Small paintbrushes
- Suitable outdoor clear sealant
How to make them:
- Clean the stones and allow them to dry completely.
- Paint each stone with a Halloween character or pattern.
- Add faces, stems, wings, or other small details.
- Allow the paint to dry fully before applying a compatible outdoor sealant according to its instructions.
- Arrange the finished stones around garden borders or beside potted plants.
2. Painted Rocks for the Front Porch
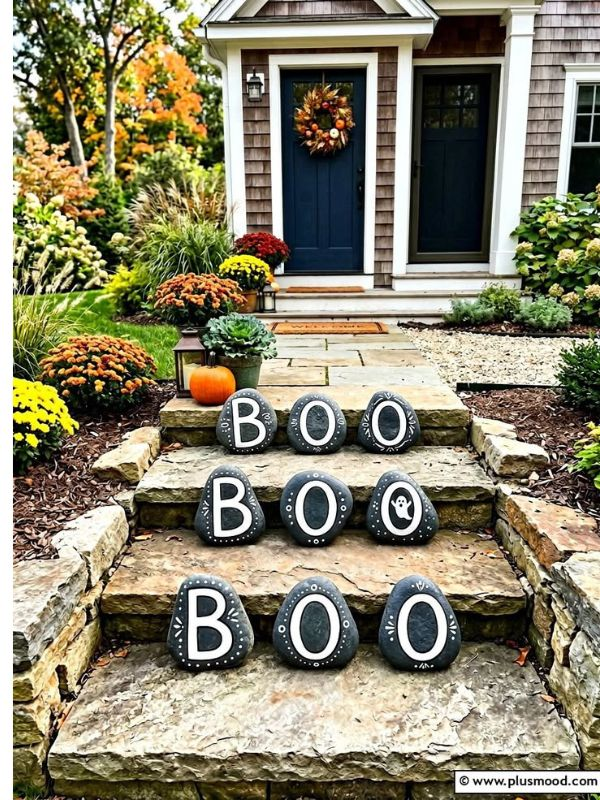
Decorate your front porch with Halloween painted rocks that complement your pumpkins, lanterns, and other seasonal decorations. Larger stones can feature bold designs that are easy to see from a distance.
Materials needed:
- Medium or large flat stones
- Black, orange, white, and purple paint
- Paintbrushes
- Suitable protective sealant
How to make them:
- Choose stones with broad surfaces for your designs.
- Paint messages such as “Boo!” or create ghost and pumpkin characters.
- Add contrasting outlines so the designs stand out.
- Let the paint dry and apply a suitable protective finish if needed.
- Place the stones on a covered porch or near your entrance where they will not obstruct the walkway.
3. Halloween Rocks for Flower Pots
Give ordinary flowerpots a festive makeover by decorating them with Halloween-themed stones. This idea works especially well for pots near an entrance, patio, or garden seating area.
Materials needed:
- Small, smooth stones
- Black, orange, white, and purple paint
- Small paintbrushes
- Suitable clear sealant, optional
How to make them:
- Paint small stones as pumpkins, ghosts, black cats, or tiny monsters.
- Add simple facial details after the base colors dry.
- Protect the designs with a compatible sealant if appropriate.
- Arrange the painted rocks on the soil surface, keeping them away from plant stems and drainage holes.
- Group stones of different sizes together for a colorful Halloween display.
4. Spooky Rocks for Outdoor Pathways
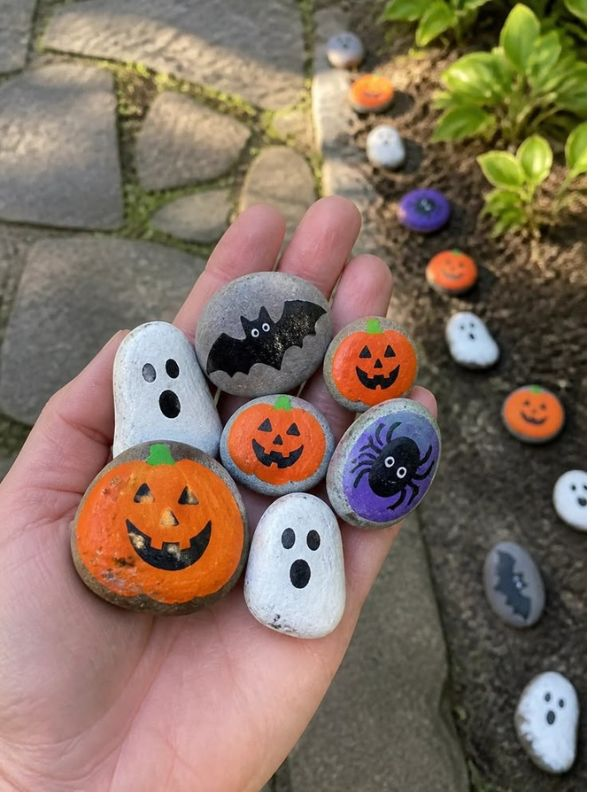
Halloween pathway rocks can help create a playful route toward your front door. Use bold designs such as ghosts, bats, pumpkins, and spiderwebs to make the walkway feel festive.
Materials needed:
- Flat, sturdy stones
- Black, white, orange, and purple paint
- Paintbrushes
- Suitable protective finish
How to make them:
- Select stones that sit securely on the ground.
- Paint each stone with a different Halloween design.
- Add bright details that are easy to recognize.
- Allow the paint and any protective finish to dry and cure fully.
- Place the stones beside the path rather than on the walking surface to reduce slipping and tripping risks.
5. Halloween Rocks for the Yard
Create a fun Halloween display in your yard by painting a collection of spooky rocks in different sizes. You can arrange them around a decorative pumpkin, a small sign, or a themed outdoor display.
Materials needed:
- Small, medium, and large stones
- Halloween-colored acrylic paint
- Paintbrushes
- Suitable outdoor sealant
How to make them:
- Paint larger stones as pumpkins, ghosts, or monsters.
- Decorate smaller stones with bats, stars, and spiderwebs.
- Use a consistent color palette to make the collection look coordinated.
- Let all the paint dry before adding a protective finish.
- Arrange the stones in a stable group where they will not block walkways or be easily kicked aside.
6. Glow-in-the-Dark Ghost Rocks
Glow-in-the-dark ghost rocks can add a playful surprise to an outdoor Halloween display after sunset. Place them in a sheltered area where their designs can be seen safely.
Materials needed:
- Smooth stones
- White paint
- Glow-in-the-dark craft paint suitable for the intended use
- Black paint
- Small paintbrushes
How to make them:
- Paint the stones white and allow them to dry.
- Add ghost shapes, using the natural shape of each stone as a guide.
- Apply glow-in-the-dark paint according to the product instructions.
- Add black eyes and mouths after the other layers dry.
- Allow the finished stones to dry completely and place them in a safe, sheltered display area.
Remember that glow-in-the-dark paint usually needs exposure to light to charge, and its brightness and duration depend on the product.
7. Pumpkin Patch Painted Stones
Create a miniature pumpkin patch with orange painted rocks. This simple idea looks lovely near flowerpots, outdoor steps, or a Halloween centerpiece.
Materials needed:
- Round and oval stones
- Orange, green, and brown paint
- Small paintbrushes
- Suitable protective finish
How to make them:
- Paint each stone orange.
- Add curved lines to suggest pumpkin ridges.
- Paint a green stem and small brown vine details.
- Give some pumpkins smiling faces for a friendly look.
- Group the finished stones together to create a miniature pumpkin patch.
8. Haunted House Outdoor Rocks
If you enjoy more detailed painting, turn a large flat stone into a miniature haunted house. This design makes an eye-catching addition to a covered porch or sheltered garden display.
Materials needed:
- Large, flat stones
- Black, navy, purple, yellow, and white paint
- Fine and medium paintbrushes
- Pencil
How to make them:
- Paint the stone a dark blue or purple.
- Sketch a crooked house with pointed roofs.
- Paint the house black and add yellow windows.
- Decorate the background with a moon, bats, or bare trees.
- Let the artwork dry fully and apply a compatible protective finish if the display requires it.
9. Black Cat Outdoor Stones
Black cat rocks are a charming choice for a Halloween display, especially when placed beside pumpkins or flowerpots.
Materials needed:
- Smooth stones
- Black, yellow, white, and pink paint
- Small paintbrushes
How to make them:
- Paint the stones black.
- Add pointed ears at the top.
- Paint yellow or green eyes.
- Add a pink nose, whiskers, and a small mouth.
- Allow the stones to dry before placing them in a sheltered outdoor display.
10. Funny Monster Rocks for the Porch
Add humor to your outdoor Halloween decorations with brightly colored monster rocks. These are especially suitable for family-friendly displays.
Materials needed:
- Smooth stones
- Green, purple, blue, or orange paint
- Black and white paint
- Small paintbrushes
How to make them:
- Paint each stone a different bright color.
- Add one large eye or two smaller eyes.
- Paint a funny mouth, teeth, or a tongue.
- Add spots, stripes, or little horns.
- Arrange the finished monsters together beside your porch decorations.
Tips for Making Outdoor Halloween Painted Rocks Last Longer
- Start with clean, dry stones: Dirt and moisture can interfere with paint adhesion.
- Choose suitable paint: Use craft paint intended for your project and check whether it is appropriate for outdoor exposure.
- Apply thin coats: Allow each layer to dry according to the manufacturer’s instructions.
- Use a compatible outdoor sealant: Follow the label for application, ventilation, and curing time.
- Keep decorations stable: Place stones where they will not roll, obstruct walkways, or create tripping hazards.
- Shelter delicate designs: A covered porch or protected patio can help reduce exposure to rain and sunlight.
- Bring them indoors when necessary: Store your painted rocks in a dry place during severe weather to help preserve the artwork.
- Keep small stones away from young children and pets: Small rocks can present choking or swallowing hazards.
Outdoor Halloween rock painting is an easy way to personalize your seasonal decorations without spending much money. Whether you choose a few pumpkin stones for your porch or create an entire collection of ghosts, monsters, and haunted houses, these handmade decorations can bring extra Halloween spirit to your outdoor space.
Halloween Rock Painting Activities for School and Parties
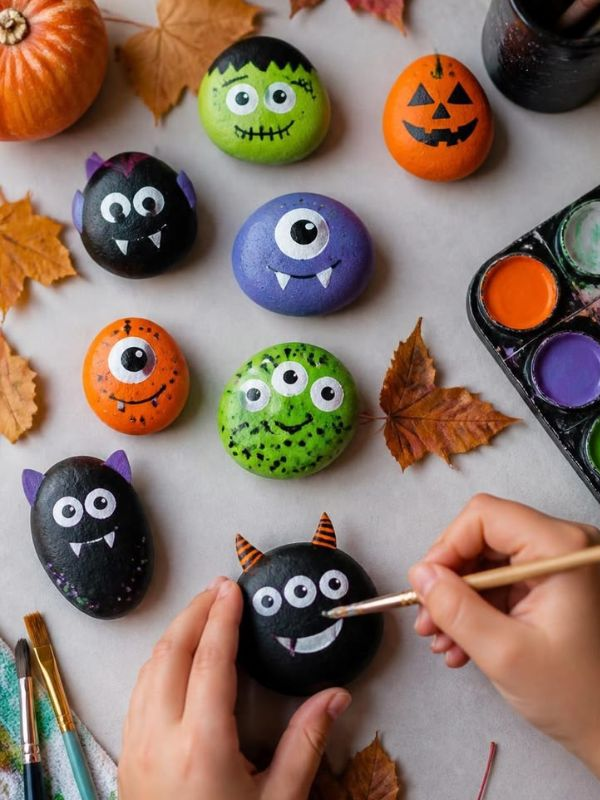
Halloween rock painting activities for school and parties are a fun way to bring children and adults together for a creative seasonal celebration. Instead of relying only on traditional Halloween games, you can set up a simple painting station where everyone decorates stones with ghosts, pumpkins, bats, monsters, and other spooky characters.
This activity works well for classroom craft sessions, Halloween birthday parties, community events, and family gatherings. It is also easy to adapt for different ages and skill levels. Younger children can paint simple shapes and colorful patterns, while older kids and adults can experiment with more detailed designs.
With a few basic supplies and some preparation, you can turn Halloween rock painting into an enjoyable group activity that encourages creativity, teamwork, and imaginative play.
1. Halloween Rock Painting for Classroom Activities
Halloween rock painting is a great classroom activity because students can practice creativity while making their own decorations. Teachers can connect the craft to art lessons by asking students to experiment with shapes, patterns, and contrasting colors.
Materials needed:
- Smooth, clean stones
- Child-safe craft paints
- Paintbrushes and paint trays
- Paper towels and table coverings
- Aprons or old shirts
How to organize the activity:
- Cover the desks or tables to protect them from paint.
- Give each student one or two stones.
- Show examples of simple designs, such as ghosts, pumpkins, and black cats.
- Let students choose their favorite designs and paint at their own pace.
- Allow the rocks to dry in a designated area before students take them home or use them in a classroom display.
For younger students, prepare simple outlines in advance and choose age-appropriate supplies. Always supervise children and keep small stones away from anyone who may put them in their mouth.
2. Halloween Rock Painting Party Station
Set up a Halloween rock painting station at a birthday party or seasonal gathering. Guests can take a break from games and snacks to create their own handmade decorations.
Materials needed:
- Smooth stones in different sizes
- Orange, black, white, purple, and green paint
- Small and medium paintbrushes
- Paper plates or palettes
- Water cups and paper towels
- Protective table coverings
How to organize the activity:
- Arrange the stones, paints, and brushes on a dedicated table.
- Display a few finished examples to inspire guests.
- Invite each guest to choose a stone and create a Halloween design.
- Set aside a drying area so the finished rocks do not get smudged.
- Let guests take their creations home once the paint is completely dry and safe to handle.
If you have many guests, prepare extra brushes and divide the supplies among several small tables to avoid crowding.
3. Cute Ghost Rock Painting Challenge
Turn ghost painting into a friendly challenge by inviting participants to create the cutest, funniest, or most unusual ghost. This activity is simple enough for beginners and entertaining for mixed-age groups.
Materials needed:
- Smooth stones
- White and black paint
- Small paintbrushes
- Optional colored paint for cheeks and accessories
How to play:
- Give each participant a stone and a set amount of time to paint.
- Ask everyone to create a ghost with a unique facial expression.
- Encourage participants to add hats, bows, or other fun details.
- Display the finished rocks together.
- If appropriate, let the group vote for playful categories such as “funniest ghost” or “cutest ghost.”
Keep the challenge lighthearted so everyone feels proud of their artwork, regardless of painting experience.
4. Pumpkin Rock Painting Activity
Pumpkin painting is another easy Halloween craft for school groups and parties. Participants can create traditional jack-o’-lantern faces or decorate their stones with cheerful pumpkin patterns.
Materials needed:
- Round or oval stones
- Orange, green, and black paint
- Paintbrushes
- Paper towels
How to organize the activity:
- Give each participant a clean stone.
- Ask everyone to paint the stone orange.
- Once the base coat dries, add green stems and curved lines.
- Invite participants to create happy, silly, or spooky pumpkin faces.
- Arrange the finished stones into a mini pumpkin patch for everyone to admire.
For a group activity, provide a few face examples but allow participants to invent their own designs.
5. Halloween Rock Painting for Family Craft Time
Rock painting can also be a relaxing family activity before Halloween. Parents and children can work on their designs together, share supplies, and create decorations for the home.
Materials needed:
- Smooth stones
- Acrylic craft paint suitable for the participants’ ages
- Paintbrushes
- Newspaper or a washable craft mat
- Paper towels
How to organize the activity:
- Gather everyone around a protected work surface.
- Let each family member choose a Halloween character.
- Paint the larger shapes first and add small details after the base colors dry.
- Encourage family members to help one another with tricky designs.
- Display the finished stones on a shelf or covered craft table.
Choose simple designs for younger children and allow older participants to try more detailed artwork.
6. Halloween Rock Painting as a Party Favor
Instead of sending guests home with ordinary party favors, let them create personalized Halloween rocks to take home. The finished stones can serve as little keepsakes from the event.
Materials needed:
- Small, smooth stones
- Paint in a few Halloween colors
- Small paintbrushes
- Paper bags or small craft boxes
- Optional gift tags
How to organize the activity:
- Prepare a selection of clean stones before the party.
- Set out simple design ideas, such as pumpkins, ghosts, and bats.
- Let guests paint one stone each.
- Allow enough time for the paint to dry fully.
- Place each finished rock in a paper bag or craft box with a small Halloween note.
If guests need to leave before the paint is dry, arrange for them to collect their rocks later or provide a safe way to transport them without touching the wet artwork.
7. Halloween Rock Painting Team Competition
A team challenge can make rock painting more exciting for older children, teens, and adults. Each team works together to create a coordinated collection of Halloween rocks.
Materials needed:
- Several smooth stones for each team
- A shared selection of paints
- Paintbrushes
- Paper and pencils for planning
- A table covering
How to play:
- Divide participants into small teams.
- Give each team a theme, such as haunted houses, friendly monsters, or spooky creatures.
- Allow a few minutes for the teams to plan their designs.
- Set a reasonable painting time based on the group’s age and skill level.
- Display each team’s collection and invite everyone to appreciate the creativity involved.
If you choose to award prizes, use fun categories such as “best teamwork,” “most colorful collection,” and “most creative theme.”
8. Halloween Rock Painting and Storytelling
Combine painting with storytelling to encourage imagination. Each participant paints a Halloween character and invents a short story about it.
Materials needed:
- Smooth stones
- Paintbrushes and craft paint
- Paper and pencils, optional
- A display tray or table
How to organize the activity:
- Ask each participant to paint a character, such as a ghost, witch, pumpkin, or monster.
- Let the paint dry before handling the rocks.
- Invite participants to give their characters names.
- Ask each person to share a short story about where the character lives or what it does on Halloween night.
- For a classroom, collect the stories into a simple group booklet or display them beside the painted stones.
This activity combines art with storytelling and gives participants an opportunity to express their ideas.
Tips for Planning a Successful Halloween Rock Painting Activity
- Prepare the supplies beforehand: Clean the stones, organize the paints, and cover the tables before guests arrive.
- Choose simple designs: Ghosts, pumpkins, dots, and stripes are easy for beginners to paint.
- Allow enough time for drying: Wet paint can smudge, so include a drying period in your schedule.
- Provide enough workspace: Give participants room to paint without knocking over other people’s supplies.
- Use age-appropriate materials: Check product labels and supervise children, especially younger ones.
- Plan for cleanup: Keep paper towels, wipes, and a designated area for used brushes nearby.
- Make the activity inclusive: Offer simple designs for beginners and more detailed options for participants who want a challenge.
- Think about transportation: Provide small boxes or paper bags if guests need to take their creations home.
Halloween rock painting activities are an easy way to make school celebrations, parties, and family gatherings more creative. Whether participants paint cute ghosts, design pumpkin stones, or work together on a themed collection, everyone gets the chance to make something personal and memorable.
Tips for Making Halloween Painted Rocks Look Beautiful
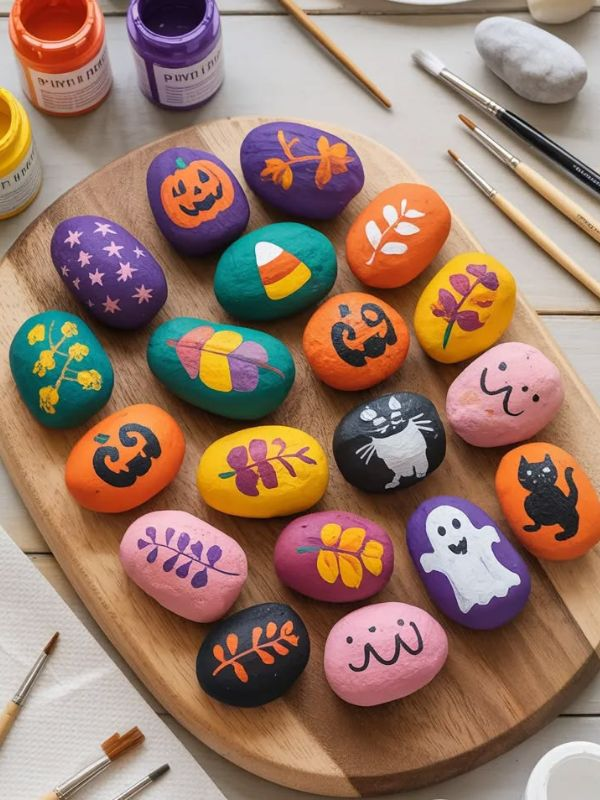
Making Halloween painted rocks look beautiful does not require professional painting skills or expensive supplies. With the right stones, suitable paint, and a little patience, you can create eye-catching decorations featuring ghosts, pumpkins, black cats, bats, and other Halloween characters.
Whether you are painting rocks for your home, a school activity, a Halloween party, or an outdoor display, a few simple techniques can help your designs look neater and last longer. Here are practical tips to help you get the best results from your Halloween rock painting projects.
1. Choose Smooth, Clean Stones
The type of stone you choose can make a big difference to the finished design. Smooth, flat stones are generally easier to paint because they provide a more even surface for colors and small details.
Before painting, remove dirt and dust from the rocks and allow them to dry completely. Avoid stones that crumble easily or have loose material on the surface, as these may not hold paint well.
2. Use Colors That Complement Each Other
Halloween designs often look attractive when you combine a few seasonal colors. Orange, black, white, purple, and green are popular choices, but you do not need to use every color in one design.
Try combinations such as:
- Orange and black for pumpkins and jack-o’-lanterns.
- White and black for ghosts, skulls, and spiderwebs.
- Purple and green for playful monster designs.
- Black and silver for elegant gothic patterns.
- Orange, white, and yellow for candy corn stones.
Using two to four colors in a design can help your painted rocks look coordinated rather than overly busy.
3. Start With Simple Designs
If you are a beginner, start with designs that use basic shapes and only a few details. Simple artwork can look just as attractive as complicated paintings when the colors are neat and the design is well balanced.
Ghosts, smiling pumpkins, candy corn, and polka dots are excellent starting points. As your confidence improves, you can try more detailed designs such as haunted houses, sugar skulls, and intricate spiderwebs.
4. Apply Thin, Even Coats of Paint
Thick paint can create lumps, uneven patches, and long drying times. For a smoother finish, apply a thin coat and allow it to dry before adding another.
If the original stone color still shows through, apply a second coat rather than trying to cover everything with one heavy layer. This technique is especially useful when painting white ghosts on dark stones or bright pumpkins on gray rocks.
5. Let Each Layer Dry Completely
One of the easiest ways to spoil a painted rock is to add another color before the first layer has dried. Wet paint can smear, mix with nearby colors, or leave fingerprints on your design.
Allow the base coat to dry before adding facial features, outlines, or decorative patterns. Follow the drying instructions on your paint packaging, as the time required varies by product and conditions.
6. Use Small Brushes for Fine Details
Large brushes are useful for covering the main surface, but small brushes are better for eyes, mouths, whiskers, spiderwebs, and thin outlines.
You can also use suitable paint pens for precise lines and small decorations. If you are unsure how a detail will look, practise it on scrap paper before painting directly onto the stone.
7. Sketch Complicated Designs Before Painting
For more detailed Halloween artwork, lightly sketch the main shapes with a pencil before applying paint. This helps you plan where each feature should go and reduces the need to correct mistakes later.
For example, sketch the outline of a haunted house before painting its walls and windows. For a skull design, mark the eye sockets, nose, and mouth so the features are evenly positioned.
Keep the sketch light so it does not show through the finished paint.
8. Create Contrast Between the Background and Design
Contrast helps your Halloween artwork stand out. If the background and the main design are similar in color, important details may be difficult to see.
Try painting white ghosts on black stones, black bats on pale backgrounds, or bright orange pumpkins against dark purple. A thin contrasting outline can also help define the shape of a character.
9. Add Small Decorative Details
Small additions can make a simple design look more polished. Once the main paint has dried, consider adding:
- Tiny stars and moons around a ghost.
- Green stems and curved lines on pumpkins.
- White highlights in monster eyes.
- Fine whiskers on black cats.
- Silver dots around spiderwebs.
- Little bats or stars around a haunted house.
Avoid adding too many details to a small stone. A few well-placed decorations often look better than a crowded design.
10. Protect Your Finished Painted Rocks
If you want to keep your Halloween painted rocks for future use, consider applying a clear sealant compatible with your paint and intended display location.
Make sure the paint is fully dry before sealing, and follow the product instructions for application, ventilation, and curing time. For outdoor decorations, choose a finish specifically suitable for outdoor exposure.
Keep in mind that a sealant does not make every painted rock completely weatherproof. Prolonged rain, strong sunlight, and extreme weather can still cause fading or damage, so store delicate designs indoors when necessary.
11. Display Your Painted Rocks Creatively
A beautiful design can look even better when displayed thoughtfully. Instead of scattering your painted stones randomly, group them by color, character, or theme.
Here are a few ways to display your Halloween rocks:
- Arrange ghost and pumpkin stones on a decorative tray.
- Place larger painted stones beside flowerpots on a covered porch.
- Group monster rocks together for a playful Halloween centerpiece.
- Display black-and-white designs on a shelf for a coordinated look.
- Use a collection of painted stones to decorate a classroom craft table.
For outdoor displays, place stones securely and keep them away from walking surfaces where they could cause trips or slips.
12. Keep Your Painting Area Organized
An organized workspace makes it easier to paint neatly and reduces accidental smudges. Keep your brushes, paints, and finished stones in separate areas.
Use newspaper or a washable craft mat to protect your table. Rinse brushes between colors, wipe up spills promptly, and give finished rocks enough space to dry without touching one another.
If children are joining the activity, use age-appropriate supplies and supervise them throughout the process.
The secret to beautiful Halloween painted rocks is to keep your designs manageable, choose colors that work well together, and allow enough time for every layer to dry.
How to Display or Use Halloween Painted Rocks
After spending time painting cute ghosts, spooky pumpkins, black cats, and other Halloween characters, you will want to show off your finished creations. There are many creative ways to display or use Halloween painted rocks, whether you want to decorate your home, add a festive touch to a party, or give handmade gifts to friends and family.
Halloween painted rocks are versatile, affordable decorations that can fit into almost any seasonal display. You can arrange them on shelves, use them as table decorations, decorate flowerpots, or create a fun Halloween rock hunt for children. Here are some creative ways to display and use your finished painted stones.
1. Use Halloween Painted Rocks as Table Decorations
Painted rocks can make charming additions to your Halloween dining table, coffee table, or party snack table. Choose designs that match your existing decorations for a coordinated look.
Arrange pumpkin rocks, ghost stones, and black cat designs on a decorative tray. You can also place a few painted stones around a centerpiece made with artificial pumpkins, leaves, or battery-operated candles.
For a simple display, combine black, orange, and white rocks in a shallow bowl. Keep the stones away from food-contact surfaces, and make sure they do not interfere with serving dishes.
2. Decorate Your Front Porch
Your front porch is an excellent place to display Halloween painted rocks and welcome visitors with a little seasonal creativity.
Place larger painted stones beside flowerpots, near a decorative pumpkin display, or on a sheltered porch shelf. You can paint messages such as “Boo!” or decorate the stones with smiling ghosts and colorful pumpkins.
Choose a protected location if possible, especially if your painted rocks are not designed to withstand outdoor weather. Keep them securely positioned and away from steps or walking paths.
3. Create a Halloween Rock Centerpiece
A Halloween rock centerpiece is a simple way to decorate a dining table, party table, or entryway. It works particularly well when you have painted several stones with different Halloween characters.
To create one, choose a shallow tray, decorative bowl, or small basket. Arrange your painted rocks by color or character, placing larger stones at the back and smaller ones toward the front.
You can add artificial autumn leaves, miniature pumpkins, or other lightweight decorations around the stones. Keep the arrangement stable and avoid using materials that could damage the paint.
4. Decorate Flowerpots With Painted Stones
Halloween painted rocks can add a festive touch to indoor plants and outdoor flowerpots. This is an easy way to reuse your stones without creating an entirely new decoration.
Choose small painted pumpkins, ghosts, or monster rocks and arrange them on the soil surface around the edge of a flowerpot. Leave space around plant stems and avoid covering drainage holes.
For outdoor pots, use painted rocks with a suitable protective finish and check them occasionally for signs of fading or weather damage.
5. Use Painted Rocks as Halloween Party Decorations
If you are hosting a Halloween party, painted rocks can help decorate different areas of your space. Their small size makes them useful for creating themed displays without taking up much room.
Try these ideas:
- Place ghost rocks on a decorative tray near the entrance.
- Arrange pumpkin stones around a party centerpiece.
- Display monster rocks on a craft table.
- Use black-and-white stones to decorate a shelf.
- Group spiderweb and bat rocks around a Halloween sign.
For a party with children, keep small stones away from young guests who might put them in their mouths.
6. Make Handmade Halloween Gifts
Halloween painted rocks can become thoughtful handmade gifts for friends, family members, teachers, or craft-loving neighbors.
Choose designs that match the recipient’s interests. A friend who loves cats might enjoy a painted black cat stone, while someone who enjoys cute decorations may prefer a smiling ghost or pumpkin.
Place the finished stone in a small gift box or paper bag and add a handwritten Halloween message. Make sure the paint and any sealant have dried and cured fully before wrapping the gift.
7. Organize a Halloween Painted Rock Hunt
A Halloween rock hunt is a fun activity for families, classrooms, and community gatherings. Instead of hiding candy alone, you can create a collection of painted stones for participants to discover.
Paint several stones with ghosts, pumpkins, bats, and monsters. Hide them in safe, easy-to-reach locations around a room or designated play area.
Give participants a list of characters to find, or invite them to collect one rock of each design. You can also let children exchange the rocks they find.
For safety, supervise younger children and avoid hiding stones near roads, drains, water, or other hazardous locations. Use larger stones for groups that include young children, and never leave small stones where they could become choking hazards.
8. Display Halloween Rocks on Shelves
A shelf display is ideal if you want to keep your Halloween painted rocks indoors and reuse them every year.
Arrange your stones in a row, grouping similar designs together. For example, place ghost rocks on one side, pumpkin stones in the center, and black cats or bats on the other side.
You can add a small seasonal sign or artificial autumn leaves to complete the display. Choose a stable shelf where the rocks will not easily fall, especially if children or pets are nearby.
9. Use Painted Rocks for Classroom Displays
Teachers and parents can use Halloween painted rocks to create colorful classroom decorations. The stones can also be part of an art project that celebrates each child’s creativity.
Arrange the rocks on a designated display table or use them to decorate a classroom shelf. You could group them by design, color, or the techniques students used.
Another idea is to let each child name their painted character and write a short story about it. Display the stories beside the rocks to create a combined art and writing project.
Make sure the stones are placed securely and follow the school’s safety guidelines for small objects and craft materials.
10. Save Halloween Painted Rocks for Next Year
One advantage of painted rocks is that you can reuse them for future Halloween celebrations. With proper care, they can become part of your yearly seasonal decoration collection.
After Halloween, check each stone for chipped paint, dirt, or other damage. Clean it gently when needed and allow it to dry completely before storing it.
Place the rocks in a sturdy box with tissue paper or another soft separator to reduce scratches. Store the box in a cool, dry place away from direct sunlight and excessive moisture.
If you plan to display the stones outdoors again, inspect the paint and protective finish before putting them outside.
Tips for Displaying Halloween Painted Rocks Beautifully
- Choose a theme: Group ghosts together, create a pumpkin collection, or mix several designs in a coordinated color palette.
- Vary the sizes: Combining small and large stones can make a display more interesting.
- Keep the arrangement simple: A few carefully placed stones can look better than a crowded display.
- Protect the paint: Keep delicate designs away from rain, harsh sunlight, and rough handling.
- Choose safe locations: Avoid placing rocks where they could cause trips, block walkways, or be reached by very young children.
- Store them properly: Keep your finished stones in a dry box so you can enjoy them again next Halloween.
Halloween painted rocks are more than just a fun craft project. They can become decorations, handmade gifts, party accessories, and memorable family activities. Whether you display them on your porch, arrange them on a table, or organize a Halloween rock hunt, there are plenty of ways to give your creative work a special place in your celebration.
Frequently Asked Questions About Halloween Rock Painting Ideas
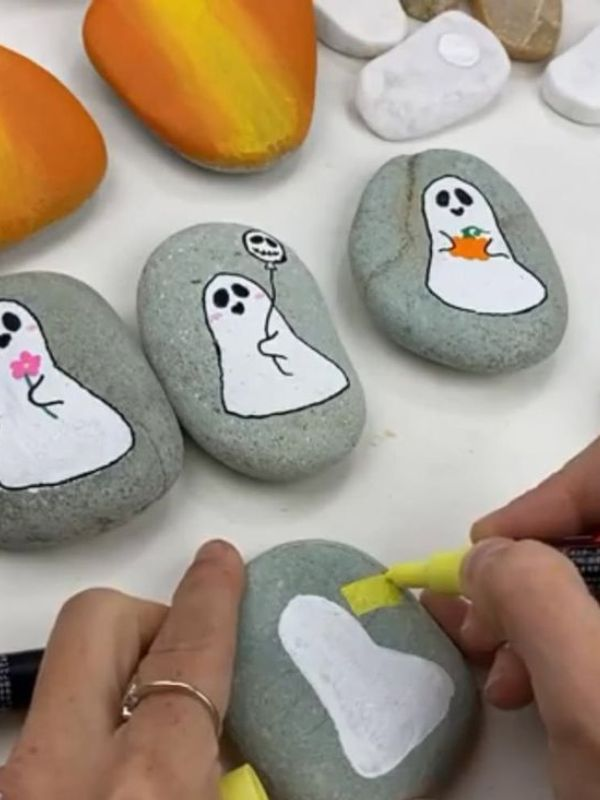
What paint is best for Halloween rock painting?
Acrylic craft paint is a popular choice for Halloween rock painting because it offers good color coverage and works well on clean, dry stones. Use small paintbrushes or suitable paint pens to add details such as eyes, mouths, and spiderwebs.
Do I need to prime rocks before painting them?
Priming is optional, but applying a suitable primer or a base coat of acrylic paint can help create a smoother, more even surface. Clean the rocks thoroughly and allow them to dry before painting.
What are the easiest Halloween rock painting ideas for beginners?
The easiest Halloween rock painting ideas for beginners include smiling pumpkins, simple ghosts, candy corn patterns, black-and-white designs, polka dots, and cute monster faces. These designs use basic shapes and require only a few paint colors.
Can kids paint Halloween rocks?
Yes, Halloween rock painting is a fun craft for children when they have age-appropriate supplies and adult supervision. Choose simple designs, use suitable craft paints, and protect the work surface. Keep small stones away from young children who may put them in their mouths.
How do I make Halloween painted rocks waterproof?
To help protect Halloween painted rocks from moisture, allow the paint to dry completely and apply a clear sealant suitable for the paint and intended display location. Follow the manufacturer’s instructions for application and curing. Keep in mind that even sealed rocks may fade or deteriorate with prolonged exposure to rain and sunlight.
Can I use ordinary rocks for Halloween painting?
Yes, ordinary rocks can work well for Halloween painting. Choose stones with relatively smooth, stable surfaces, wash away dirt and debris, and let them dry completely before applying paint. Flat stones are especially useful for designs with faces and fine details.
How long does it take for painted rocks to dry?
Drying time depends on the type of paint, the thickness of each coat, and the surrounding conditions. Thin coats of acrylic craft paint may dry within minutes to an hour, but thicker layers can take longer. Follow the paint manufacturer’s instructions and allow the artwork to dry fully before handling or sealing it.
What Halloween rock painting ideas are best for outdoor decorations?
Ghost rocks, pumpkin stones, black cat designs, spiderweb rocks, and haunted house scenes are excellent choices for outdoor Halloween displays. Use paint and protective finishes suitable for outdoor exposure, and place the stones in sheltered, secure locations to help preserve the artwork.
How can I make my Halloween painted rocks look more professional?
Start with smooth, clean stones and apply thin, even coats of paint. Let each layer dry before adding details, use fine brushes for small features, and choose colors that contrast with the background. A compatible clear sealant can help protect the finished design.
What can I do with Halloween painted rocks after Halloween?
You can store your painted rocks in a dry box and reuse them next year. You can also give them as handmade gifts, use them for craft activities, display them on shelves, or save them for future Halloween parties and classroom projects.
Conclusion
These Halloween rock painting ideas offer a fun and affordable way to get creative this spooky season. Whether you prefer cute ghost rocks, smiling pumpkins, creepy eyeballs, or detailed haunted house designs, there are plenty of options for kids, adults, and beginners to enjoy.
With a few smooth stones, basic painting supplies, and a little imagination, you can create beautiful Halloween decorations for your porch, garden, classroom, or party. Remember to start with simple designs, allow each layer of paint to dry, and protect your finished artwork with a suitable sealant when needed.
You can also turn your painted rocks into handmade gifts, party favors, or fun Halloween rock-hunting activities for the whole family. Choose your favorite designs, gather your supplies, and enjoy creating unique decorations that make your Halloween celebration extra special!