If you’ve ever looked at your favourite wig and thought, “This used to look so beautiful; what happened?”, then this “how to revamp your wig at home” article is for you.
Wigs, whether straight or curly, no matter their quality, can lose their shine and shape after several wears. They tangle, get dry, and stop looking as fresh as they used to be. You can revamp your wig at home and make it look brand new again.
Learning how to revamp a straight or curly wig at home will save you money and revive your wig. This guide will walk you through simple, clear steps to clean, detangle, and restyle your wigs, such as straight, curly, human hair, and synthetic wigs.
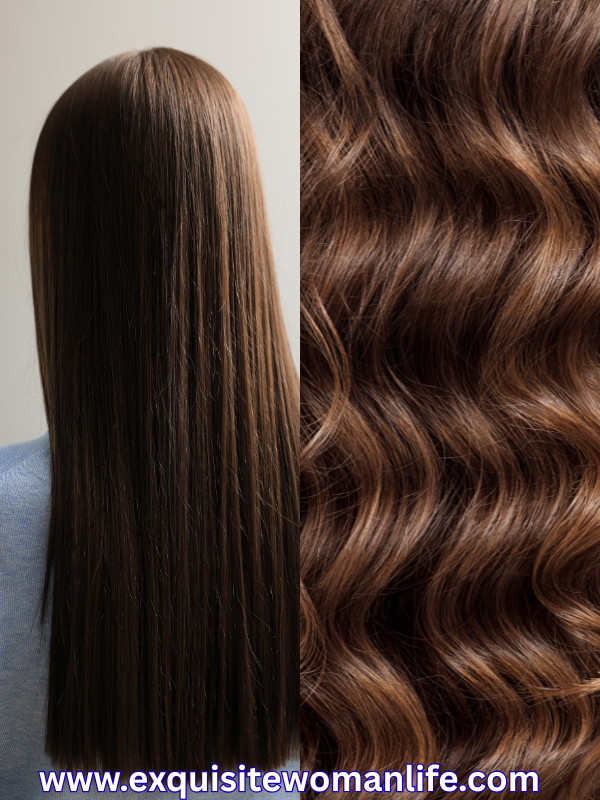
How to Revamp a Straight Wig at Home

If your straight wig starts to look dull, tangled, or stiff, you can fix it with the following steps
Step 1- Detangle the Wig Gently
Before you wash your wig, always start by removing tangles. This helps reduce shedding and breakage. The best tools for this are a wide-tooth comb or a paddle brush designed for wigs.
Place the wig on a mannequin head or hold it firmly, comb it starting from the tips and work your way upward toward the roots. This method keeps the strands from snapping or pulling out.
If your wig is very tangled or feels dry, don’t rush to comb it. Mix a small amount of deep conditioner with water in a spray bottle, shake well, and lightly spray it on the tangled areas. Let it sit for about 5 to 10 minutes so it softens the hair. Then, gently comb through section by section.
This method adds moisture to the hair, makes it easier to manage, and reduces the chances of breakage, especially if the wig hasn’t been treated for a while.
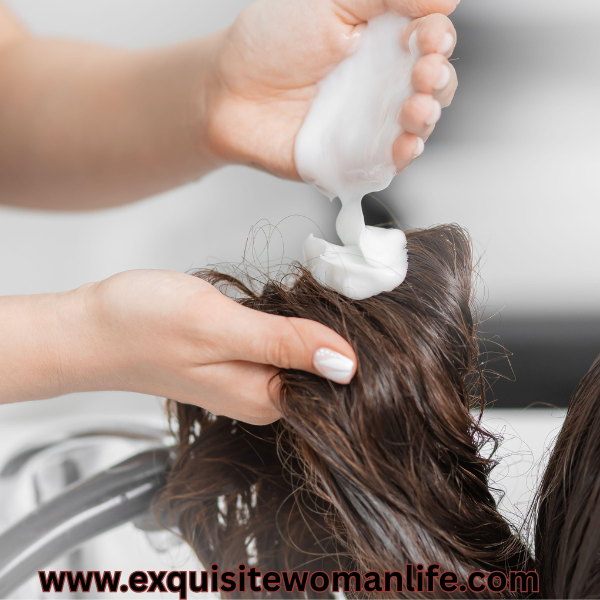
Step 2- Wash the Straight Wig Properly
Once detangled, fill a bowl or sink with lukewarm water and add a small amount of sulfate-free shampoo. Sulfate-free products are gentle and help keep your wig soft and manageable.
Place the wig in the water and gently swirl it around with your hand.
Wash the wig cap and the laces well , you use a soft toothbrush to brush out build ups on the frontal lace or closure.
Avoid rubbing or scrubbing the hair, which can cause tangles or make the strands rough.Instead, hold the wig from the top and let the water move through it.
After washing, lift the wig out of the water and, using both hands, draw the water down the strands in a straight motion. This helps remove excess water and keeps the wig smooth. Do not twist or wring it. That can damage the hair.
If you’re working with a human hair wig, you can lightly massage the shampoo through the strands before rinsing. For synthetic wigs, only swirl gently; do not massage
When you’re done, rinse the wig with clean lukewarm water until there’s no shampoo left. You’ll notice it already feels lighter and cleaner.
Step 3 – Deep Condition for Smoothness
After washing, your wig needs to be moisturised to stay silky and soft. Apply a good deep conditioner or mix coconut oil and leave-in conditioner. You can add other hair treatment to strengthen the wig.
Work the product through the strands using your fingers or a wide-tooth comb. Ensure that every part of the wig is coated evenly. Then, place the wig in a plastic bag or cover it with a shower cap and let it sit for 10–15 minutes in oven or inside a hot water. This allows the conditioner to soak in and deeply restore the hair’s shine.
Rinse it thoroughly with lukewarm water, then gently squeeze out excess water using a soft towel; don’t rub it. You’ll notice how much softer and smoother the hair feels right away.
Step 4 – Dry and Straighten the Wig Safely
After rinsing out the conditioner, place the wig on a wig stand or mannequin head and let it dry naturally. This helps maintain the shape and prevents heat damage.
If you’re in a hurry, you can blow-dry, but do it carefully. Set your dryer to cool or low heat, and apply a heat protectant spray first. This creates a barrier that keeps your wig from drying out or losing its smooth texture.
When blow-drying, use a paddle brush to gently guide the hair straight as you move the dryer along the strands. Work in sections, starting from the bottom up. Be patient; rushing with high heat can cause frizz and split ends.
To achieve a salon-smooth finish without frizz, once your wig is dry, you can run a flat iron over it briefly on a low to medium setting. Always apply a small amount of heat protectant before straightening. Finish by brushing through with a wide-tooth comb to keep it sleek and soft.
Step 5 -Add Final Touches
Now that your wig is clean, soft, and straight, it’s time to give it that fresh, polished look. Start by checking the ends — if you notice any rough or frizzy parts, use a pair of sharp scissors to trim the ends lightly. This instantly makes the wig look new and healthy.
Next, apply a drop or two of wig serum or natural hair oil. Rub it gently between your palms, then glide it through the strands. This adds shine, reduces dryness, and keeps the hair looking silky without feeling greasy.
Finally, always store your wig properly. The best way is to place it on a mannequin head or wig stand so it holds its shape and stays tangle-free. If you don’t have a stand, you can also hang it neatly or keep it in a satin bag to protect it from dust and friction.
With these simple steps, your straight wig will look as fresh and smooth as the day you bought it — and you did it all from home!
How to Revamp a Curly Wig at Home

Curly wigs are beautiful, but they can also lose shape or become tangled over time. With care and the right technique, you can revamp a curly wig at home and make it soft, defined, and beautiful again.
Step 1 – Prepping and Detangling Curly Wig.
Curly wigs need a gentle touch. Start by placing your wig on a mannequin head or holding it firmly on your lap. Use your fingers or a wide-tooth comb to separate the curls slowly. This helps you remove knots without breaking the curl pattern.
If the curls are tight or dry, use a detangling spray or combine water, conditioner, and a few drops of natural oil in a spray bottle. Shake it well and lightly mist the wig, focusing on the tangled areas. Let it sit for about 5 minutes to soften the strands.
Then, start detangling section by section, beginning from the ends and working upward. Be patient; rushing can pull out curls or cause shedding. Curly wigs respond best to gentle care, and your patience will show in the final result.
Step 2 -Wash Without Killing the Curls
When it’s time to wash, the goal is to clean the wig without losing the curl definition. Fill a basin or bowl with cool water; it helps the curls stay tight and keeps frizz away. Add a small amount of curl-friendly shampoo, and swirl the wig in the water gently.
Avoid rubbing, twisting, or scrubbing the curls. Instead, gently squeeze the shampoo through the strands with your hands. This motion cleans while keeping the curls in their natural shape.
It’s best to use a basin instead of running water, as running water can stretch or pull on the curls, causing them to loosen. Once you’re done washing, rinse with cool, clean water until no shampoo remains.
You’ll notice the curls already starting to spring back to life — soft, clean, and defined, just the way they should be.
Step 3 – Deep Condition and Define Curls
After washing, apply a generous amount of deep conditioner to the strands, ensuring every section is coated. Use your fingers to work the product through the curls gently.
Let the conditioner sit for at least 15 minutes; this allows it to soak into the hair and restore softness. You can cover the wig with a shower cap or plastic bag during this time to help the moisture penetrate deeper.
Once the time is up, rinse the wig thoroughly with cool water until most of the conditioner is out. This removes any product buildup while keeping the curls hydrated and smooth.
While the wig is still damp, it’s time to bring the curls back to life. Using your fingers, finger-coil or scrunch the curls gently to restore their natural shape.
You can choose what to use for this step based on how your wig feels:
-
If your curls feel soft but need a light boost: use a leave-in conditioner. It adds moisture and softness without weighing the curls down.
-
If your curls look dry or frizzy: use a curl cream for stronger hold and longer-lasting definition.
-
Or mix both: a small amount of leave-in conditioner with a dab of curl cream; this combo hydrates and defines at the same time.
You can make a DIY curl cream using aloe vera gel mixed with a bit of leave-in conditioner. This keeps the curls hydrated, bouncy, and frizz-free.
Step 4 – Dry and Refresh the Wig.
Place the wig on a wig stand and let it air dry naturally. Avoid blow-drying if possible, as heat can flatten curls or cause dryness. Air drying keeps the curls soft, full, and bouncy.
Once the wig is dry, you can lightly mist it with a few sprays of natural oil (like argan or coconut oil) or a curl activator spray to refresh and add shine. Gently fluff the curls with your fingers to bring back volume.
Step 5- Maintain the Curls Long-Term
To keep your curls looking beautiful for longer, store your wig properly when not in use. Keeping it on a mannequin head helps retain its shape, but if you won’t be using it for a while, it’s best to place it in a nylon bag instead. This helps lock in moisture and keep the curls soft and hydrated.
Avoid brushing curly wigs daily; it can pull out the curl pattern. Instead, use your fingers to separate and fluff the curls when needed.
If you wear your wig overnight, cover it with a satin bonnet or scarf. This reduces friction and keeps the curls soft and defined.
With the right care, your curly wig will stay fresh, bouncy, and ready to wear every time.
Common Wig Revamp Mistakes to Avoid
Even when you mean well, a few small mistakes can make your wig lose its beauty faster than expected. Here are some things to watch out for when revamping your wig at home:
1. Overusing Heat on Synthetic Wigs
Synthetic wigs cant handle high heat. Using straighteners or blow dryers on them can cause melting or permanent damage. If you must apply heat, always check that your wig is labeled “heat-friendly” and use the lowest setting possible.this article says more about synthentic hair
2. Skipping Detangling Before Washing
Washing a tangled wig is one of the quickest ways to ruin it. Knots can tighten even more when wet, leading to shedding and breakage. Always detangle your wig first — it makes the washing and conditioning process smoother and helps your wig last longer.
3. Using Too Much Product
It’s tempting to load your wig with oils, serums, or creams to make it shine, but too much can do more harm than good. Heavy product buildup weighs down the hair, makes it look greasy, and can even attract dust. A little goes a long way, especially with leave-in conditioners and oils.
4. Brushing Curly Wigs When Dry
Brushing curly wigs when they’re dry is a recipe for frizz and breakage. Instead, always use your fingers or a wide-tooth comb when the curls are slightly damp. This keeps the curls defined, soft, and bouncy.
Best Products to Use When Revamping Wigs
You don’t need expensive salon products to bring your wig back to life. The right care items even affordable ones can make a huge difference. Here are some effective and budget-friendly options to try at home.
1. Shampoos and Conditioners
Look for sulfate-free shampoos and moisturizing conditioners designed for wigs or color-treated hair. These products cleanse without stripping the fibers or drying out the hair.
If you’re on a budget, a mix of mild baby shampoo and water can also do the job gently.
DIY Tip: Mix 2 tablespoons of apple cider vinegar with water to remove buildup and restore shine , it’s great for both synthetic and human hair wigs.
2. Oils and Leave-in Conditioners
A few drops of argan oil, coconut oil, or olive oil can restore softness and shine. Always start with a small amount — too much can weigh your wig down.
For extra moisture, use a light leave-in conditioner to keep the strands smooth and manageable.
DIY Tip: Combine one spoon of coconut oil, a few drops of glycerin, and water in a spray bottle for a quick homemade wig refresher.
3. Wig Sprays and Detanglers
A good wig detangling spray makes combing easier and reduces shedding. You can also make your own with one part conditioner and two parts water — shake it well before use.
Mini Product Guide: Straight vs. Curly Wig Care
For Straight Wigs:
-
Lightweight oil (argan or jojoba).
-
Heat protectant spray if using styling tools.
-
Paddle brush or wide-tooth comb.
For Curly Wigs:
-
Curl-enhancing cream or mousse.
-
Leave-in conditioner for definition.
-
Microfiber towel or cotton T-shirt for drying.
FAQs on Wig Revamp
1. Can I use regular shampoo to wash my wig?
It’s not the best choice. Regular shampoos often contain harsh ingredients that can dry out or damage wig fibers, especially synthetic ones. Instead, use a sulfate-free or wig-friendly shampoo — it’s gentler and helps your wig last longer.
2. How do I know if my wig is too old to revamp?
If your wig sheds excessively, tangles beyond repair, or the lace or cap is tearing, it might be time to retire it. However, if it’s just dull, dry, or frizzy, a good deep conditioning and trimming session can often bring it back to life.
3. What’s the best way to keep curls defined after washing?
After washing, apply a leave-in conditioner or curl cream while the wig is still damp. Then, scrunch the curls gently upward to shape them. Let the wig air dry on a stand for bouncy, natural curls. Avoid brushing or combing dry curls — just use your fingers to fluff them.
4. Can I dye my wig after revamping it?
Yes — but it depends on the wig type. Human hair wigs can be dyed safely using gentle hair dye. However, synthetic wigs don’t absorb color the same way; using dye can damage them. If you want a color change on synthetic wigs, go for temporary spray-on color instead.
5. How often should I revamp my wig?
It depends on how often you wear it. For daily use, revamping every 2–3 weeks helps keep it fresh and manageable. If you wear your wig occasionally, once every 4–6 weeks is enough.
6. Can I use hot tools to restyle my wig?
Only if your wig is heat-friendly or made of human hair. Always use a heat protectant spray before applying any heat, and keep the temperature low to prevent damage.
7. Why does my wig still feel dry after conditioning?
It might need more moisture and sealing. After conditioning, apply a small amount of oil or serum to lock in hydration. Also, avoid leaving wigs out in open air for too long — store them in a nylon bag or satin bonnet to retain moisture.
8. What’s the safest way to store my wig long-term?
If you’ll be wearing your wig soon, keep it on a mannequin head to maintain its shape. But for long-term storage, place it in a nylon or silk bag to prevent it from drying out and collecting dust.