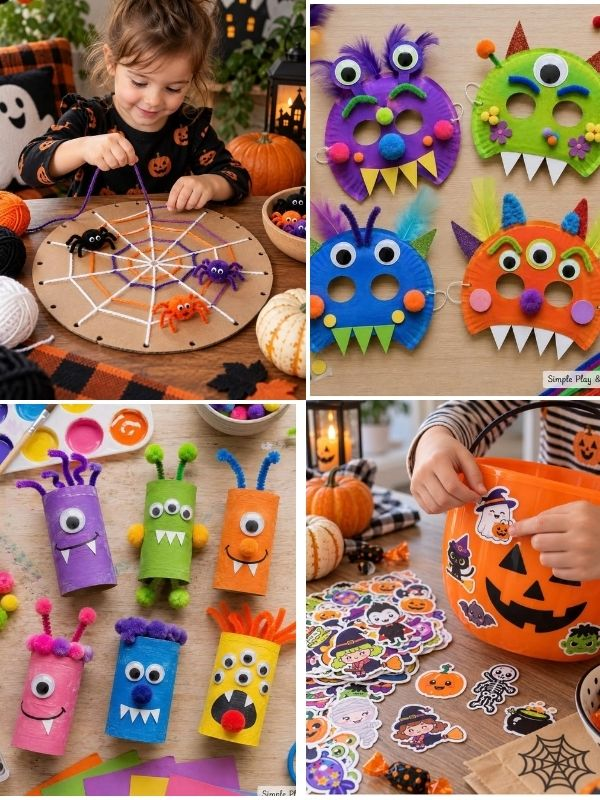
Halloween crafts for kids are a fun way to keep children entertained, letting them explore their creativity. From simple paper crafts to cute pumpkins, ghosts, spiders, and monsters, there are plenty of easy projects children can make at home or in the classroom.
The best Halloween crafts depend on a child’s age and abilities. Toddlers need simple crafts with easy steps and safe materials, while preschoolers can handle slightly more detailed projects. Elementary kids can try more creative crafts that involve cutting, painting, decorating, and assembling different materials.
In this guide, you will find easy Halloween crafts for toddlers, preschoolers, and elementary kids. These ideas are suitable for home activities, classroom projects, Halloween parties, or simply spending a fun afternoon making something together.
See Halloween drink ideas kids will love
Easy Halloween Crafts for Toddlers
Halloween crafts for toddlers should be simple enough to complete in a short time without complicated instructions. At this age, children enjoy touching, sticking, painting, stamping, and choosing colors more than following detailed craft techniques.
Choose washable, child-friendly materials and let toddlers do the parts they can manage, such as painting, gluing with help, sticking paper pieces, and decorating. Adults should handle scissors and supervise the activity throughout.
1. Paper Plate Pumpkin
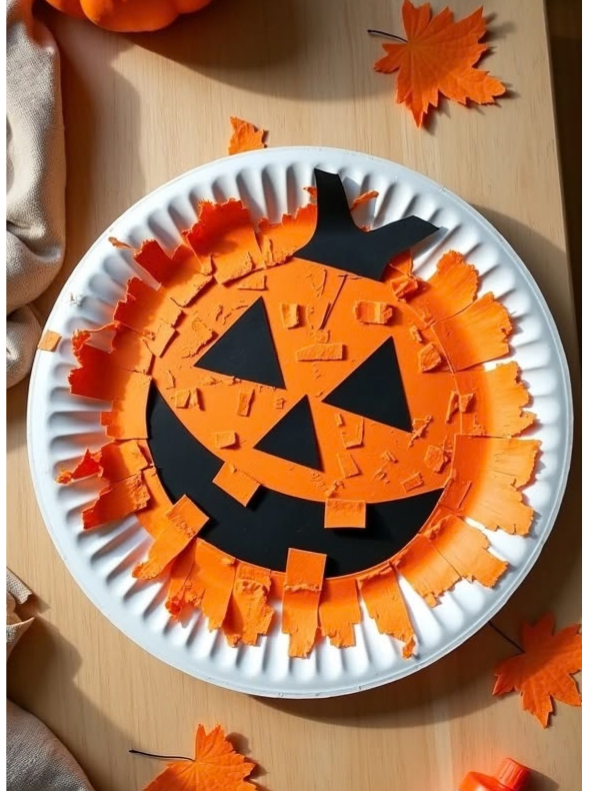
A paper plate pumpkin is an easy Halloween craft that lets toddlers practice painting and decorating.
You will need:
- A paper plate
- Orange washable paint
- Black paper
- Green paper
- Child-safe glue
- Paintbrush
How to make it:
- Place the paper plate on a flat surface and let your child paint the entire front orange.
- Allow the paint to dry completely.
- Cut two triangle shapes for the eyes and a simple mouth from black paper. Adults should do the cutting.
- Cut a small green rectangle or leaf shape for the pumpkin stem.
- Help your toddler glue the eyes, mouth, and stem onto the pumpkin.
- Let the finished pumpkin dry before displaying it.
This craft can be made with different facial expressions so each child can create their own pumpkin character.
2. Handprint Ghost
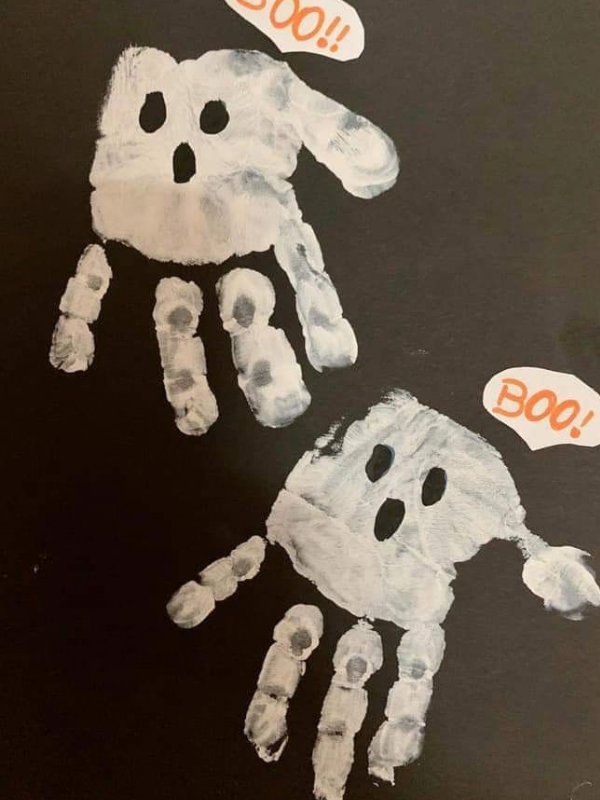
A handprint ghost is a cute keepsake that parents can make with their toddlers.
You will need:
- White washable paint
- Black paper or white paper
- Black marker
- Baby wipes or a damp cloth for cleaning hands
How to make it:
- Paint a thin layer of white washable paint onto your toddler’s hand.
- Gently press the painted hand onto the paper with the fingers pointing downward.
- Carefully lift the hand away from the paper.
- Wash your child’s hand immediately after making the print.
- Allow the handprint to dry.
- Add two black eyes and a small mouth with a marker once the paint is dry.
- Write your child’s name and the date underneath the ghost if you want to keep it as a Halloween memory.
The fingers become the ghost’s hanging arms, making the finished craft look playful and cute.
3. Pumpkin Stamping Craft
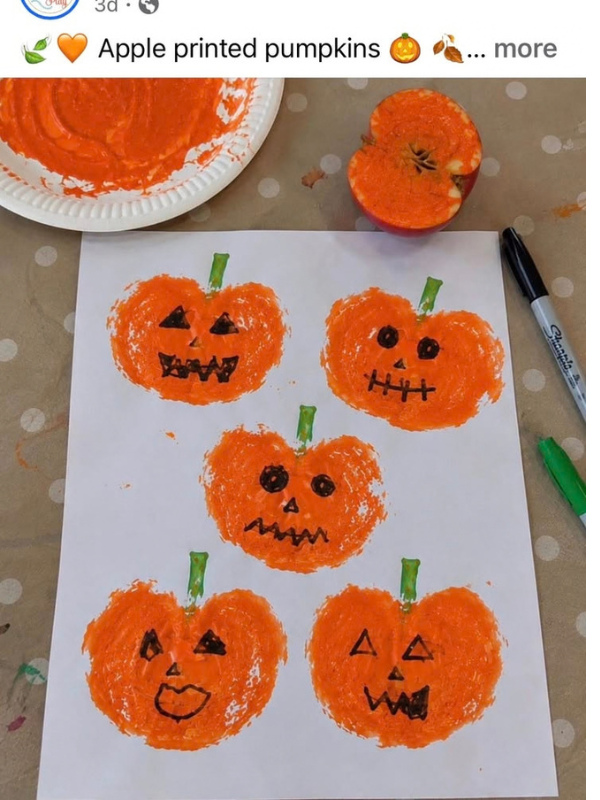
Pumpkin stamping is a fun activity for toddlers who enjoy painting but may not be ready for detailed crafts.
You will need:
- Orange washable paint
- White paper
- A small sponge or round sponge
- Green washable paint
- Black marker
How to make it:
- Pour a small amount of orange paint onto a plate or shallow container.
- Dip the round sponge lightly into the paint.
- Help your toddler press the sponge onto the paper to create pumpkin shapes.
- Let your child make several pumpkins across the paper.
- Once the paint is dry, add small green stems with a brush or marker.
- Adults can add simple faces to some of the pumpkins using a black marker.
For younger toddlers, you can leave the pumpkins without faces and let them focus on stamping and painting.
4.Handprint Ghost
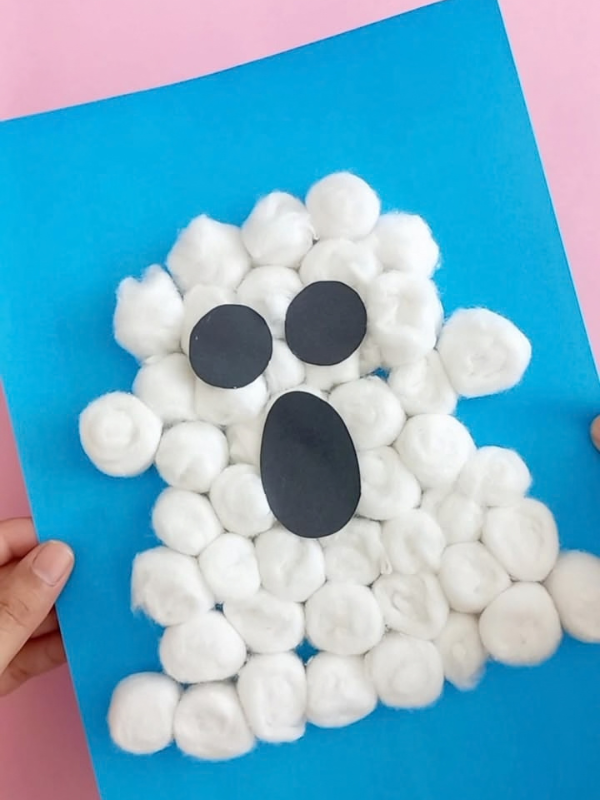
This craft is easy to prepare and gives toddlers a fun sensory activity.
You will need:
- White paper
- Cotton balls
- Child-friendly glue
- Black paper or a black marker
How to make it:
- Draw or lightly outline a simple ghost shape on the paper.
- Put small amounts of child-friendly glue inside the ghost shape.
- Give your toddler cotton balls and encourage them to place them over the glued area.
- Continue until the ghost is covered with cotton balls.
- Allow the craft to dry.
- Add two black eyes and a small mouth.
Toddlers can practice placing the cotton balls while creating a soft, fluffy ghost.
5. Simple Paper Spider
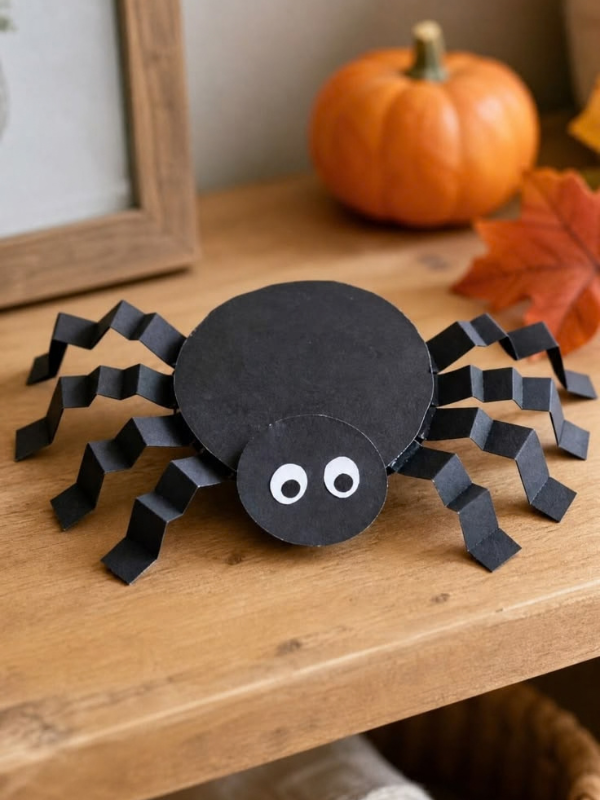
A simple paper spider is a fun Halloween craft that requires only a few materials.
You will need:
- Black paper
- White paper
- Child-friendly glue
- Black marker
How to make it:
- Adults should cut a large black circle for the spider’s body.
- Cut several thin strips of black paper for the legs.
- Give the pieces to your toddler.
- Help your child glue the spider’s body onto a piece of white paper.
- Let your toddler help glue the legs around the body.
- Add two white eyes and black pupils.
- Allow the finished spider to dry.
You can make the spider extra cute by giving it a smiling face.
6. Halloween Sticker Craft
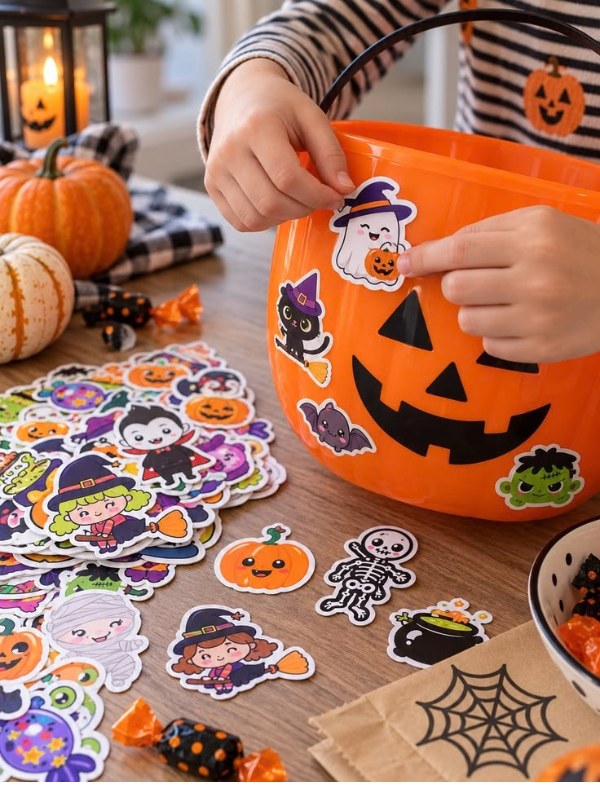
Halloween stickers are one of the easiest craft options for toddlers because there is little preparation involved.
You will need:
- A sheet of white or colored paper
- Large Halloween-themed stickers
- Crayons or washable markers
How to make it:
- Give your toddler a sheet of paper and a selection of large Halloween stickers.
- Help them peel the stickers if they have difficulty doing so.
- Let them place pumpkins, ghosts, bats, cats, or other Halloween stickers wherever they like.
- Give them crayons or washable markers to add lines, circles, or simple drawings around the stickers.
- Display the finished artwork on the refrigerator, wall, or classroom board.
This is a particularly good option when you want a quick Halloween activity with very little cleanup.
7. Paper Bag Ghost
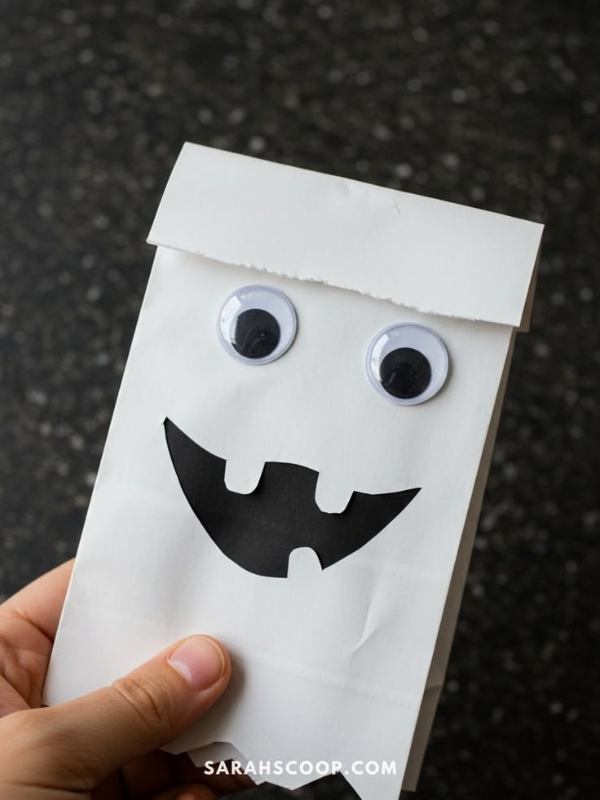
A paper bag ghost can become both a Halloween craft and a simple puppet for toddlers.
You will need:
- A plain paper lunch bag
- White washable paint or white paper
- Black paper
- Child-friendly glue
- Black marker
How to make it:
- Paint the front of the paper bag white or cover it with white paper.
- Allow the paint to dry completely.
- Cut two large black eyes and a mouth from black paper.
- Help your toddler glue the pieces onto the bag.
- Once everything is dry, place a hand inside the bag and move it to make the ghost “talk.”
Keep the design simple so your toddler can focus on decorating rather than following complicated steps.
8. Halloween Finger Painting
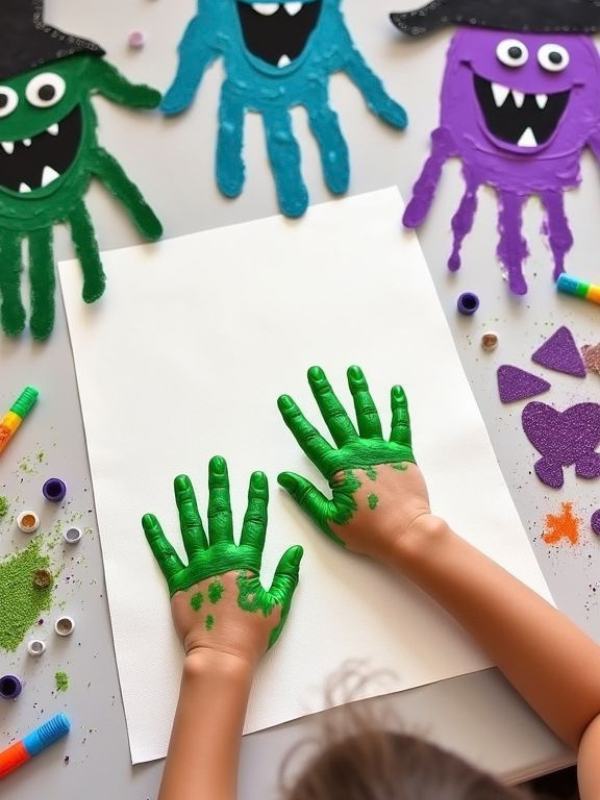
Finger painting is a simple way to turn a regular art activity into a Halloween project.
You will need:
- White paper
- Washable orange, black, purple, and green paint
- A washable mat or old newspaper
How to make it:
- Cover the work area with newspaper or a washable mat.
- Put small amounts of washable paint on a plate.
- Let your toddler dip a finger into the paint.
- Help them make orange fingerprints that can become pumpkins.
- Black fingerprints can become spiders or bats with a little help from an adult.
- Add simple stems, legs, or faces after the paint dries.
- Wash your toddler’s hands when the activity is finished.
This activity does not need to look perfect. The goal is to let toddlers explore colors and textures while creating Halloween-themed artwork.
9. Halloween Paper Collage
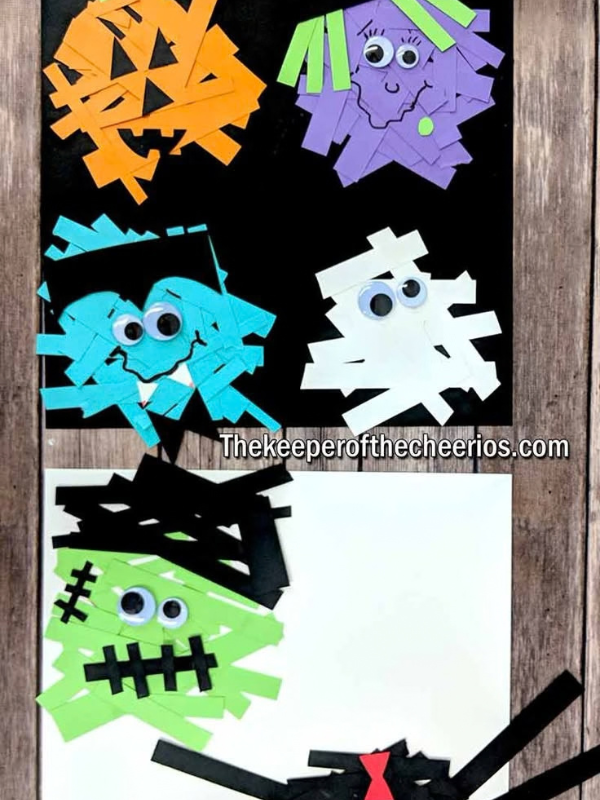
A Halloween collage gives toddlers the freedom to create without needing to follow a complicated pattern.
You will need:
- A large sheet of paper
- Orange, black, purple, green, and white paper
- Child-friendly glue
- Crayons
How to make it:
- Adults should tear or cut colorful paper into large pieces before starting.
- Put the pieces in a small container where your toddler can easily reach them.
- Add small amounts of glue to the large sheet of paper.
- Let your toddler place the paper pieces wherever they want.
- Add Halloween drawings with crayons after the glue has dried.
- Display the finished collage as a Halloween decoration.
10. Cute Halloween Monster Craft
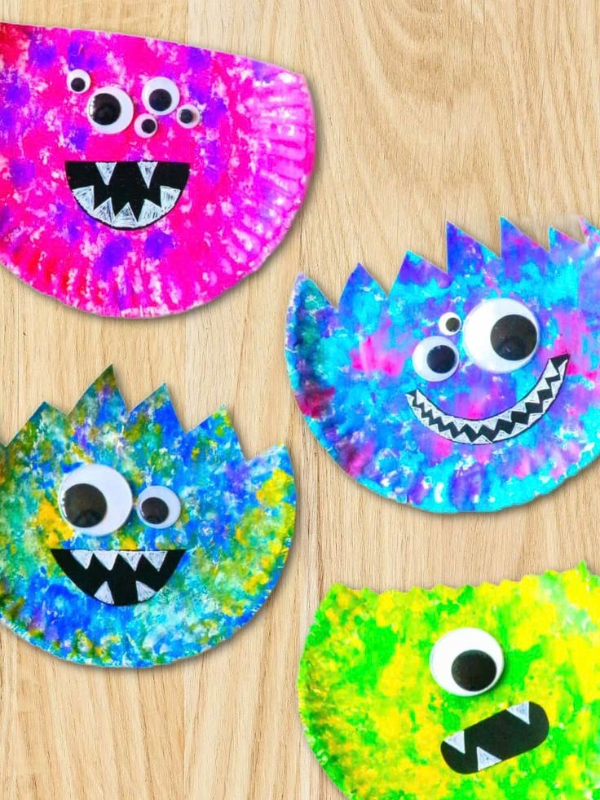
A simple monster craft allows toddlers to experiment with different colors and shapes.
You will need:
- Colored paper
- Child-friendly glue
- Large googly eyes or paper eyes
- Crayons
- Washable markers
How to make it:
- Adults should cut a large, simple monster shape from colored paper.
- Give your toddler different paper shapes for the eyes, mouth, and decorations.
- Help your child glue the pieces onto the monster.
- Let them choose where to place the eyes and other features.
- Add hair, spots, teeth, or other details with crayons or markers.
- Leave the monster to dry before displaying it.
Letting toddlers choose the colors and placement of the features makes each monster different and gives them a chance to express their creativity.
See Halloween party and School treats ideas for kids
Tips for Making Halloween Crafts Safe for Toddlers
Keep toddler crafts simple and supervise children throughout the activity. Adults should handle scissors, hot glue, and any other tools that could cause injury. Choose washable, non-toxic craft supplies and avoid small loose pieces that could become a choking hazard.
Most importantly, do not worry about making the craft perfect. Toddlers are still developing their fine motor skills, so the finished project may look different from the example. Give them the freedom to paint, stick, stamp, and decorate in their own way while you provide help when needed.
See Halloween party ideas and activities for kids
Halloween Crafts for Preschoolers
Halloween crafts for preschoolers are a fun way to encourage creativity while giving children an activity they can enjoy at home, in preschool, or during a Halloween party. At this age, children can usually handle simple painting, gluing, coloring, stamping, and assembling with some adult guidance.
Choose crafts with easy steps and materials that are suitable for young children. Adults should still handle cutting and closely supervise activities that involve small pieces or craft tools.
1. Paper Plate Spider
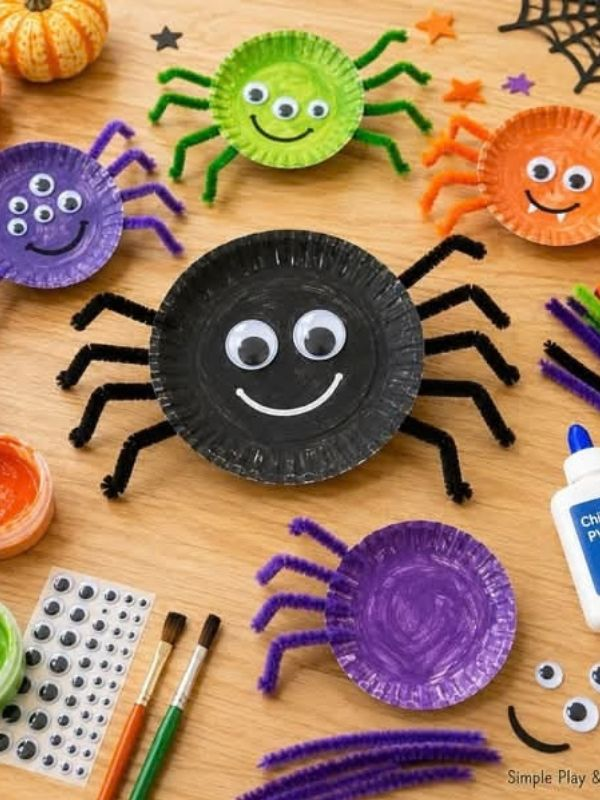
A paper plate spider is an easy Halloween craft that preschoolers can paint, decorate, and assemble.
You will need:
- 1 paper plate
- Black washable paint
- Black construction paper
- White paper
- Child-friendly glue
- Black marker
- Paintbrush
How to make it:
- Place the paper plate on a protected work surface.
- Let your child paint the entire plate black.
- Leave the plate aside until the paint is completely dry.
- While the plate is drying, an adult can cut eight long strips from black construction paper for the spider’s legs.
- Cut two large circles from white paper for the eyes.
- Once the plate is dry, help your child glue the eight legs around the edges.
- Glue the eyes near the top of the plate.
- Use a black marker to add pupils to the eyes.
- Add a small smiling mouth if your child wants one.
- Leave the spider flat until all the pieces are firmly attached.
You can hang the finished spiders around the classroom or use them as Halloween party decorations.
2. Toilet Paper Roll Bat
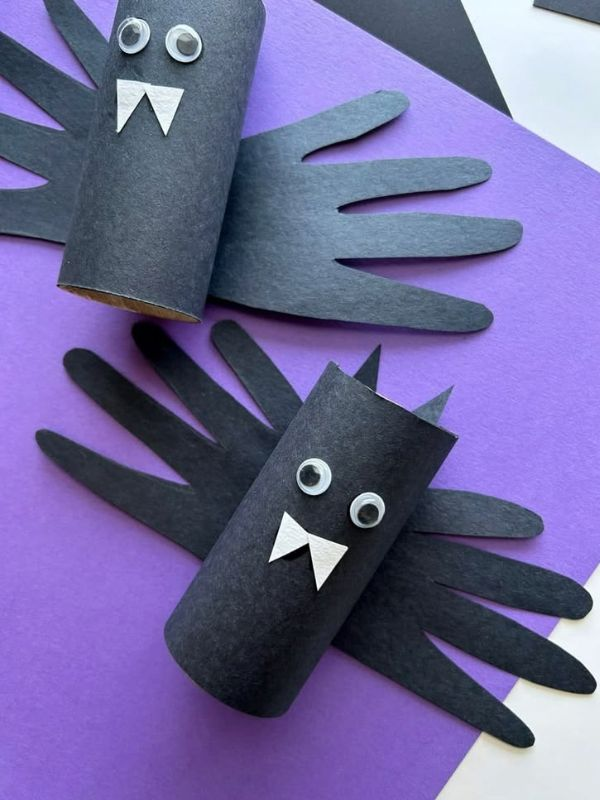
Turn an empty toilet paper roll into a cute Halloween bat with a few simple materials.
You will need:
- 1 empty toilet paper roll
- Black paint or black construction paper
- Black construction paper
- White paper
- Glue
- Black marker
- Paintbrush
How to make it:
- Paint the toilet paper roll black and allow it to dry completely.
- If you prefer a quicker option, wrap the roll with black construction paper instead.
- An adult should cut two bat wings from black paper.
- Cut two small white circles for the eyes.
- Help your child glue the wings onto the sides of the roll.
- Glue the eyes onto the front.
- Add black pupils with a marker.
- Draw a small mouth and two tiny fangs.
- Allow the glue to dry before playing with or displaying the bat.
You can make several bats and hang them from string to create a simple Halloween decoration.
3. Paper Pumpkin Craft
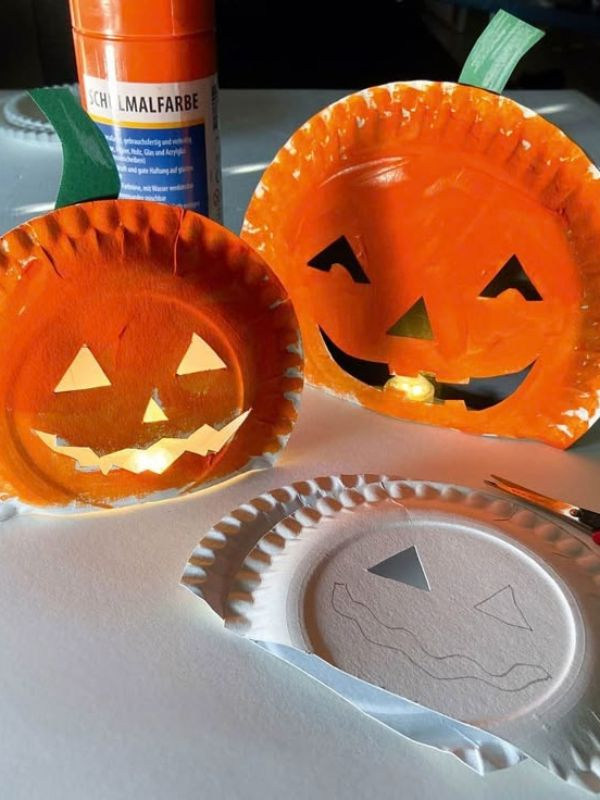
This simple pumpkin craft gives preschoolers an opportunity to practice cutting, gluing, and decorating.
You will need:
- Orange construction paper
- Green construction paper
- Black construction paper
- Child-safe scissors
- Glue
- Crayons or markers
How to make it:
- Draw a large pumpkin shape on orange paper.
- Let your preschooler carefully cut around the shape if they are comfortable using child-safe scissors. Adults can cut it for younger preschoolers.
- Cut a small green rectangle or stem shape.
- Cut simple black shapes for the eyes, nose, and mouth.
- Help your child glue the pumpkin onto a larger sheet of paper.
- Add the green stem at the top.
- Let your child glue the eyes, nose, and mouth onto the pumpkin.
- Encourage them to add their own details with crayons or markers.
- Allow the craft to dry before displaying it.
Ask your child to create a happy, surprised, or silly pumpkin face to make the activity more interactive.
4. Ghost Paper Bag Puppet
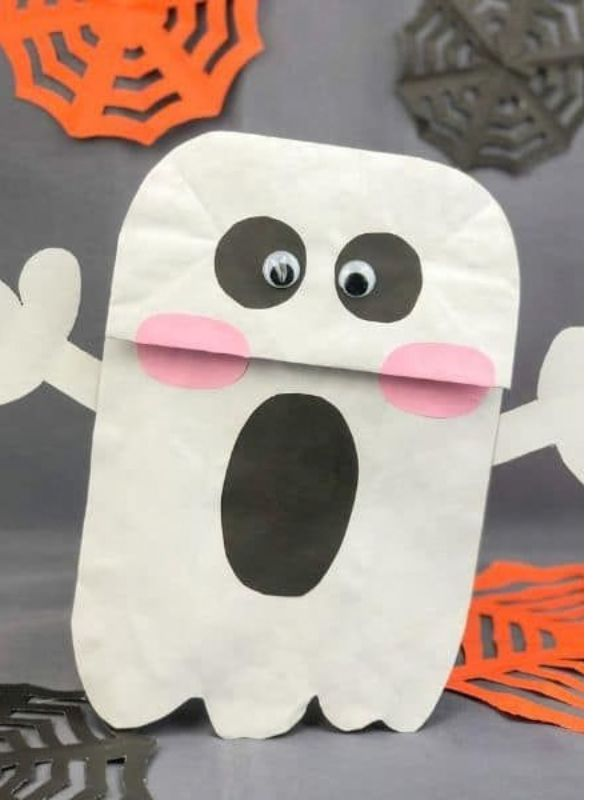
A paper bag ghost can become a Halloween decoration and a simple puppet for imaginative play.
You will need:
- 1 white paper lunch bag
- White paint
- Black construction paper
- Glue
- Black marker
- Crayons
How to make it:
- Place the paper bag with the flat bottom facing upward. This will become the ghost’s head.
- Let your child paint the bag white if it is not already white.
- Allow the paint to dry.
- An adult should cut two black eyes and a mouth from construction paper.
- Help your child glue the facial features onto the bag.
- Let your child add extra details with crayons or markers.
- Once everything is dry, place your hand inside the bag.
- Move the bag up and down while your child gives the ghost a funny voice.
Encourage children to create a short Halloween story using their ghost puppet.
5. Popsicle Stick Witch
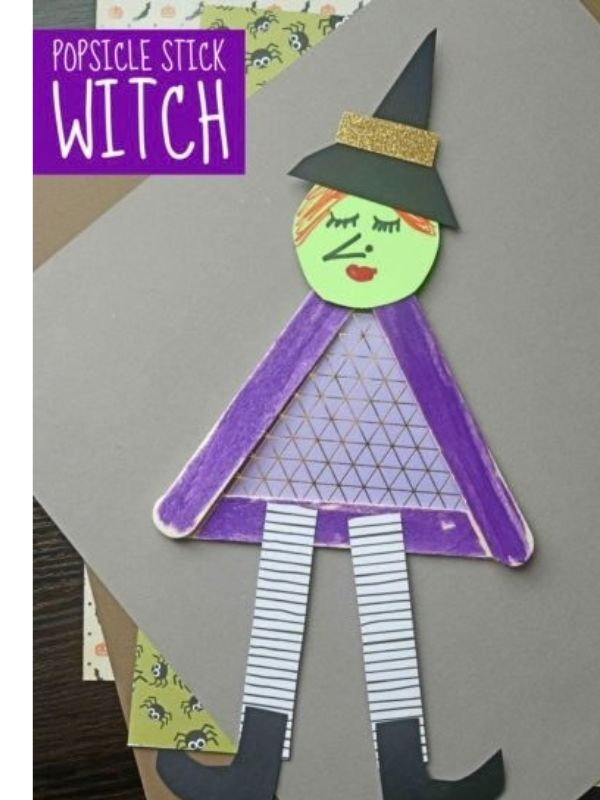
Preschoolers can make a simple witch character using popsicle sticks and paper.
You will need:
- Popsicle sticks
- Green or purple construction paper
- Black construction paper
- Glue
- Googly eyes or white paper
- Black marker
- Crayons
How to make it:
- Place several popsicle sticks side by side to create the witch’s face.
- An adult can glue the sticks together to make a small flat surface.
- Paint the sticks green or cover them with green paper.
- Allow the paint to dry.
- Cut a black witch hat from construction paper.
- Help your child glue the hat onto the top.
- Add two eyes.
- Draw a nose and a smiling or funny mouth.
- Use small pieces of paper or yarn to create the witch’s hair.
- Add details such as a hat buckle or colorful decorations.
This craft can also be turned into a small Halloween character display.
6. Halloween Monster Craft
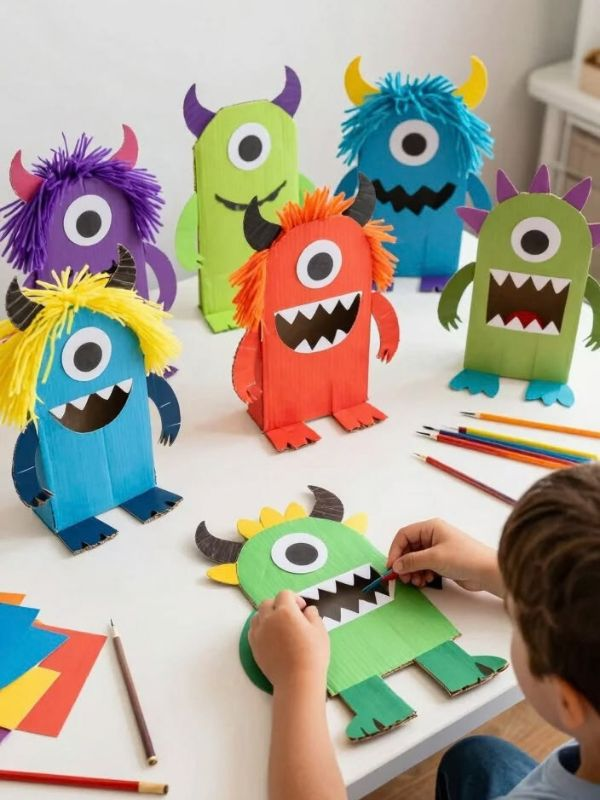
Let preschoolers create their own funny monsters using different shapes and colors.
You will need:
- Colored construction paper
- Glue
- Googly eyes or paper eyes
- Crayons
- Child-safe scissors
- Markers
How to make it:
- Give your child a large sheet of colored paper for the monster’s body.
- Help them choose the shapes they want for the eyes, mouth, ears, and teeth.
- Adults can pre-cut the shapes, or preschoolers can use child-safe scissors with supervision.
- Help your child arrange the pieces before gluing them.
- Glue the body and facial features onto the paper.
- Add hair, spots, horns, teeth, or funny eyebrows.
- Encourage your child to give the monster a name.
- Write the name underneath the finished craft.
There is no right or wrong way to make the monster, which makes this a great open-ended activity.
7. Spider Web Craft
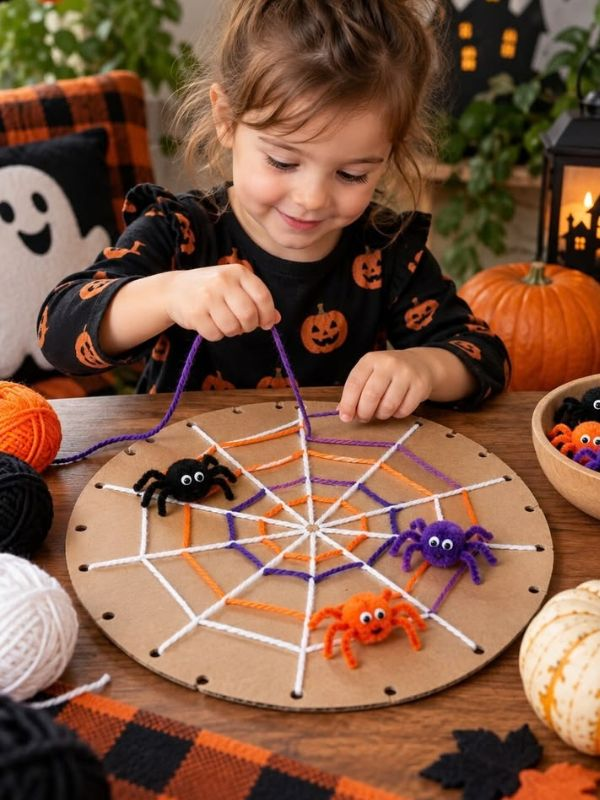
A spider web craft is a simple project that helps preschoolers practice following lines and patterns.
You will need:
- Black construction paper
- White yarn
- Child-friendly glue
- A small paper spider
- White crayon
How to make it:
- Draw a simple spider web pattern on black paper using a white crayon.
- Cut pieces of white yarn into manageable lengths.
- Apply small amounts of glue along some of the drawn lines.
- Help your child place the yarn over the glue to follow the web pattern.
- Continue until the main parts of the web are covered.
- Let the glue dry.
- Add a small paper spider to the web.
- Leave the finished craft flat until everything is completely dry.
This activity works particularly well as a classroom Halloween project.
8. Halloween Pumpkin Stamping
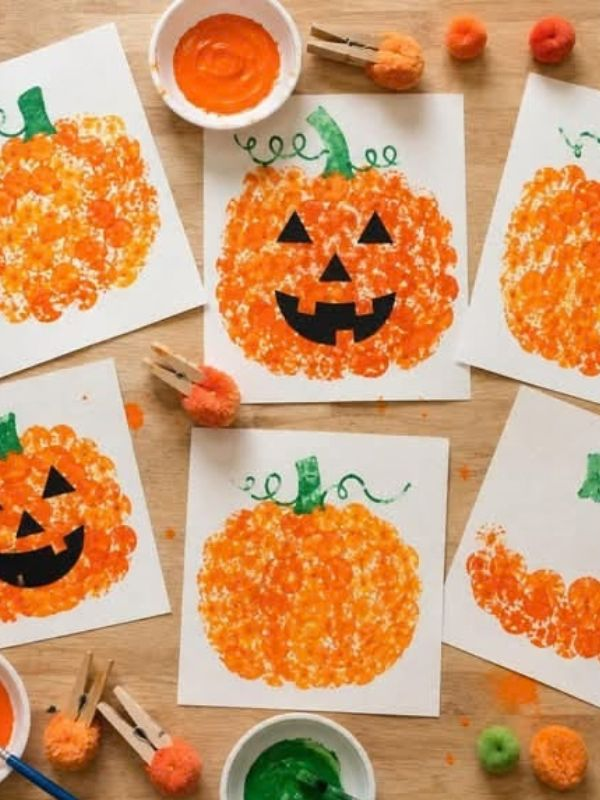
Pumpkin stamping lets preschoolers create a colorful Halloween picture while practicing patterns.
You will need:
- White paper
- Orange washable paint
- A round sponge
- Green paint
- Black marker
- Paintbrush
How to make it:
- Pour a small amount of orange paint onto a plate.
- Dip the round sponge into the paint.
- Press the sponge onto the paper to create pumpkin shapes.
- Repeat the process to make several pumpkins.
- Allow the orange paint to dry slightly.
- Use green paint to add stems.
- Once the pumpkins are dry, let your child draw different faces on them with a black marker.
- Add grass, leaves, clouds, or other Halloween details with crayons.
You can turn the finished artwork into a Halloween classroom display.
9. Halloween Paper Lantern
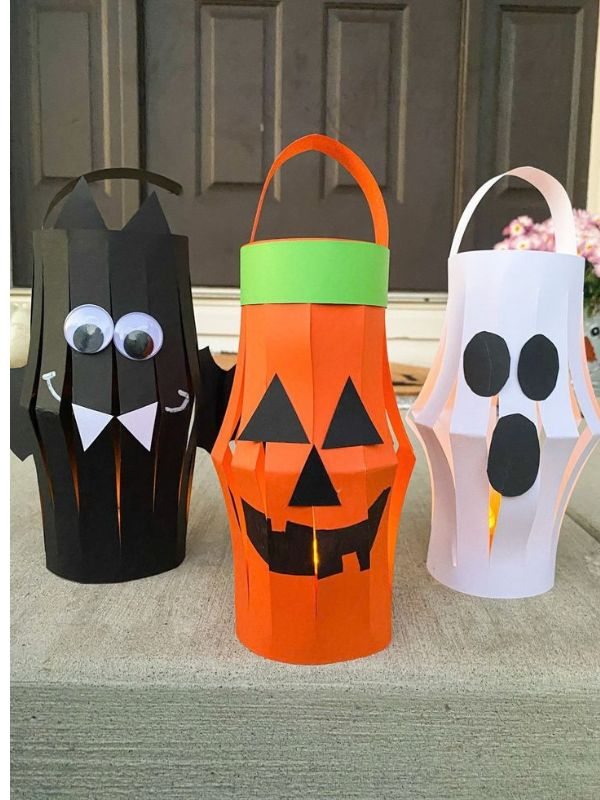
A simple paper lantern can become a colorful decoration for a preschool classroom or home.
You will need:
- Orange or black construction paper
- Child-safe scissors
- Glue or tape
- Crayons or markers
- Green or black paper for decorations
How to make it:
- Fold a sheet of construction paper in half lengthwise.
- An adult should make evenly spaced cuts from the folded edge toward the opposite edge, stopping before cutting all the way through.
- Open the paper carefully.
- Bring the two short edges together to create a lantern shape.
- Secure the edges with glue or tape.
- Add a paper handle at the top.
- Let your child decorate the lantern with pumpkins, ghosts, bats, or other Halloween drawings.
Use the lantern as a daytime decoration. If you want to add a light, use a safe battery-operated LED light rather than a real candle.
10. Popsicle Stick Haunted House
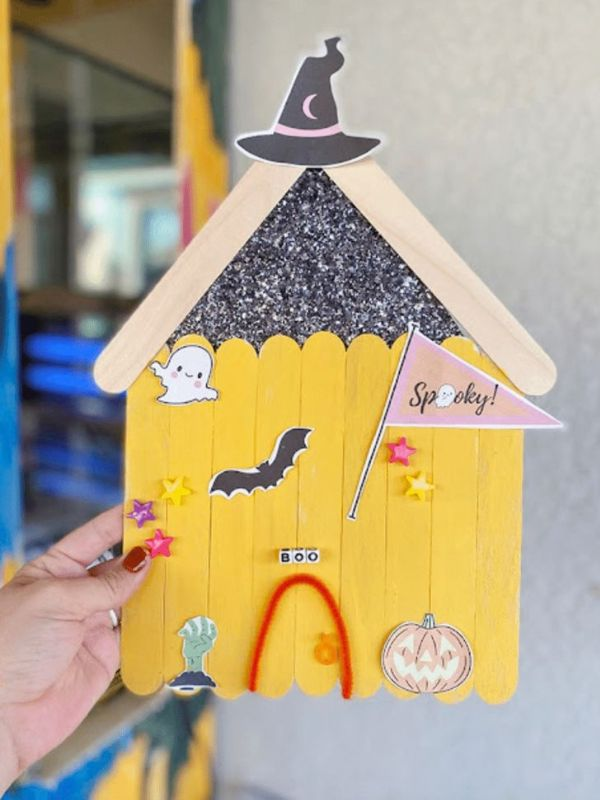
Preschoolers can create a simple haunted house using popsicle sticks and paper.
You will need:
- Popsicle sticks
- Cardboard or thick paper
- Black, orange, and purple paper
- Glue
- Crayons or markers
- Child-safe scissors
How to make it:
- Arrange popsicle sticks on a piece of cardboard to create the walls of a small house.
- An adult can glue the sticks in place.
- Cut a triangular piece of paper for the roof.
- Help your child glue the roof onto the house.
- Add a door and windows using black paper.
- Let your child decorate the house with pumpkins, bats, ghosts, or a moon.
- Draw a path leading to the door.
- Add grass, trees, or other Halloween details around the house.
- Leave the craft flat until the glue has completely dried.
This craft gives preschoolers plenty of room to add their own ideas and create a unique haunted house.
11. Halloween Mask Craft
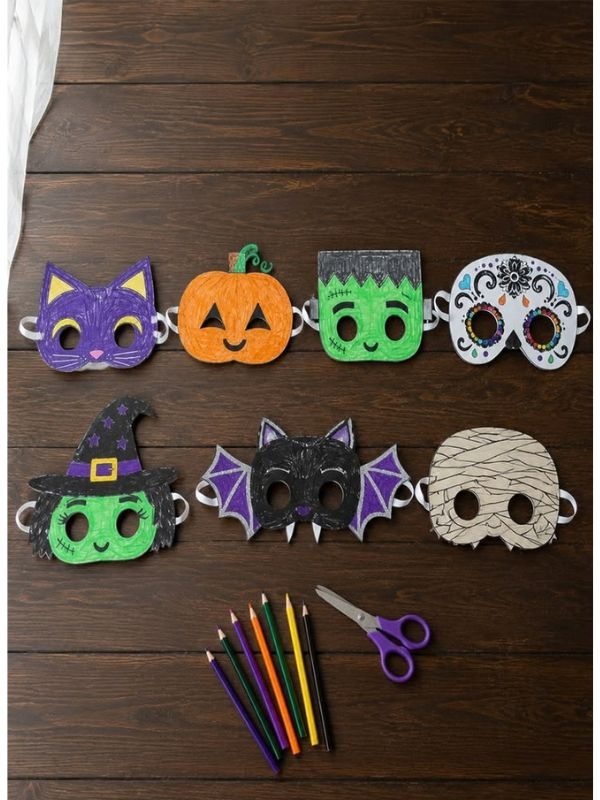
Preschoolers can create simple Halloween masks using paper plates.
You will need:
- A paper plate
- Washable paint or crayons
- Construction paper
- Glue
- Child-safe scissors
- Craft stick
How to make it:
- Adults should cut the paper plate into a simple mask shape.
- Cut out two eye holes so your child can see clearly.
- Let your preschooler decorate the mask with crayons or washable paint.
- Add paper ears, whiskers, horns, or other features depending on the character.
- Allow all paint and glue to dry completely.
- Attach a craft stick to the bottom of the mask so the child can hold it.
Make sure the mask does not block the child’s vision when they are using it.
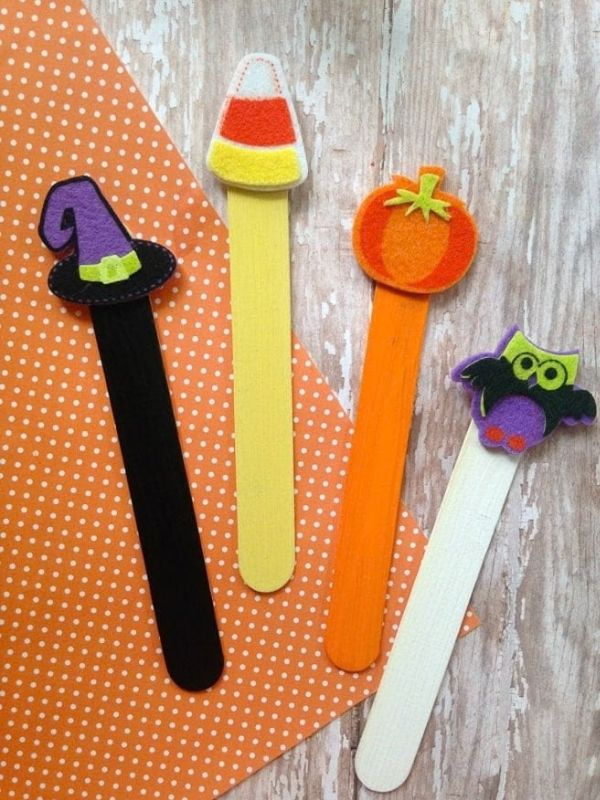
12. Halloween Bookmark
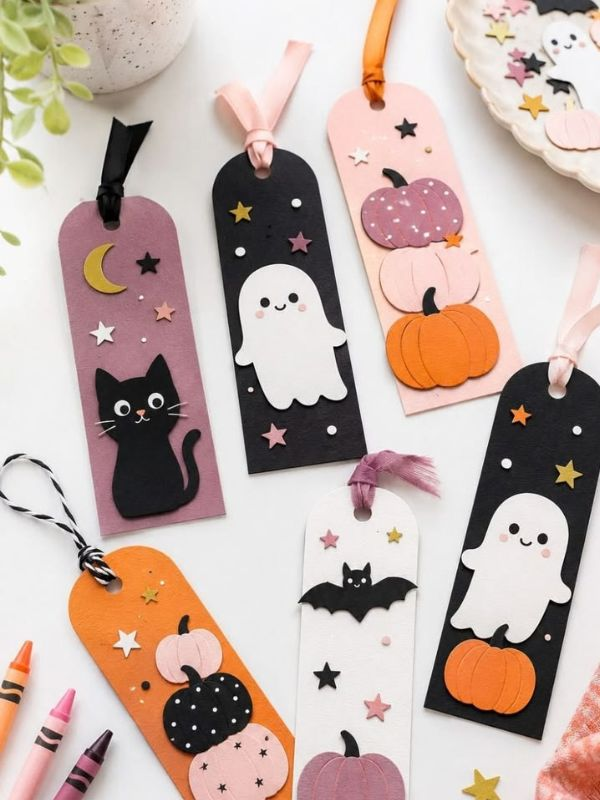
A Halloween bookmark is a simple craft that preschoolers can make and use after the holiday.
You will need:
- Cardstock or thick paper
- Crayons or markers
- Halloween stickers
- Glue
- Child-safe scissors
- Ribbon
How to make it:
- Cut a long rectangle from cardstock.
- Let your child decorate it with pumpkins, ghosts, bats, spiders, or Halloween colors.
- Add Halloween stickers if desired.
- Write your child’s name on the bookmark.
- Adults can make a small hole at the top.
- Thread a short piece of ribbon through the hole.
- Tie the ribbon securely.
The finished bookmark can be used in a favorite storybook or given to a parent, teacher, or friend as a small Halloween gift.
Tips for Making Halloween Crafts With Preschoolers
Keep the craft area organized and give children only the materials they need for each project. Demonstrate each step before asking them to try it themselves. Preschoolers can often participate in simple cutting, gluing, painting, and decorating, but they should still be supervised.
Avoid making the activity about creating a perfect finished product. Allow children to choose their own colors, facial expressions, and decorations. The goal is to let them create, practice new skills, and enjoy the Halloween activity.
For classroom activities, prepare some materials in advance to save time. Pre-cutting complicated shapes can also allow children to spend more time decorating and creating rather than waiting for materials to be prepared.
See Halloween Treats ideas for kids
Halloween Crafts for Elementary Kids
Halloween crafts for elementary kids can be more creative and detailed than crafts for toddlers and preschoolers. Children in this age group can usually follow several steps, use scissors with supervision, decorate their own designs, and work with different materials.
These crafts are great for school projects, Halloween parties, after-school activities, or a fun afternoon at home. Encourage children to add their own colors, patterns, and details instead of trying to make every project look exactly the same.
1. Halloween Paper Lanterns
Paper lanterns are a fun way for elementary kids to create Halloween decorations for their rooms or classrooms.
You will need:
- Orange, black, purple, or green construction paper
- Child-safe scissors
- Glue or tape
- Markers
- Ruler
- Battery-operated LED light if desired
How to make it:
- Place a sheet of construction paper horizontally on a flat surface.
- Fold the paper in half lengthwise.
- Use a ruler to mark several evenly spaced lines from the folded edge toward the open edge.
- Cut along the lines, stopping before reaching the opposite edge.
- Open the paper carefully.
- Bring the two short edges together and secure them with glue or tape.
- Cut a long strip of paper for the handle.
- Attach the handle to the top of the lantern.
- Decorate the outside with Halloween drawings, stickers, or cut-out shapes.
- If you want the lantern to glow, place a battery-operated LED light inside.
Never use a real candle inside a paper lantern. A battery-operated light is a safer choice.
2. Halloween Paper Plate Mask
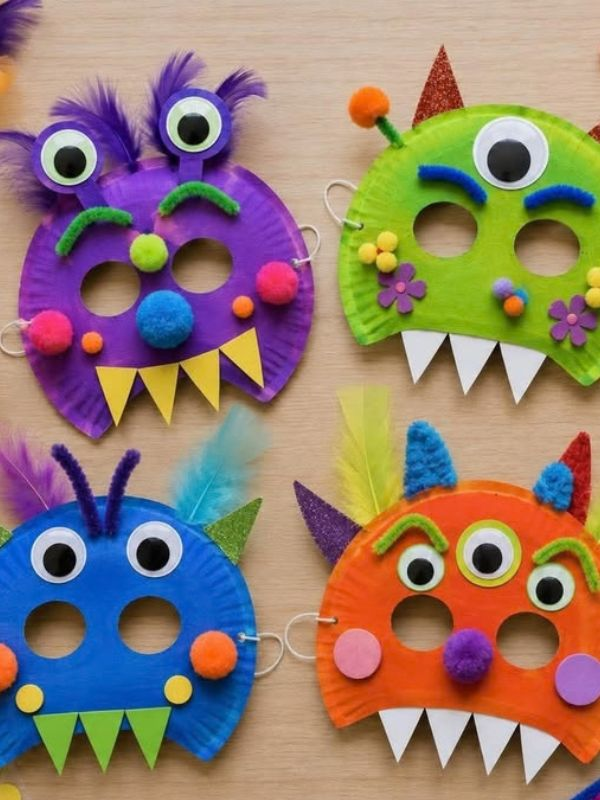
Elementary kids can turn a paper plate into a creative Halloween mask featuring a witch, monster, cat, pumpkin, or other character.
You will need:
- Paper plate
- Washable paint
- Construction paper
- Child-safe scissors
- Glue
- Markers
- Craft stick or elastic
How to make it:
- Decide what Halloween character you want to create.
- An adult can help cut the paper plate into a suitable mask shape.
- Carefully mark and cut out two eye holes.
- Paint the mask in colors that match your chosen character.
- Let the paint dry completely.
- Cut out extra features such as ears, horns, whiskers, fangs, or a witch hat.
- Glue the pieces onto the mask.
- Use markers to add smaller details.
- Attach a craft stick to the bottom of the mask or add an appropriate strap with adult help.
- Allow everything to dry before wearing the mask.
Make sure the finished mask does not block the child’s vision.
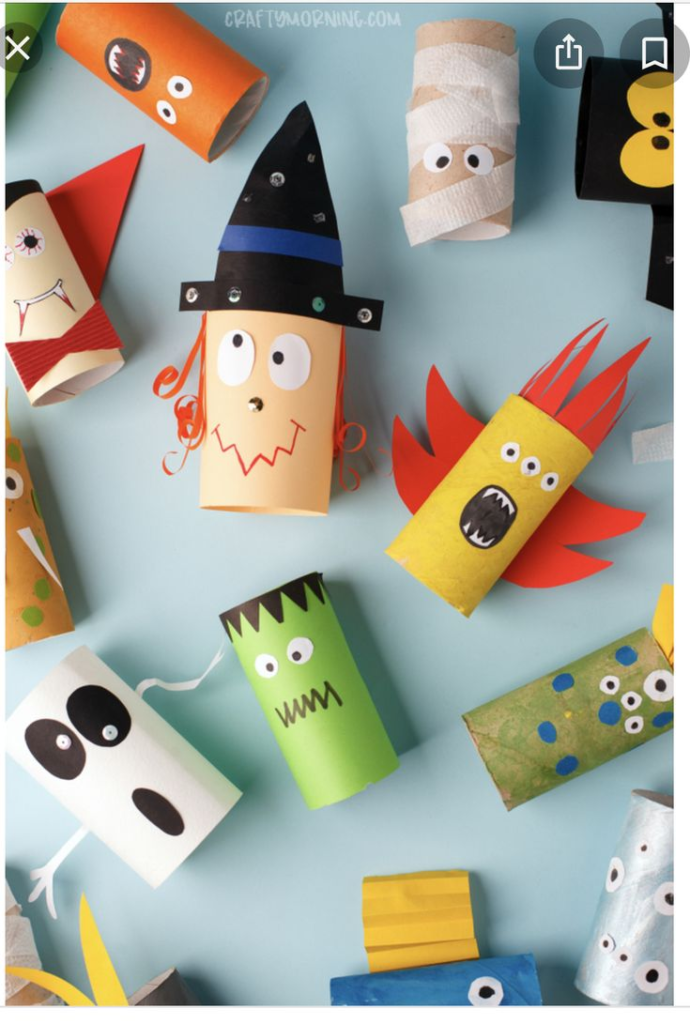
3. Toilet Paper Roll Halloween Characters
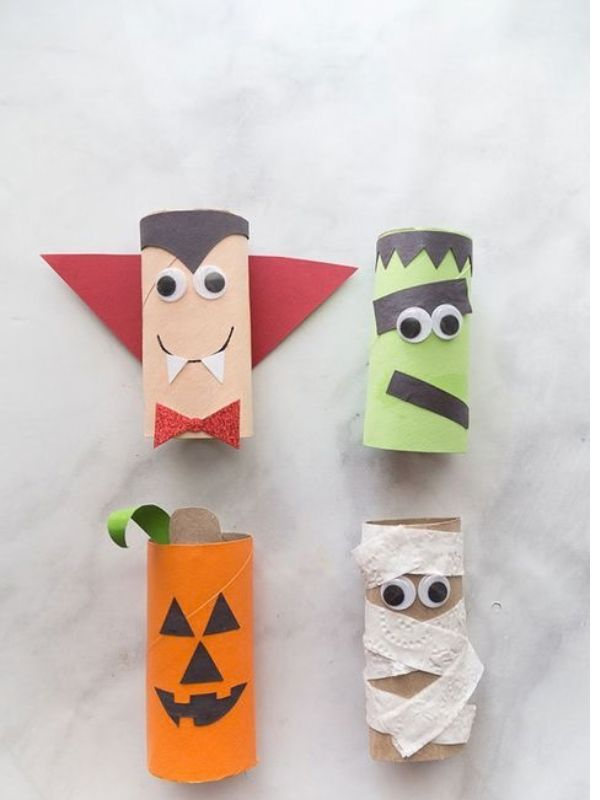
Empty toilet paper rolls can be turned into several Halloween characters, making this a fun recycled-material craft.
You will need:
- Empty toilet paper rolls
- Colored construction paper
- Glue
- Scissors
- Markers
- Googly eyes
- Paint
How to make it:
- Choose a Halloween character such as a ghost, vampire, witch, mummy, bat, or monster.
- Paint the toilet paper roll or cover it with colored paper.
- Allow the paint to dry.
- Cut paper shapes for the character’s hat, hair, wings, ears, or other features.
- Glue the pieces onto the roll.
- Add eyes and facial features.
- Use markers to draw details such as teeth, scars, buttons, or clothing.
- Let the finished character dry before displaying it.
Make several characters and create a small Halloween display.
4. Halloween Monster Puppet
A monster puppet gives elementary kids a chance to combine crafting with imaginative play.
You will need:
- Paper lunch bag
- Construction paper
- Glue
- Child-safe scissors
- Markers
- Googly eyes
- Yarn
How to make it:
- Place the paper bag with the folded bottom flap facing toward you.
- Choose the color of your monster.
- Cover or paint the front of the bag.
- Cut out eyes, teeth, ears, horns, or other features.
- Glue the pieces onto the bag.
- Add yarn for hair if desired.
- Draw a mouth or other facial details.
- Allow the puppet to dry.
- Put your hand inside the bag and move the flap to make the monster talk.
- Encourage your child to create a short Halloween story for the puppet.
5. Popsicle Stick Haunted House
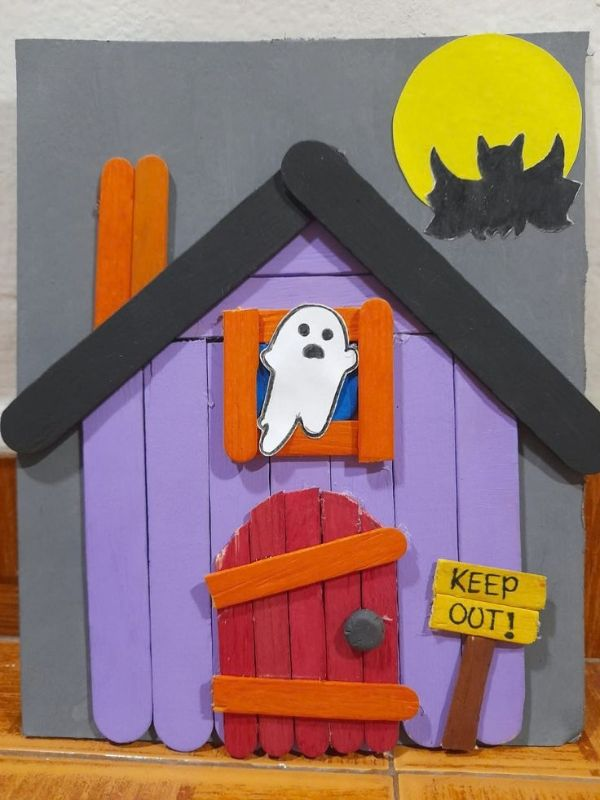
A popsicle stick haunted house is a creative project that allows children to build and decorate their own Halloween scene.
You will need:
- Popsicle sticks
- Cardboard
- Glue
- Black, purple, orange, and white construction paper
- Scissors
- Markers
- Paint
How to make it:
- Arrange popsicle sticks on a piece of cardboard to create the walls of the house.
- Glue the sticks together carefully and allow them to dry.
- Add more sticks or cardboard to create a roof.
- Paint the house or cover sections with colored paper.
- Cut out windows and a door.
- Add a crooked roof, chimney, or other details.
- Create ghosts, bats, pumpkins, or a moon from construction paper.
- Glue the decorations around the house.
- Draw a path, trees, or a spooky sky on the cardboard base.
- Leave the entire project to dry before moving it.
Children can make the house as spooky or silly as they want.
6. Halloween Bookmarks
Halloween bookmarks are simple crafts that children can actually use after making them.
You will need:
- Cardstock
- Colored pencils or markers
- Halloween stickers
- Scissors
- Glue
- Ribbon
How to make it:
- Cut a long rectangle from cardstock.
- Choose a Halloween design such as a pumpkin, ghost, bat, witch, or monster.
- Draw the design on the bookmark.
- Color it using markers, colored pencils, or crayons.
- Add Halloween stickers or small paper decorations.
- Write your name or a Halloween message on the back.
- Make a small hole at the top.
- Thread a piece of ribbon through the hole and tie it securely.
This can also make a simple Halloween gift for classmates or teachers.
7. Halloween Spider Web Craft
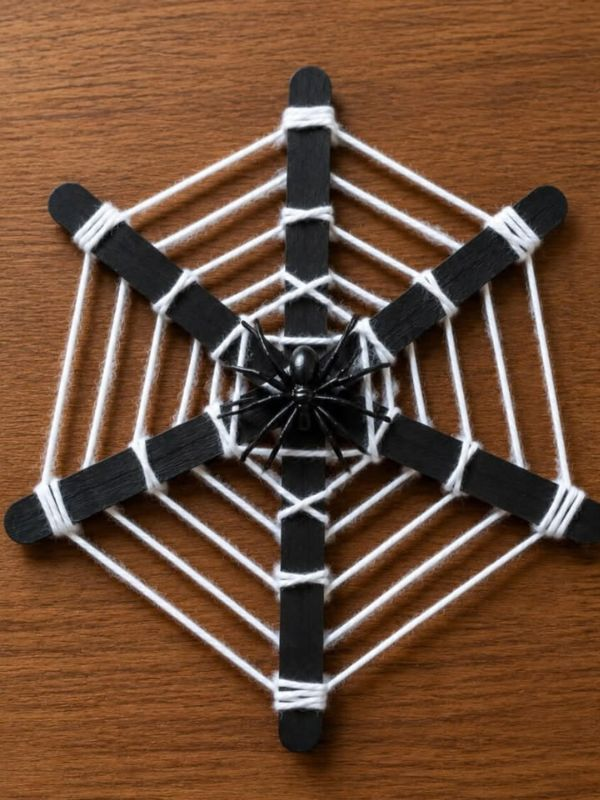
This spider web craft is a good project for elementary kids because they can create the web pattern themselves.
You will need:
- Black cardstock
- White yarn
- Glue
- Scissors
- White crayon
- Black construction paper
How to make it:
- Draw a large spider web on the black cardstock using a white crayon.
- Cut pieces of white yarn that are long enough to cover the different sections of the web.
- Apply glue carefully along the drawn lines.
- Place the yarn over the glue to follow the web pattern.
- Continue until the main lines of the web are covered.
- Cut a small spider shape from black paper.
- Add eyes and legs to the spider.
- Glue the spider onto the finished web.
- Allow the project to dry completely.
For a more advanced version, children can create several webs of different sizes and turn them into a wall display.
8. Halloween Scratch Art
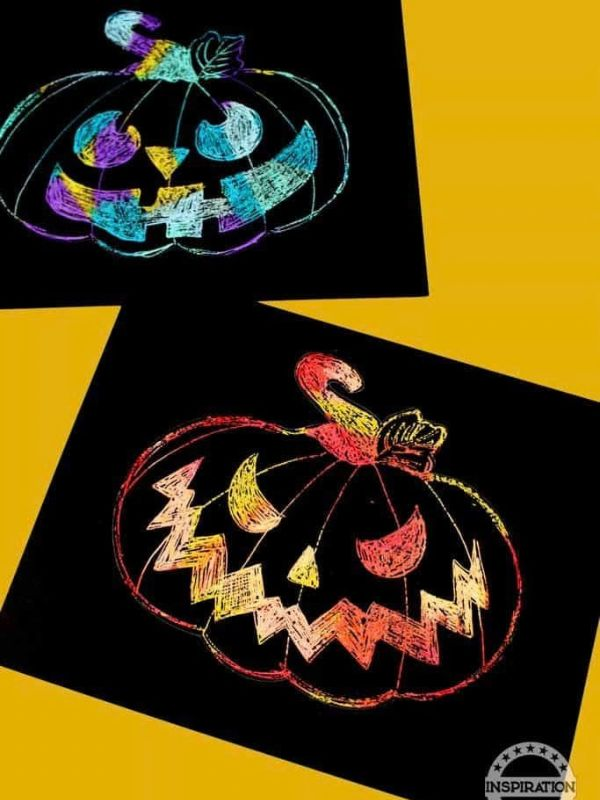
Halloween scratch art is a creative activity that lets elementary kids reveal bright colors underneath a dark surface.
You will need:
- White paper
- Bright crayons
- Black crayon or black paint
- A wooden craft stick
- Halloween-themed templates if desired
How to make it:
- Cover the paper with bright colors using crayons.
- Make sure the entire surface is covered with a thick layer of color.
- Cover the colored area with black crayon or a suitable black scratch-art layer.
- Allow the surface to become smooth and evenly covered.
- Use a craft stick to carefully scratch Halloween designs into the black surface.
- Create pumpkins, ghosts, bats, spiders, witches, or haunted houses.
- Add different patterns and details to make the colors underneath show through.
An adult should supervise children while they use the craft stick.
9. DIY Halloween Wind Sock
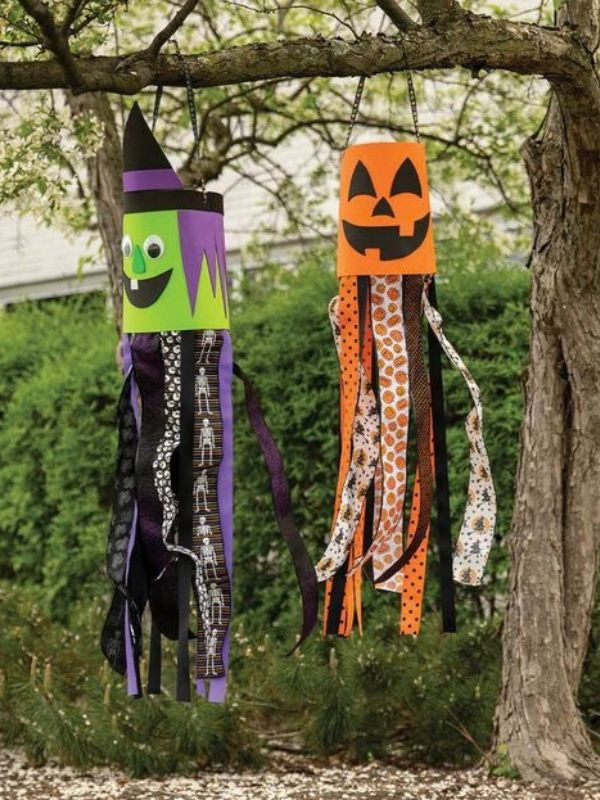
A Halloween windsock is a fun decoration that can be hung outside or near a window.
You will need:
- Construction paper
- Glue or tape
- Scissors
- Markers
- Crepe paper or ribbon
- String
How to make it:
- Choose a Halloween color such as orange, black, purple, or green.
- Decorate a large sheet of construction paper with Halloween drawings.
- Roll the paper into a cylinder.
- Secure the edges with glue or tape.
- Cut several long strips of crepe paper or ribbon.
- Attach the strips to the bottom edge.
- Make two small holes near the top.
- Thread string through the holes.
- Hang the windsock where it can move gently in the air.
Children can create different characters or patterns on each windsock.
10. Halloween Painted Rocks
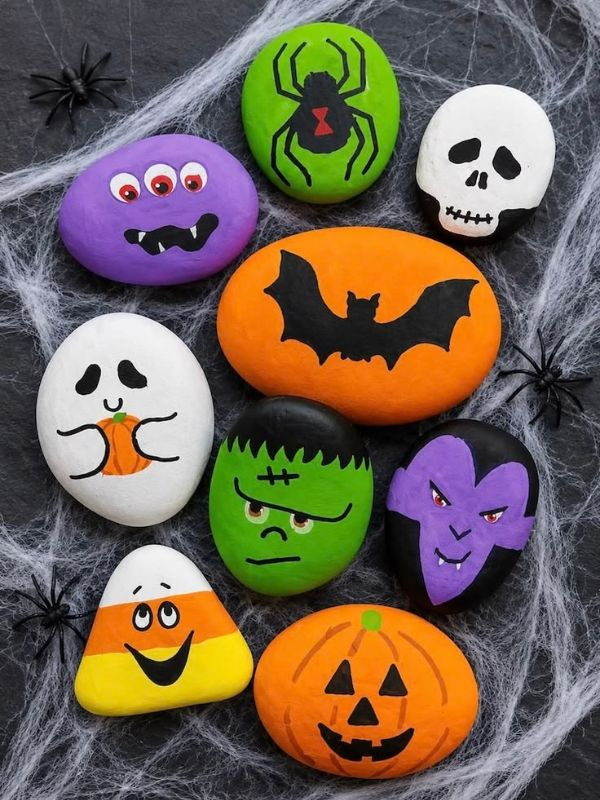
Painting rocks is an easy outdoor craft that gives elementary kids plenty of room for creativity.
You will need:
- Smooth, clean rocks
- Washable or suitable craft paint
- Paintbrushes
- Black and white markers
- Water
- Paper towels
How to make it:
- Wash the rocks and allow them to dry completely.
- Choose a simple Halloween design.
- Paint the base color onto the rock.
- Allow the first layer to dry.
- Add the character’s eyes, mouth, and other details.
- Use a fine brush or marker for smaller features.
- Allow the painted rocks to dry completely.
- Display them around your home, classroom, or garden.
Popular designs include pumpkins, ghosts, black cats, spiders, candy corn, monsters, and eyeballs.
11. Halloween Garland
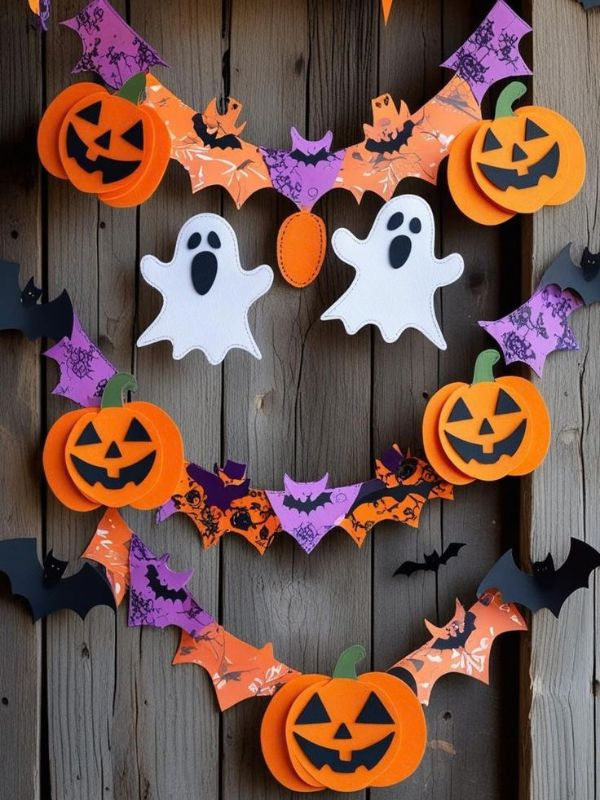
A homemade Halloween garland can become a colorful decoration for a classroom, bedroom, or party.
You will need:
- Construction paper
- Scissors
- Glue
- String or yarn
- Markers
- Halloween templates
How to make it:
- Choose several Halloween shapes such as pumpkins, ghosts, bats, and spiders.
- Draw or trace the shapes onto construction paper.
- Carefully cut out the shapes.
- Decorate each piece with markers, crayons, paint, or smaller paper shapes.
- Make small holes near the top of each decoration.
- Thread the shapes onto a long piece of string.
- Space the decorations evenly.
- Hang the finished garland across a wall, doorway, or classroom display.
12. DIY Halloween Photo Frame
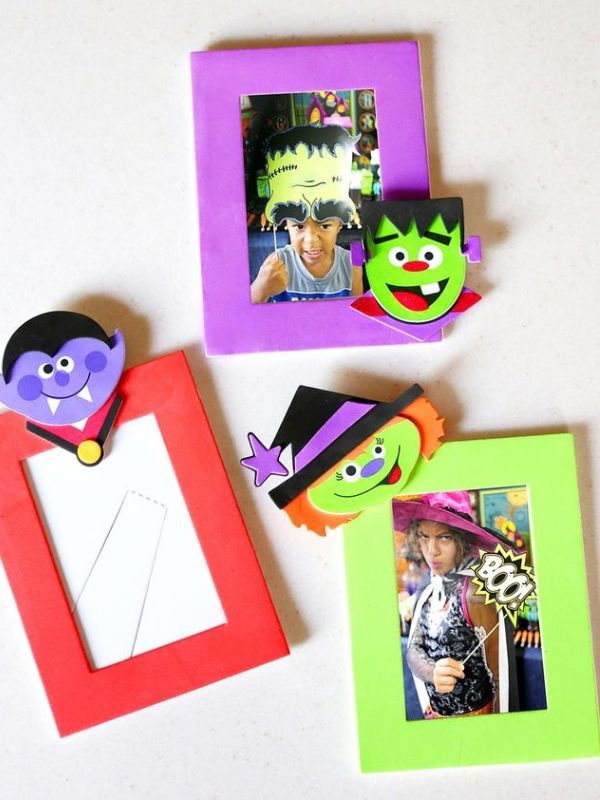
A Halloween photo frame is a fun craft that can also become a keepsake.
You will need:
- Cardboard
- Construction paper
- Glue
- Scissors
- Markers
- Halloween stickers
- Ribbon or other decorations
How to make it:
- Cut a rectangle from cardboard.
- Cut a smaller rectangle from the center to create the opening for the photo.
- Cover the frame with orange, black, purple, or another Halloween color.
- Decorate the edges with pumpkins, bats, ghosts, spiders, or other shapes.
- Add Halloween stickers or hand-drawn designs.
- Write the child’s name and the year somewhere on the frame.
- Allow all glue and paint to dry.
- Place a favorite Halloween photo inside the frame.
Tips for Halloween Crafts With Elementary Kids
Let elementary kids take more responsibility for their projects while still supervising activities that involve scissors, glue, paint, or other craft tools. Give them examples, but allow them to change the colors, shapes, and designs.
If you are doing these crafts in a classroom, prepare the materials before the activity begins. Group similar supplies together and give each child enough workspace to complete the project comfortably.
For a Halloween party, choose crafts that can be completed within the time available. Simpler projects such as painted rocks, bookmarks, paper masks, and toilet paper roll characters work well when children need to finish their crafts before going home.
Most importantly, let children use their imagination. The finished craft does not need to look perfect. Giving elementary kids the freedom to create their own Halloween characters and decorations makes the activity more enjoyable and helps them develop their creative skills.
See Halloween treats ideas for kids
Easy Halloween Crafts Kids Can Make at Home
Halloween crafts do not have to require expensive supplies or complicated instructions. Many fun projects can be made at home using paper, cardboard, paper plates, toilet paper rolls, crayons, paint, glue, and other basic craft materials.
These easy Halloween crafts can be adapted for different ages. Younger children may need more help with cutting and assembling, while older children can complete more of the steps independently.
1. Paper Plate Pumpkin
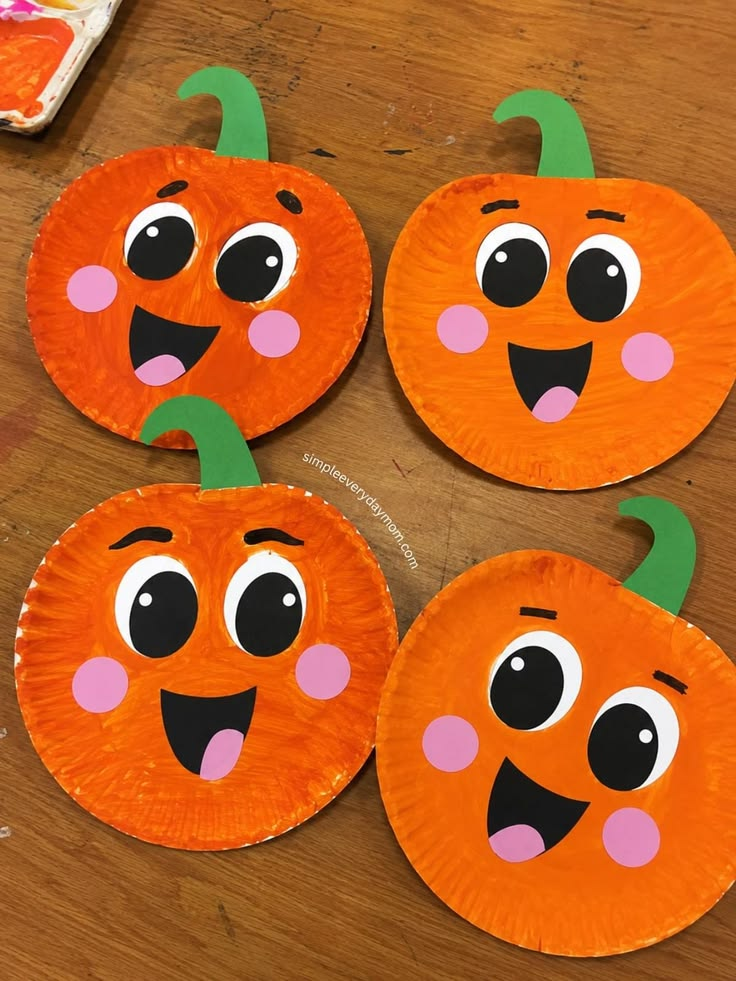
A paper plate pumpkin is a simple craft that works well for children of different ages.
You will need:
- Paper plate
- Orange paint
- Black paper
- Green paper
- Glue
- Paintbrush
How to make it:
- Let your child paint the paper plate orange.
- Leave it to dry completely.
- An adult can cut eyes and a mouth from black paper.
- Cut a small green stem from green paper.
- Help your child glue the facial features and stem onto the plate.
- Add extra details with a marker if desired.
Hang the finished pumpkin on a wall or place it on a shelf as a Halloween decoration.
2. Toilet Paper Roll Bat
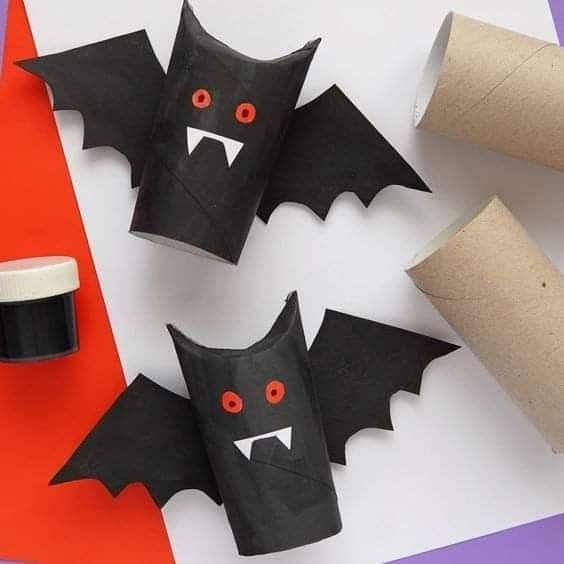
Turn an empty toilet paper roll into a cute Halloween bat.
You will need:
- Empty toilet paper roll
- Black paint or black paper
- Black construction paper
- White paper
- Glue
- Markers
How to make it:
- Paint the toilet paper roll black and allow it to dry.
- An adult can cut two bat wings from black paper.
- Cut two white circles for the eyes.
- Glue the wings onto both sides of the roll.
- Add the eyes to the front.
- Draw pupils, a mouth, and small fangs.
- Allow everything to dry before displaying the bat.
3. Halloween Monster Collage
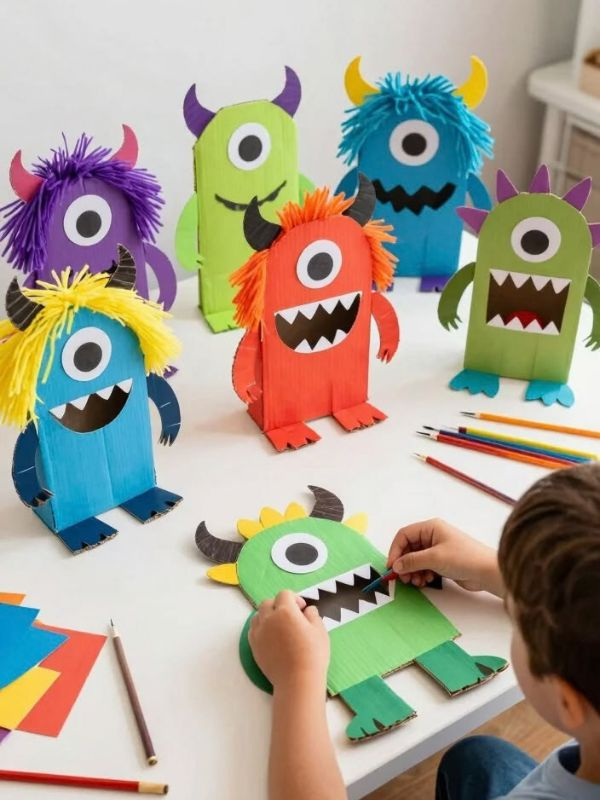
A monster collage lets children use their imagination to create a funny or spooky character.
You will need:
- Colored paper
- White paper
- Glue
- Scissors
- Markers
- Googly eyes if available
How to make it:
- Give your child a large sheet of paper for the background.
- Cut or tear different pieces of colored paper.
- Let your child arrange the pieces into a monster.
- Glue the body, eyes, mouth, teeth, ears, and other features onto the paper.
- Add hair, spots, horns, or other details.
- Give the monster a funny name and write it underneath.
This is especially good for children who enjoy creating their own designs rather than copying a template.
4. Cotton Ball Ghost
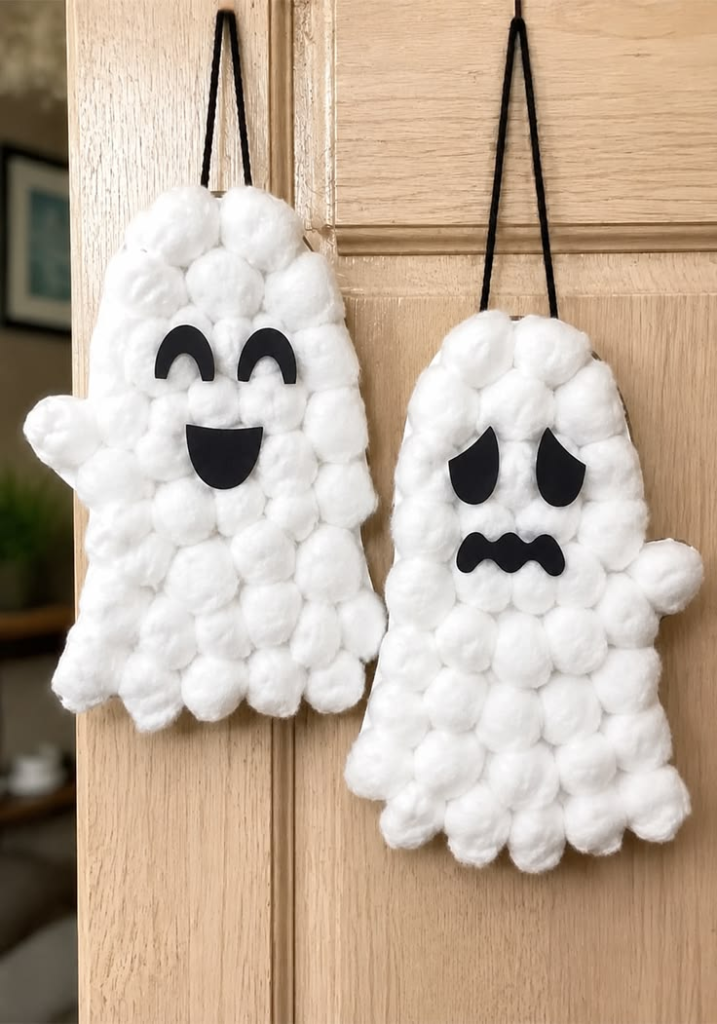
A cotton ball ghost is soft, simple, and inexpensive to make.
You will need:
- White paper
- Cotton balls
- Glue
- Black paper or marker
How to make it:
- Draw a simple ghost outline on a piece of paper.
- Add small amounts of glue inside the outline.
- Let your child place cotton balls over the glued area.
- Continue until the ghost is covered.
- Add two eyes and a mouth with black paper or a marker.
- Allow the craft to dry completely.
You can make several ghosts and hang them together as a Halloween decoration.
5. Halloween Paper Garland
A paper garland is an easy way for children to create their own Halloween decorations.
You will need:
- Orange, black, purple, and white paper
- Scissors
- Glue
- String
- Markers
How to make it:
- Draw Halloween shapes such as pumpkins, bats, ghosts, and spiders on colored paper.
- Cut out the shapes.
- Let your child decorate each piece with markers or crayons.
- Make a small hole near the top of each shape.
- Thread the shapes onto a long piece of string.
- Space them out evenly.
- Hang the finished garland across a wall, doorway, or window.
6. Halloween Painted Rocks
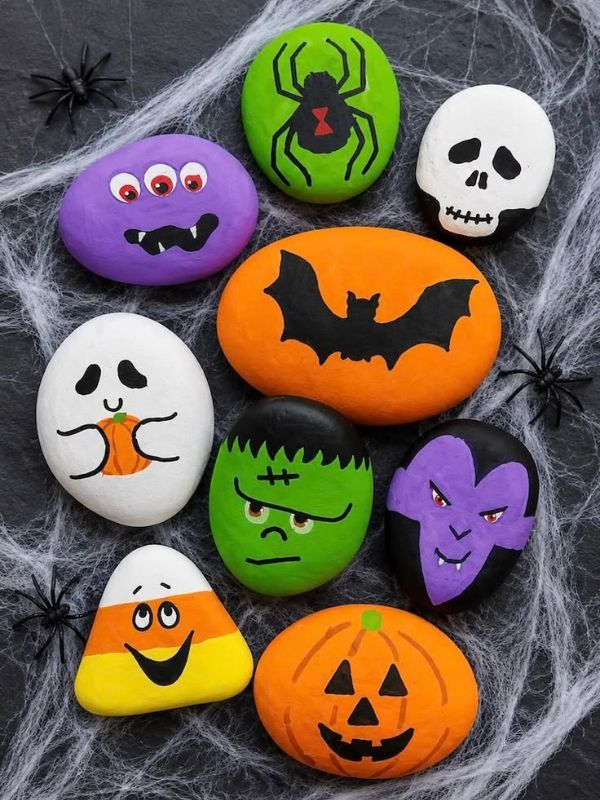
If you have smooth rocks around your home, turn them into colorful Halloween decorations.
You will need:
- Clean smooth rocks
- Paint
- Paintbrushes
- Markers
- Water
- Paper towels
How to make it:
- Wash the rocks and let them dry.
- Choose a Halloween character or design.
- Paint the base color onto the rock.
- Wait for it to dry.
- Add eyes, mouths, patterns, or other details.
- Let the finished rocks dry completely.
Children can paint pumpkins, ghosts, bats, monsters, spiders, or even small candy corn designs.
7. Halloween Bookmark
A Halloween bookmark is a useful craft that children can continue enjoying after Halloween.
You will need:
- Cardstock or thick paper
- Markers or crayons
- Scissors
- Halloween stickers
- Ribbon
- Glue
How to make it:
- Cut a long rectangle from cardstock.
- Let your child decorate it with Halloween drawings or stickers.
- Add their name or a short Halloween message.
- Adults can make a small hole at the top.
- Thread a piece of ribbon through the hole.
- Tie the ribbon securely.
- Allow any glue to dry before using the bookmark.
8. Paper Bag Ghost Puppet
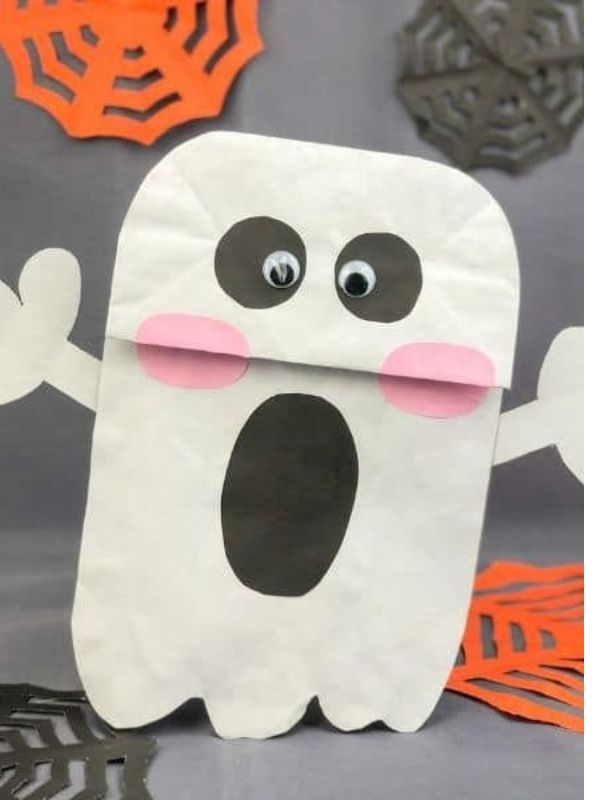
Turn a simple paper lunch bag into a Halloween puppet.
You will need:
- Paper lunch bag
- White paint
- Black paper
- Glue
- Markers
How to make it:
- Paint the paper bag white and allow it to dry.
- Cut two black eyes and a mouth.
- Glue the facial features onto the bag.
- Add other details such as eyebrows or a funny hairstyle.
- Once dry, put your hand inside the bag.
- Move the bag’s flap to make the ghost talk.
Children can use their finished puppets to create a short Halloween story or puppet show.
9. Popsicle Stick Halloween Characters
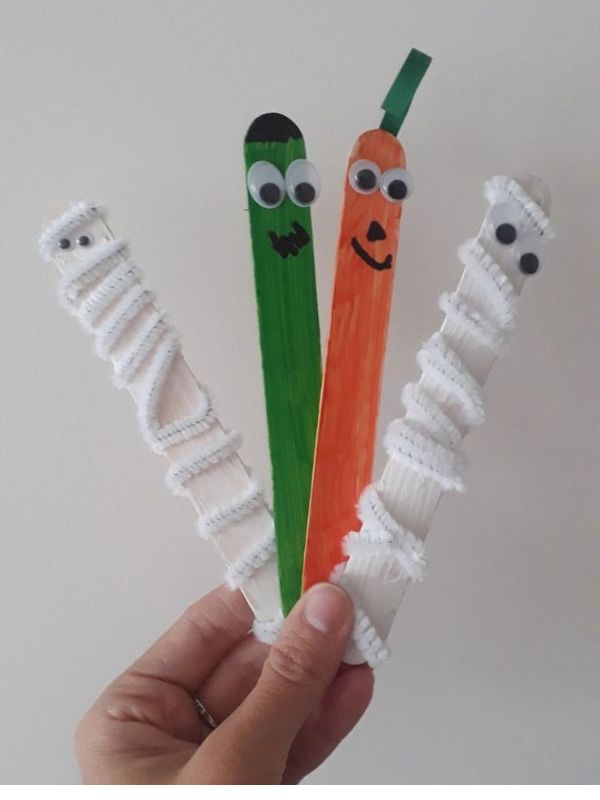
Popsicle sticks can be turned into simple Halloween characters such as pumpkins, ghosts, witches, or monsters.
You will need:
- Popsicle sticks
- Paint
- Construction paper
- Glue
- Markers
- Googly eyes
How to make it:
- Arrange several popsicle sticks next to one another.
- An adult can glue them together to create a flat surface.
- Paint the sticks in the color of your chosen character.
- Allow them to dry.
- Add eyes, mouths, hats, ears, or other features using paper.
- Draw the smaller details with markers.
- Leave the character to dry completely.
Make several different characters and use them to create a small Halloween display.
10. Halloween Handprint Art
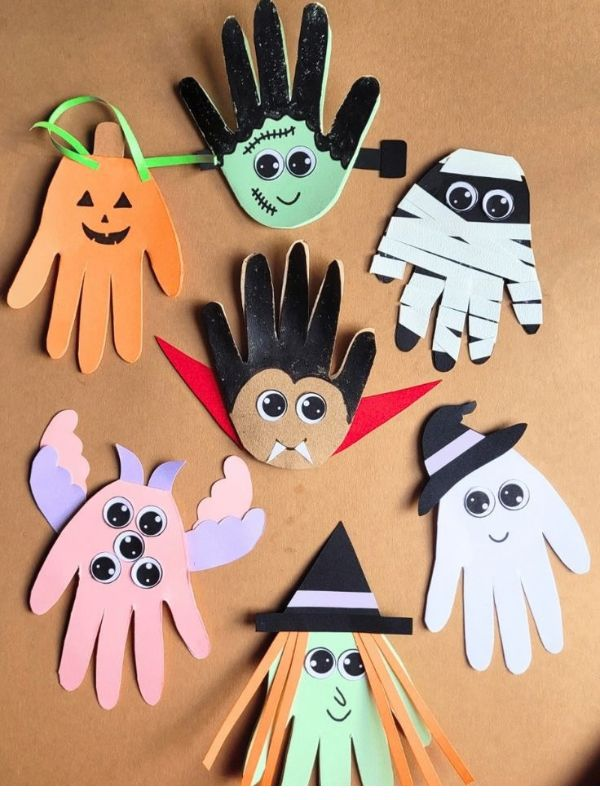
Handprint art is a fun way to create Halloween pictures while also making a keepsake.
You will need:
- White paper
- Washable paint
- Paintbrush
- Black marker
- Water and a towel for cleaning hands
How to make it:
- Choose a Halloween design such as a ghost, spider, pumpkin, or bat.
- Apply a thin layer of washable paint to your child’s hand.
- Help them press their hand firmly onto the paper.
- Carefully lift the hand away.
- Wash their hand immediately.
- Allow the print to dry completely.
- Use a black marker to add eyes, legs, wings, stems, or other details.
- Write the child’s name and date on the artwork.
This craft is especially nice for younger children because it creates a simple Halloween activity and a keepsake that parents can save.
Halloween Crafts for Kids Using Simple Materials
You do not need expensive craft supplies to make fun Halloween crafts with kids. Many creative projects can be made with simple materials you already have at home, such as paper, cardboard, paper plates, toilet paper rolls, cotton balls, crayons, and paint.
Using everyday materials also makes Halloween crafts easier to prepare for a classroom, playdate, or family activity.
1. Paper
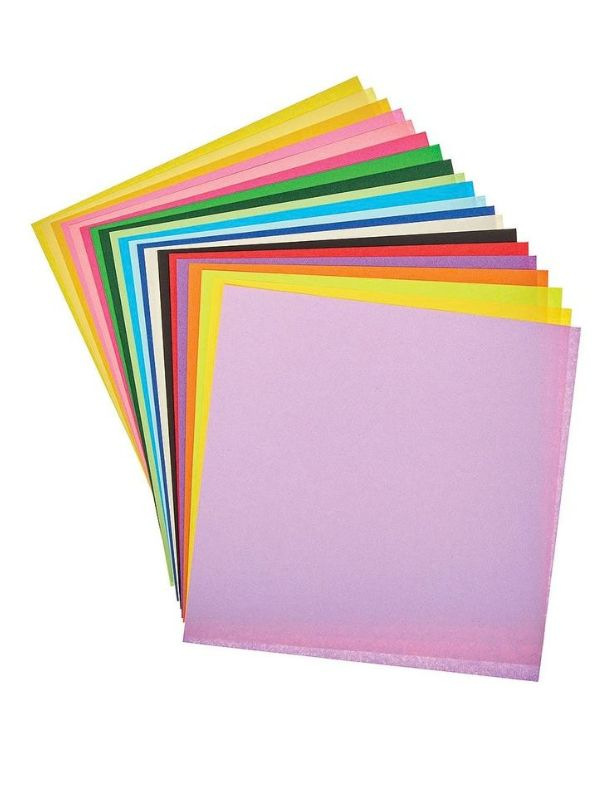
Paper is one of the easiest materials to use for Halloween crafts. Children can turn colored paper into pumpkins, ghosts, bats, spiders, witches, monsters, and other Halloween characters.
Craft idea: Cut orange paper into pumpkin shapes and let children decorate them with different faces.
2. Cardboard
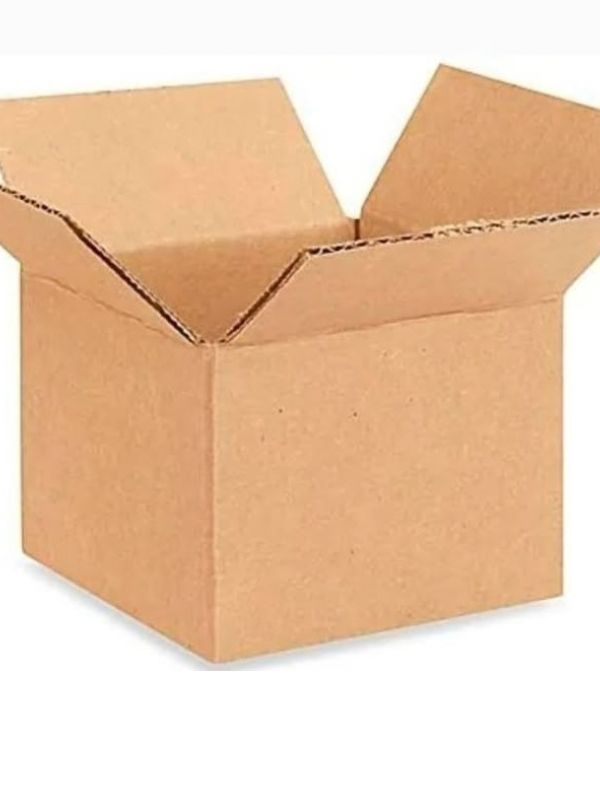
Old cardboard boxes and packaging can be reused for larger Halloween crafts.
Craft idea: Cut cardboard into the shape of a haunted house, then let children paint and decorate it with windows, doors, ghosts, bats, and pumpkins.
3. Paper Plates
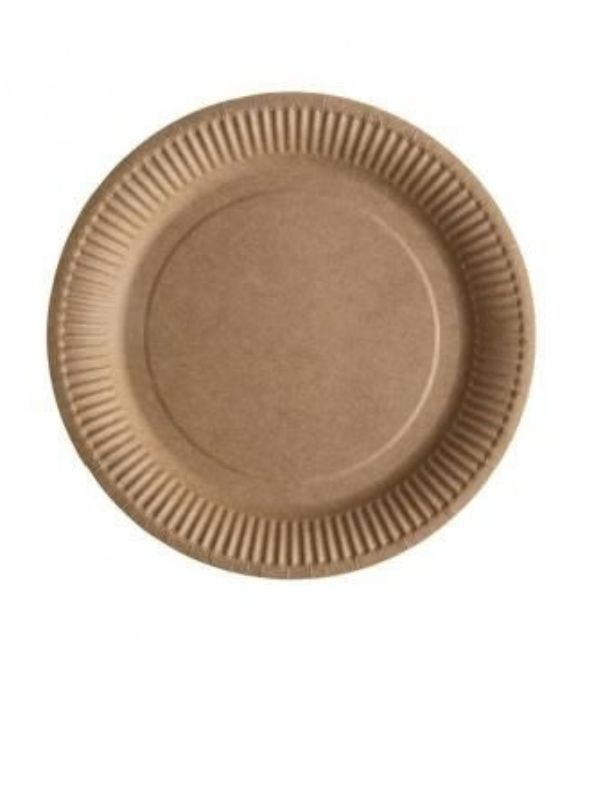
Paper plates are useful for making Halloween masks, pumpkins, spiders, ghosts, and other decorations.
Craft idea: Paint a paper plate orange, then add black paper eyes and a mouth to create a pumpkin.
4. Toilet Paper Rolls
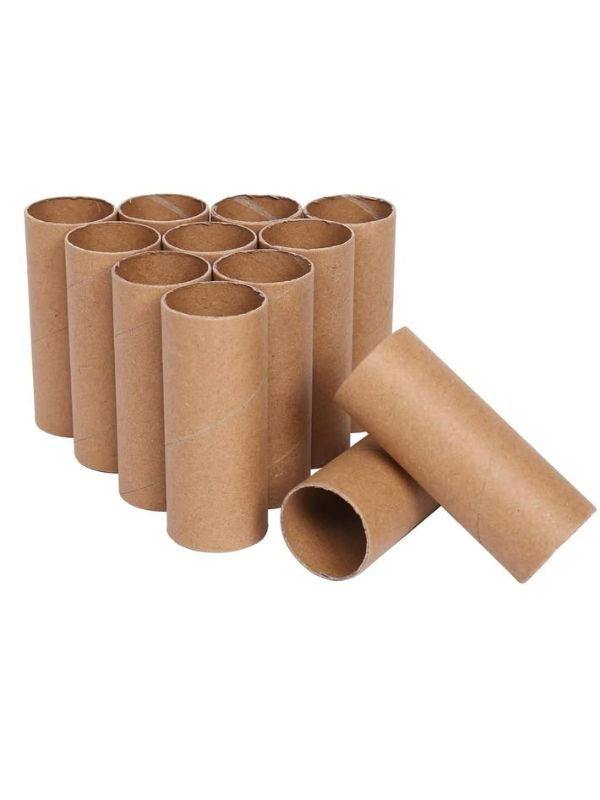
Empty toilet paper rolls are perfect for small Halloween characters and decorations.
Craft idea: Paint a toilet paper roll black and add paper wings and eyes to turn it into a bat.
5. Popsicle Sticks
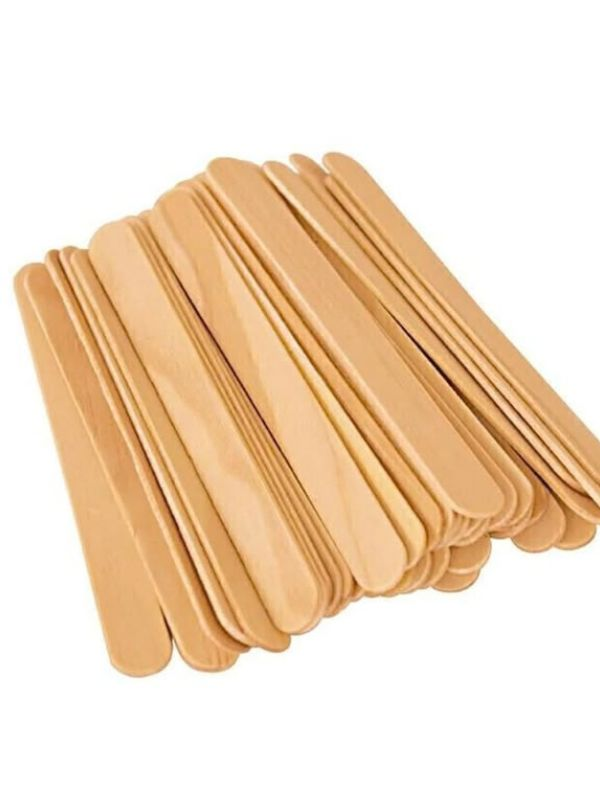
Popsicle sticks can be used to build small Halloween characters, houses, signs, and decorations.
Craft idea: Glue several sticks together and decorate them as a haunted house or Halloween character.
6. Cotton Balls
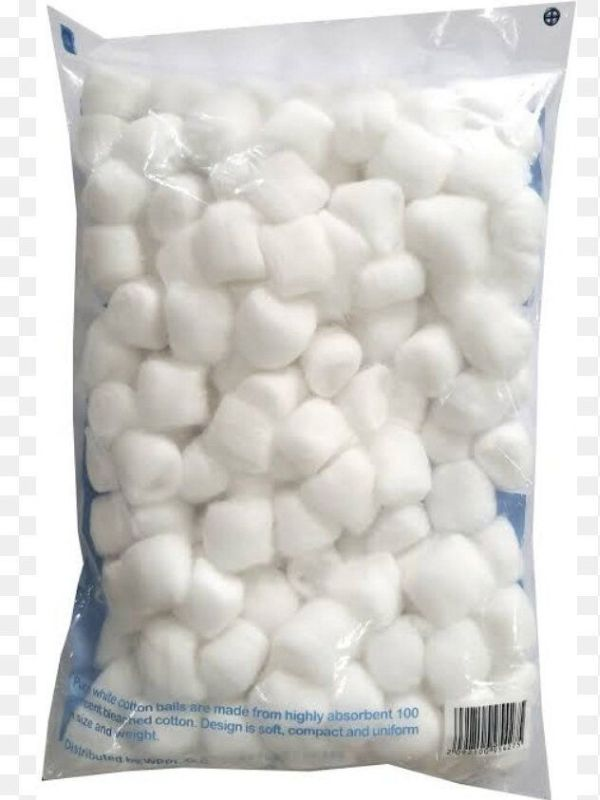
Cotton balls can create soft and fluffy Halloween crafts, especially ghosts and clouds.
Craft idea: Draw a ghost outline on paper, add glue inside the shape, and let children cover it with cotton balls.
7. Crayons
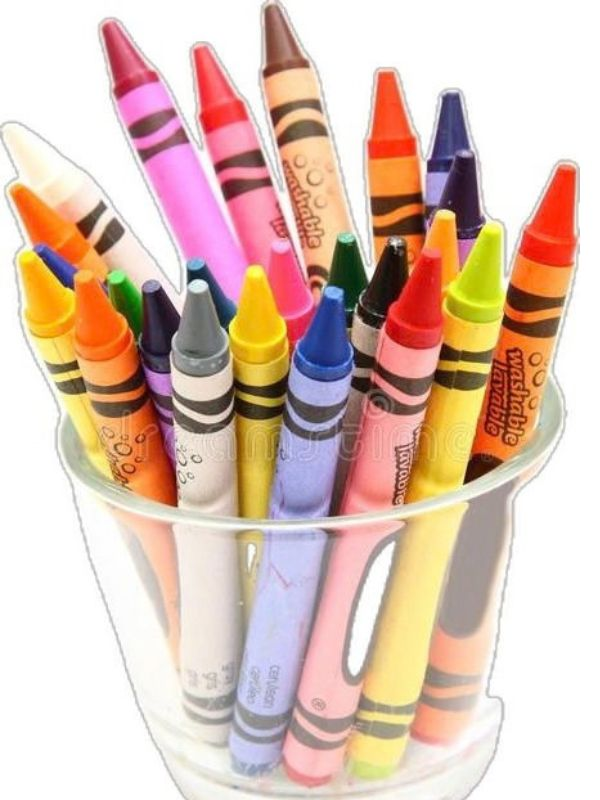
Crayons are an easy option when you want a Halloween activity that requires very little preparation.
Craft idea: Give children Halloween coloring pages or let them draw their own pumpkins, monsters, bats, and haunted houses.
8. Washable Paint
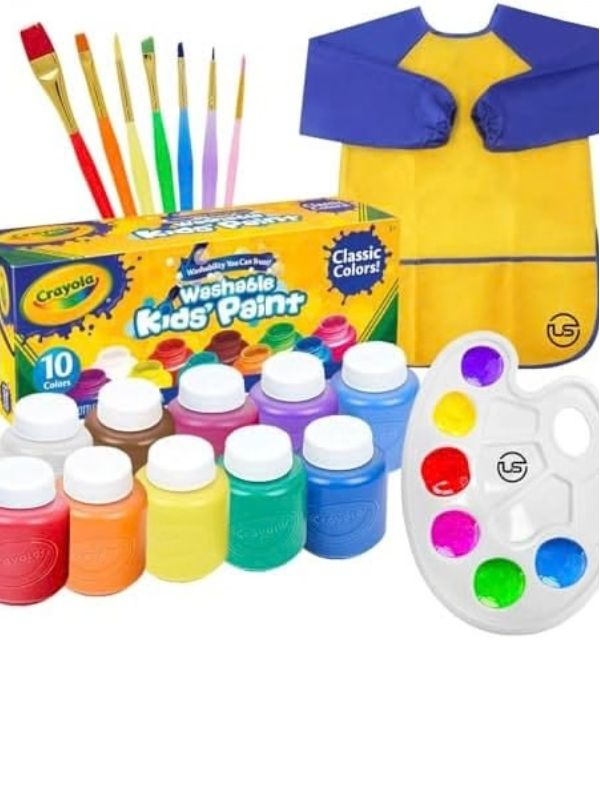
Washable paint can transform simple household materials into colorful Halloween decorations.
Craft idea: Let children paint rocks, paper plates, cardboard, or toilet paper rolls and turn them into Halloween characters.
9. Yarn
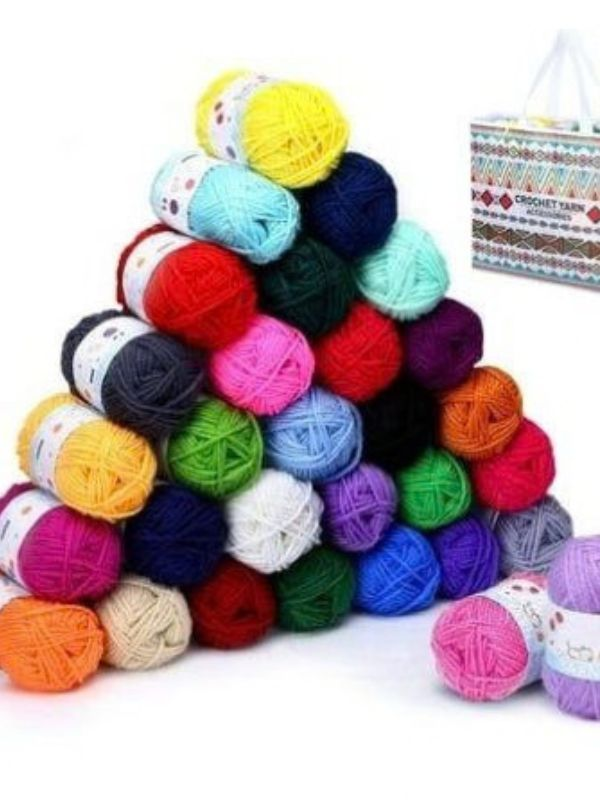
Yarn can be used to create spider webs, hair for Halloween characters, or decorations.
Craft idea: Draw a spider web on black paper and let children glue pieces of white yarn along the lines.
10. Recycled Materials
Look around the house before buying new craft supplies. Empty boxes, paper bags, cereal boxes, bottle cartons, and other clean packaging can become useful craft materials.
Craft idea: Turn an empty cereal box into a haunted house by cutting out windows and doors, then decorating it with Halloween colors and characters.
Tips for Using Simple Materials for Halloween Crafts
Before starting, gather all the materials you plan to use and prepare the workspace. Wash and dry recycled materials before giving them to children. Adults should handle difficult cutting and supervise children when using scissors, glue, paint, or other craft supplies.
Choose materials according to the child’s age. Younger children may need larger pieces and more adult assistance, while elementary kids can usually handle more detailed projects.
The goal is not to create perfect decorations. Simple materials give children the freedom to experiment, make their own designs, and enjoy creating something for Halloween.
Frequently Asked Questions
What are easy Halloween crafts for kids?
Easy Halloween crafts include paper plate pumpkins, cotton ball ghosts, paper bats, toilet paper roll characters, Halloween bookmarks, painted rocks, paper garlands, and simple monster crafts. Choose projects based on the child’s age and ability.
What are good Halloween crafts for toddlers?
Toddlers can enjoy simple crafts such as handprint ghosts, paper plate pumpkins, cotton ball ghosts, pumpkin stamping, finger painting, and Halloween sticker crafts. Choose large, easy-to-handle materials and supervise toddlers throughout the activity.
What Halloween crafts can preschoolers make?
Preschoolers can make paper plate spiders, toilet paper roll bats, paper pumpkins, ghost puppets, Halloween monsters, spider webs, popsicle stick witches, and simple haunted houses.
What are good Halloween crafts for elementary kids?
Elementary kids can try more detailed projects such as Halloween masks, haunted houses, paper lanterns, Halloween puppets, scratch art, painted rocks, Halloween garlands, and DIY photo frames.
What materials do I need for Halloween crafts?
Many Halloween crafts can be made with simple materials such as construction paper, cardboard, paper plates, toilet paper rolls, popsicle sticks, cotton balls, yarn, crayons, washable paint, glue, and markers.
How can I make Halloween crafts at home?
Choose a simple craft that matches your child’s age, gather the required materials, prepare a clean workspace, and follow the instructions step by step. Let children participate in decorating and assembling as much as they can safely manage.
What are some Halloween crafts using recycled materials?
You can use toilet paper rolls, cardboard boxes, cereal boxes, paper bags, and other clean packaging to make bats, haunted houses, monsters, ghosts, pumpkins, and Halloween decorations.
What are good Halloween crafts for a classroom?
Paper plate crafts, Halloween bookmarks, paper pumpkins, monster crafts, spider webs, paper garlands, and toilet paper roll characters are good classroom options because the materials are simple and several children can work on them at the same time.
How can I make Halloween crafts safe for young children?
Use age-appropriate, non-toxic materials and supervise children during the activity. Adults should handle difficult cutting and any tools that may be unsafe for young children. Avoid small loose pieces when crafting with toddlers because they can be choking hazards.
How can I make Halloween crafts more fun for kids?
Let children choose their own colors, characters, and decorations instead of requiring them to copy an exact example. You can also play Halloween music, tell a spooky but age-appropriate story, or turn the finished crafts into decorations for a Halloween party.
Conclusion
Halloween crafts for kids are a simple and enjoyable way to make the Halloween season more exciting. You do not need expensive supplies or complicated projects to keep children creative and engaged. Simple materials such as paper, cardboard, paper plates, cotton balls, toilet paper rolls, crayons, and paint can become fun Halloween decorations.
Choose crafts according to your child’s age and abilities. Toddlers can enjoy simple painting, stamping, and sticking activities, while preschoolers can try projects with a few more steps. Elementary kids can take on more detailed crafts that allow them to cut, build, paint, and design their own Halloween creations.
Whether you are looking for a craft to make at home, a classroom activity, or a fun project for a Halloween party, these ideas give children plenty of opportunities to create something they can be proud of. Most importantly, let them use their imagination and enjoy the process of making their own Halloween crafts.
One thought on “Halloween Crafts for Kids: 50 Easy Ideas for Toddlers, Preschoolers & Elementary Kids”