Having a straight , smooth and easily manage hair is something every woman want, that is why i was moved to publish this how to apply relaxer step by step guide to help you achieve it without visiting the saloon .Relaxing your hair at home can save money and time, but it needs to be done carefully to protect both your hair and scalp. With the right tools, preparation, and technique, you can achieve professional-looking results safely in your own space.
In this guide, I will walk you through everything you need to know to on how to apply ralaxer on a virgin hair or retouching previous relaxed hair, from preparing your hair, applying the relaxer correctly and the aftercare that keeps your hair healthy and shiny. Even if you are trying it for the first time or looking for better results, this step-by-step routine will help you relax your hair with confidence.
What You Should Know About Relaxers
A hair relaxer is a cream or lotion designed to straighten curly, wavy and coarse hair. It works by breaking down the natural protein bonds in your hair, which loosens the curl pattern and makes the hair appear straighter and smoother. Relaxers can give you a sleek, polished look and make daily styling much easier, but they must be used carefully to avoid damage and protect both your hair and scalp.
Types of Relaxers: Lye vs. No-Lye Relaxers for Home Use
There are two main types of relaxers:
-
Lye Relaxers – Made with sodium hydroxide. They work quickly and are often used in salons because of their fast processing time. However, they can be harsher on the scalp and require professional handling.
-
No-Lye Relaxers – Made with calcium hydroxide or guanidine hydroxide. They are generally milder on the scalp, making them a popular choice for home use. On the downside, they can sometimes cause dryness if not followed by proper conditioning.
Both types of relaxer straighten the hair, but your choice when deciding how to apply relaxer should depend on your comfort level, scalp sensitivity, hair needs and the time you want to spend during application. this artcle talks more on relaxer types
Who Should Use It? Hair Types and Conditions That Suit Relaxing at Home
Relaxers are designed for individuals who want straighter, easier-to-manage hair. Relaxers work well on:
-
Tightly Coiled or Curly Hair, for those who prefer to reduce shrinkage and achieve a sleeker look.
-
Coarse or Thick Hair, A relaxer can help soften dense strands, making them easier to comb and style.
-
Wavy Hair, Strong or stubborn waves can be loosened with a relaxer if a straighter finish is desired. However, people with softer waves may find that a smoothing treatment or texturiser is enough.
Relaxers should only be used on healthy, strong hair. If your scalp is irritated, sensitive, or recovering from chemical treatments, it is better to wait. Relaxers are not recommended for young children because their hair and scalp are very delicate.
Things to Know Before Applying Relaxer at Home
Before you dive into learning how to apply relaxer at home, there are a few important precautions to keep your hair healthy and safe. Skipping these steps can lead to breakage, scalp irritation, or uneven results.
Do a Strand/Patch Test Before Applying Relaxer at Home
Always test the relaxer on a small section of hair (strand test) and a tiny area of your skin (patch test). This helps you check for allergic reactions, scalp sensitivity, and how long it takes for your hair to process. It’s a simple step that can save you from serious damage.
Avoid Relaxing on a Freshly Washed or Irritated Scalp atHome
When learning how to apply relaxer at home, one golden rule is never to relax freshly washed hair or a scalp that feels sore, itchy, or irritated. Natural scalp oils act as a protective barrier during the chemical process, so wait at least 3 to 5 days after shampooing before relaxing.
Understand How Often to Apply Relaxer at Home
Relaxers are not meant to be applied every few weeks. Overlapping chemicals on already relaxed hair can cause thinning and breakage. Ideally, touch up only the new growth every 6 to 8 weeks (or longer, depending on your hair growth rate). Healthy spacing gives your hair time to recover and stay strong.
The healthiest approach is to relax only the new growth every 3 to 4 months. This gives your hair and scalp time to recover, minimises damage, and ensures stronger, smoother results.
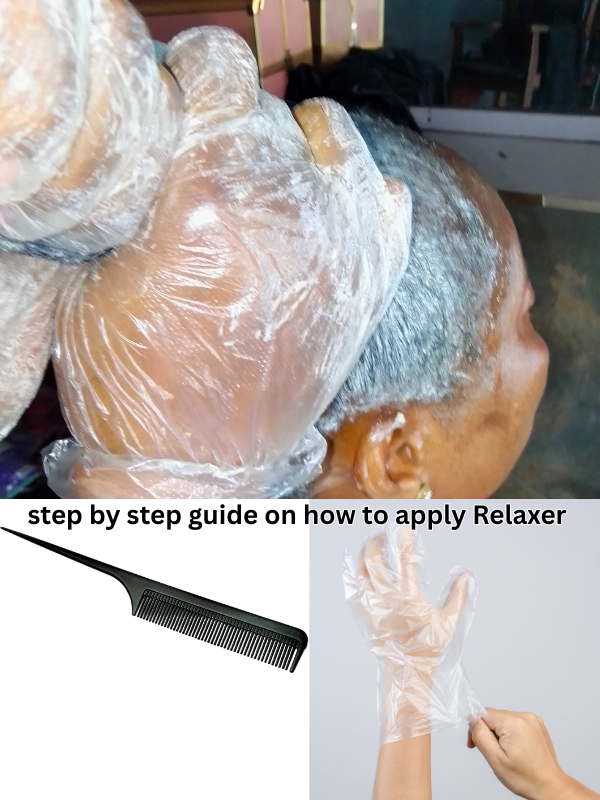
Tools and Products You’ll Need for Applying Relaxer at Home
Before starting relaxer application at home, it is important to gather everything you’ll need in one place. Trust me, I have been there before, halfway through the process, only to realise that big comb was missing. It can be stressful, and a relaxer is not something you want to leave sitting on your hair longer than planned. Having your tools ready makes the whole process smoother.
Here are list of what you’ll need:
Relaxer Kit – This usually comes with the cream relaxer, activator, and most importantly, a neutralising shampoo to stop the chemical process.
Wide-Tooth & small Comb, Gloves, and Applicator Brush – The wide-tooth comb helps with sectioning without pulling too much. Gloves protect your hands from irritation, and the brush helps to apply the relaxer neatly. you can use your hands in absences of brush


Petroleum Jelly – Apply it around your hairline, ears, and neck to protect your skin from burns. I once skipped this step when I was a beginner and ended up with tiny scars around my edges, is not a good experience at all.

Clips and a Towel – Clips make it easier to part your hair into sections. I use a rubber band sometimes but tie it loosely, while a towel around your shoulders protects your clothes.
A Timer – This is so important. leaving relaxer on the hair too long can cause serious damage. Always stick to the recommended time on the relaxer pack.
When you have all these tools ready, the process of applying relaxer at home step by step f becomes easier and more like a routine you can manage with confidence.
Step-by-Step Guide on How to Apply Relaxer at Home
Relaxing your hair at home can feel intimidating at first, but once you understand the process, it becomes much easier. The most important thing to remember is that relaxer is a strong chemical, it needs to be applied carefull. even if you are relaxing virgin hair or retouching already relaxed hair, these steps will guide you safely.
1. Start With Preparation
-
Make sure your hair and scalp are not freshly washed. Wait at least a week after shampooing.
-
Divide your hair into 3 0r 4 sections using clips or rubber band. This helps you apply the relaxer evenly.
-
Apply petroleum jelly around your hairline, ears, and the nape of your neck to protect your skin.

2. Mixing the Relaxer
-
Open your relaxer kit and carefully mix the cream relaxer with the activator (if required).
-
Always follow the instructions on the product, different brands may have slight variations.
3. Applying Relaxer on Virgin Natural Hair
If it is your first time relaxing your natural or wavy/coarse hair, follow these steps:
-
you can begin at the back or front section of your head but dont apply relaxer at the front and back hairlines at the begining to avoid the hair paining you before time.
-
Apply the relaxer to the hair tips to mid-lengths first, leaving about 2 inches from the scalp.

-
Once the mid-lengths and the hair tips are covered, go back and apply relaxer closer to the scalp, part each section in smaller parts and apply the relaxer. The scalp generates heat, which makes it process faster, so dont allow the relaxer to touch the scalp go half an inche above the scalp.

-
Massage the hair after applyig the relaxer to smaller parts of the four sections, and comb each section with a big comb

-
Part each sections aging in small parts with the small comb, apply relaxer let it touch the scalp and comb with the small comb, work quickly but carefully through each section.

- Massage each section and apply relaxer on the front and back hairlines ensuring the entire hair is covered.

Allow the hair to sit at the appropriate time
4. Retouching Already Relaxed Hair at Home (New Growth Only)
If your hair is already relaxed and you are just doing a touch-up:
-
Only apply relaxer to the new growth never overlap onto already relaxed hair.
-
start the relaxer application from the mid hair down, dont retouch the tips.

-
Work section by section like we explained above, avoiding the edges , make sure you coat all new growth evenly.
-
Smooth gently with the back of the comb or your fingers, but do not drag relaxer through the already straightened parts.
5. Processing Time
-
Set your timer immediately after finishing the application.
-
Processing time depends on your hair texture (wavy, coarse, or very thick) and the relaxer type, but generally ranges from 10–20 minutes.
-
Never exceed the maximum time recommended on the kit.
6. Rinsing and Neutralizing
-
Once the time is up, rinse your hair thoroughly with lukewarm water until the relaxer is completely out.
-
Use the neutralizing shampoo included in your kit, it is very important because it stops the chemical process.
-
Shampoo at least twice, or until the water runs clear and the lather is clean.
7. Conditioning
-
Apply the conditioner from your relaxer kit (or a deep conditioner if provided).
-
Leave it in for the recommended time, then rinse. This restores moisture and strengthens your hair after the chemical treatment.
8. Drying and Styling
-
Gently towel-blot your hair (do not rub).
-
Apply a leave-in conditioner or lightweight oil to lock in moisture.
-
Style as desired, but avoid heavy heat styling immediately after relaxing.
Aftercare Tips for Relaxed Hair
Learning how to apply relaxer at home is only the first step. What really keeps your hair beautiful, strong, and healthy is how you care for it afterward. Relaxed hair can look silky and smooth, but it also needs extra love to avoid dryness and breakage. Here are simple aftercare tips to follow:
Keep Hair Moisturized
Relaxers can strip natural oils from your strands, leaving them prone to dryness. To keep your hair soft, apply a leave-in conditioner or lightweight oil or natural oil regularly. Daily or every other day moisturizing will help your hair stay hydrated and manageable.
Limit Heat Styling
Flat irons, blow dryers, and curling wands can weaken already processed hair. If you must use heat, always apply a heat protectant and keep the temperature moderate. Giving your hair breaks from heat allows it to retain strength and shine.
Use Satin at Night
Cotton pillowcases soak up moisture and cause friction, which can lead to breakage. Switching to a satin bonnet or satin pillowcase will protect your relaxed hair overnight, keeping it smooth and preventing tangles.
Stick to a Healthy Relaxer Touch-Up Schedule
Avoid relaxing too often. The safest routine is every 3–4 months, depending on how fast your hair grows. This way, you only apply relaxer on the new growth without overlapping onto already relaxed hair, which keeps your strands healthier in the long run. read my article on how to keep your hair healthy nd also herbs and natural spices for hair growth
Common Mistakes to Avoid When Relaxing Hair at Home
Even when you know how to apply relaxer at home step by step, a few mistakes can easily sneak in and damage your hair. But with the right guidance, you can avoid them and keep your hair healthy. Here are the most common errors people make:
Leaving Relaxer in Too Long
One of the biggest mistakes is thinking that the longer you leave the relaxer on, the straighter your hair will be. In reality, leaving it past the recommended time can cause serious damage, scalp burns, and breakage. Always set a timer and follow the instructions on your relaxer kit.
Relaxing Already Processed Hair
Relaxer should only be applied to new growth, not the hair that has already been relaxed. Overlapping onto previously processed hair makes it weak, brittle, and prone to snapping. When retouching, focus carefully on the roots only.
Skipping the Neutralizing Step
Neutralizing shampoo is not optional, it is the step that stops the chemical process and restores your hair’s natural pH balance. Skipping it or rushing through it can leave relaxer residue in your hair, which continues to weaken it even after rinsing. Always wash thoroughly until the lather runs clean. read more on common mistakes

