How to start locs on natural hair step by step is one of the first questions people ask when they decide to begin their loc journey. Maybe you’ve admired beautiful, healthy locs for years, saved countless photos for inspiration, or finally feel ready to embrace a low-maintenance natural hairstyle. At the same time, it’s completely normal to feel unsure about where to begin. You might be wondering which starter loc method to choose, whether your hair is long enough, or if you’re making the right decision.
As a loc tician, I’ve met many first-time clients who walked into my salon feeling excited yet nervous. One of the most common things I hear is, “I don’t want to make a mistake that I’ll regret later.” I always reassure them that starting locs is not hard. With the right method, proper preparation, and realistic expectations, you can build healthy locs that you’ll enjoy for years to come.
There isn’t one perfect way to start locs. The best method depends on your hair texture, lifestyle, desired loc size, and how much maintenance you’re willing to do during the early stages. Understanding these factors before you begin can save you time, frustration, and unnecessary setbacks.
In this step-by-step guide, you’ll learn how to start locs on natural hair, the different starter loc methods, the tools you’ll need, how to care for your starter locs, common mistakes to avoid, and what to expect as your locs mature. By the end, you’ll have the knowledge and confidence to start your loc journey the right way.
See 25 starter loc styles you will love
What Are Starter Locs?
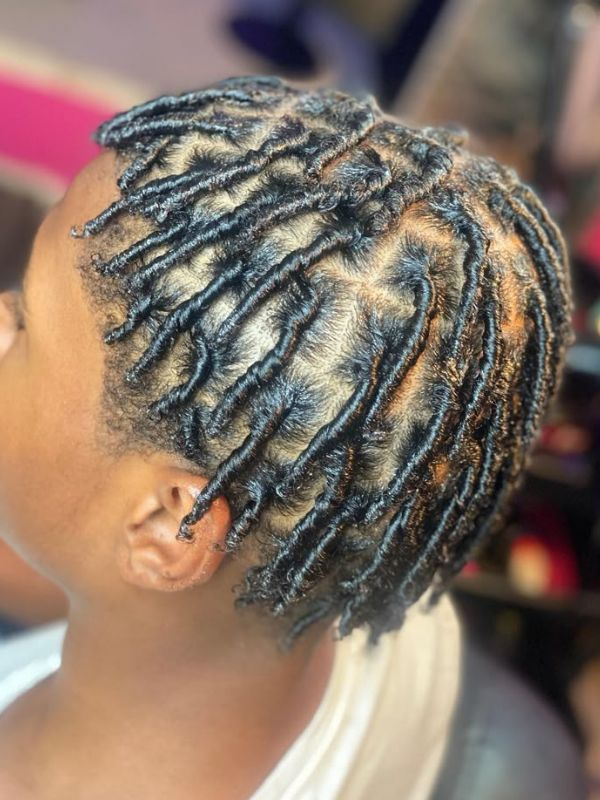
Starter locs are the first stage of the loc journey. They are newly formed sections of natural hair that have been twisted, coiled, braided, interlocked, or crocheted to begin forming mature locs. At this stage, the hair has not fully locked yet, so it is normal for the locs to look neat one day and frizzy or puffy the next.
As a loctician, I always tell first-time clients that starter locs require patience. Many people expect their locs to look fully mature within a few weeks, but they develop gradually. The changes you see during the early months are a natural part of the locking process.
1. Starter Locs Method.
Think of starter locs as the foundation of your entire loc journey. The way they are installed and cared for will influence how your mature locs look in the future.
Starter locs can be created using different methods, including
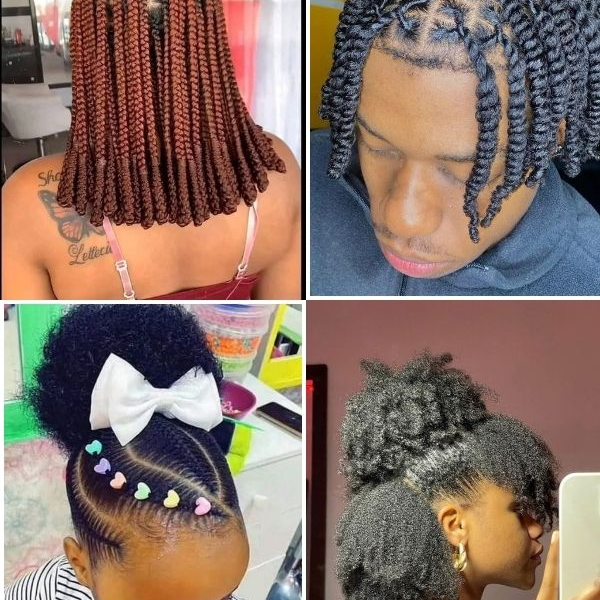
- Two-strand twists
- Comb coils
- Finger coils
- Braids
- Interlocking
- Instant locs
Each method has its own benefits, and the best one depends on your hair texture, lifestyle, and the size of locs you want.
How Long Does the Starter Loc Stage Last?
For most people, the starter loc stage lasts between three and six months, although it can be shorter or longer depending on factors such as
- Your hair texture
- The starter loc method you choose
- How often you wash your hair
- Your maintenance routine
- How quickly your hair naturally locks
People with tightly coiled hair, such as 4B and 4C hair, often notice their locs begin locking sooner than those with looser curl patterns.
What to Expect During the First Few Months
The first few months can feel like an emotional roller coaster, especially if it’s your first time wearing locs. Your hair may not look the same every day, but that’s completely normal.
During this stage, you may notice
- Frizz developing around your locs.
- Some unravelling, especially after washing.
- Hair beginning to swell and bud.
- Slight shrinkage.
- Your locs becoming firmer over time.
Try not to compare your loc journey with someone else’s. Everyone’s hair locks at a different pace, and that’s perfectly okay. Trust the process, follow a healthy maintenance routine, and give your hair the time it needs to mature into strong, beautiful locs.
Is Your Hair Ready for Locs?
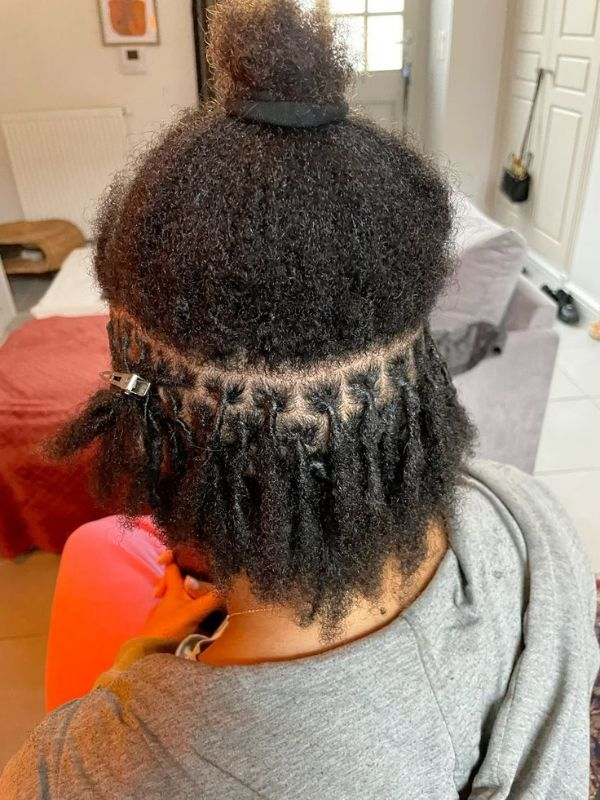
Before you start your loc journey, make sure your hair is ready. Many people think they need long or perfect hair to get locs, but that’s not true. Healthy locs can be started on different hair lengths and textures as long as your hair is in good condition.
As a loc tician, I always encourage my clients to prepare their hair before installation rather than rushing the process. Starting with healthy hair gives your locs the best foundation and can make maintenance much easier in the months ahead.
Best Hair Length for Starting Locs
There isn’t a perfect hair length for starter locs, but having enough hair makes the installation process easier.
As a general guide
- About 3 to 5 inches of natural hair is ideal for most starter loc methods.
- Longer hair gives you more styling options.
- Shorter hair can still be locked using the right technique.
Remember that your hair will shrink after the locs are installed, especially if you have tightly coiled hair.
Can You Start Locs on Short Natural Hair?
Yes. You can start locs on short natural hair, especially if you have type 4 hair. Many people begin their loc journey after a big chop or while growing out their natural hair.
For shorter hair, locticians often recommend
- Comb coils
- Finger coils
- Interlocking
These methods help create secure starter locs even when the hair is only a few inches long.
Can You Start Locs on Relaxed or Transitioning Hair?
Yes, but it depends on your hair goals.
If you are transitioning from relaxed to natural hair, it is usually best to wait until you have enough natural growth before starting locs. This helps create stronger and more uniform locs.
If your hair is fully relaxed, you can still start locs. Still, many loc practitioners recommend starting with natural hair because it locks more easily and creates a more consistent appearance over time.
Healthy Hair Checklist Before Starting
Before installing starter locs, check that your hair and scalp are in good condition.
Ask yourself these questions.
- Is my scalp clean and free from heavy buildup?
- Does my hair feel healthy rather than excessively dry or damaged?
- Have I trimmed severely damaged ends?
- Is my scalp free from sores or infections?
- Have I decided what size and style of locs I want?
- Am I ready to commit to regular loc maintenance?
If you answered yes to most of these questions, you’re likely ready to begin your loc journey. Starting with healthy hair, realistic expectations, and the right maintenance routine will help you build strong, beautiful locs that last for years.
Things to Know Before Starting Locs
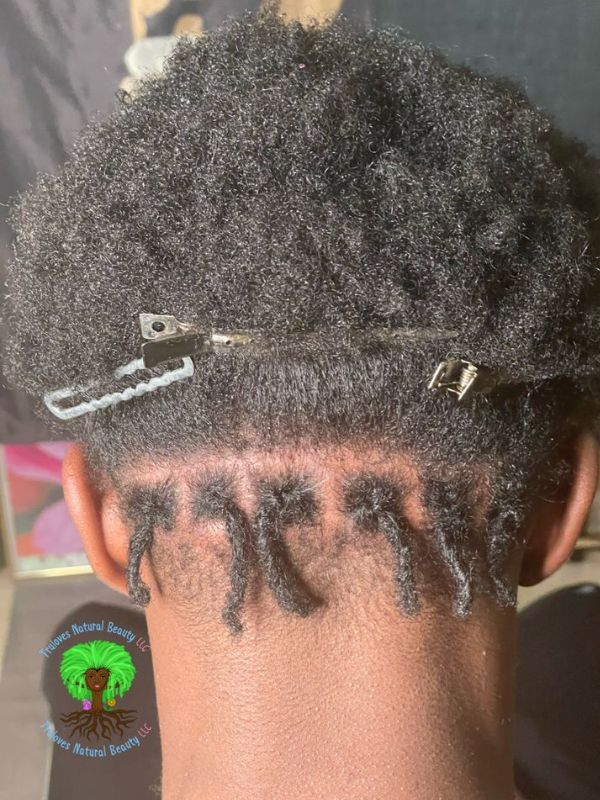
Starting locs is exciting, but it is also a long-term commitment. Before your appointment or DIY installation, take some time to understand what the journey involves. As a loctician, I’ve had clients who thought locs were completely maintenance-free, only to realise later that healthy locs still require regular care and patience.
Knowing what to expect from the beginning will help you enjoy your loc journey and avoid common mistakes.
1. Choose the Right Loctician or DIY Method
One of the most important decisions you’ll make is whether to visit a professional loctician or start your locs yourself.
If you’re new to locs, a professional can
- Recommend the best starter method for your hair.
- Create neat, even sections.
- Help you choose the right loc size.
- Give you a personalised maintenance plan.
If you decide to start your locs at home, take time to learn the proper techniques and use the right tools.
2. Decide on Your Loc Size
The size of your starter locs will determine how your mature locs look. This is one decision you should think through carefully because changing the size later can be difficult.
Common loc sizes include
- Micro locs for a fuller look with more styling options.
- Small locs for a balance between fullness and maintenance.
- Medium locs for a classic, versatile appearance.
- Large locs for a bold look with less maintenance.
Think about your lifestyle, hair density, and personal style before making your choice.
3. Understand the Commitment
Locs are not a temporary hairstyle. They require patience, consistency, and proper maintenance, especially during the first year.
Before starting, ask yourself.
- Am I ready to care for my locs regularly?
- Can I be patient during the frizzy stage?
- Am I comfortable with my hair changing over time?
Understanding the commitment can help you stay motivated when your locs go through different stages.
4. Set Realistic Expectations
Many people expect their starter locs to look like mature locs within a few weeks, but that is not how the locking process works.
During the first few months, you may experience
- Frizz.
- Budding.
- Shrinkage.
- Unravelling after washing.
- Changes in texture and appearance.
These are all normal parts of the loc journey. Avoid comparing your progress to someone else’s, because every hair type grows at a different pace.
The best way to enjoy your loc journey is to trust the process. With the right expectations, proper care, and a little patience, you’ll build healthy locs that reflect your personal style and last for many years.
Tools and Products You Need
You don’t need a shelf full of expensive products to start healthy locs. In fact, one of the biggest mistakes beginners make is buying too many products before they even begin. As a loctician, I always recommend keeping your routine simple. A few essential tools and lightweight products are all you need to create and maintain healthy starter locs.
Here are the basic tools and products you’ll need.
1. Clarifying Shampoo
Always begin with clean hair. A clarifying or residue-free shampoo removes dirt, excess oil, and product buildup, giving your starter locs a clean foundation.
Look for a shampoo that:
- Cleanses without leaving residue.
- Is gentle on your scalp.
- Does not contain heavy moisturising ingredients that coat the hair.
Starting on clean hair helps your locs lock more effectively.
2. Spray Bottle With Water
Water is your best moisturiser during your loc journey.
Use a spray bottle to
- Refresh your locs.
- Add moisture between wash days.
- Reduce dryness without causing buildup.
A fine mist works better than soaking your hair.
3. Lightweight Loc Gel or Aloe Vera Gel
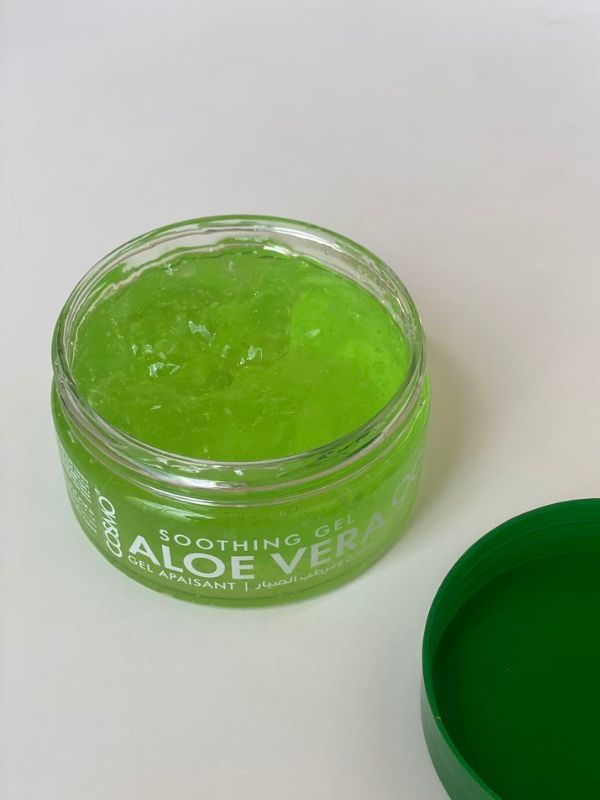
A small amount of lightweight gel can help create neat starter locs without leaving heavy residue.
Choose products that
- Have a light consistency.
- Dry without flaking.
- Do not contain wax or heavy oils.
Many locticians also use pure aloe vera gel as a natural alternative.
4. Rat Tail Comb
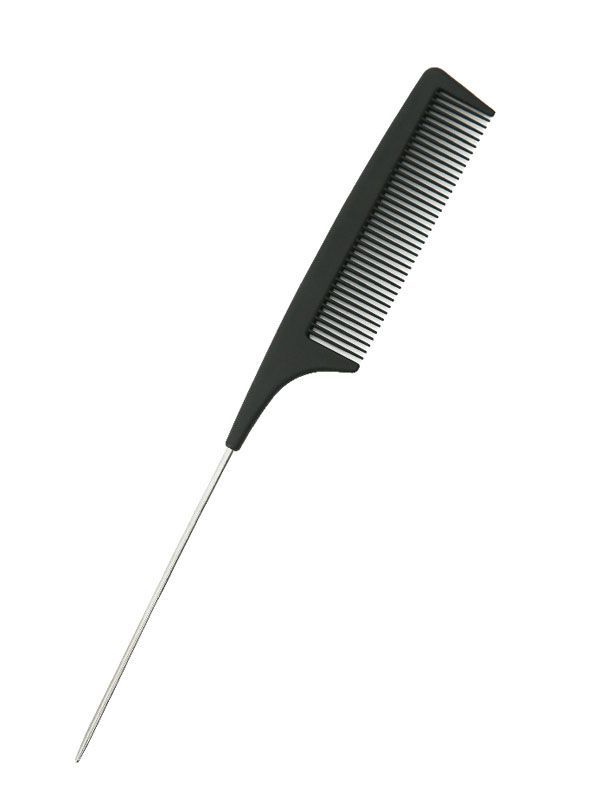
A rat tail comb is useful for creating clean, even sections.
It helps you
- Part your hair neatly.
- Maintain uniform loc sizes.
- Create straight section lines.
Even sections make your mature locs look more balanced.
5. Duckbill Clips
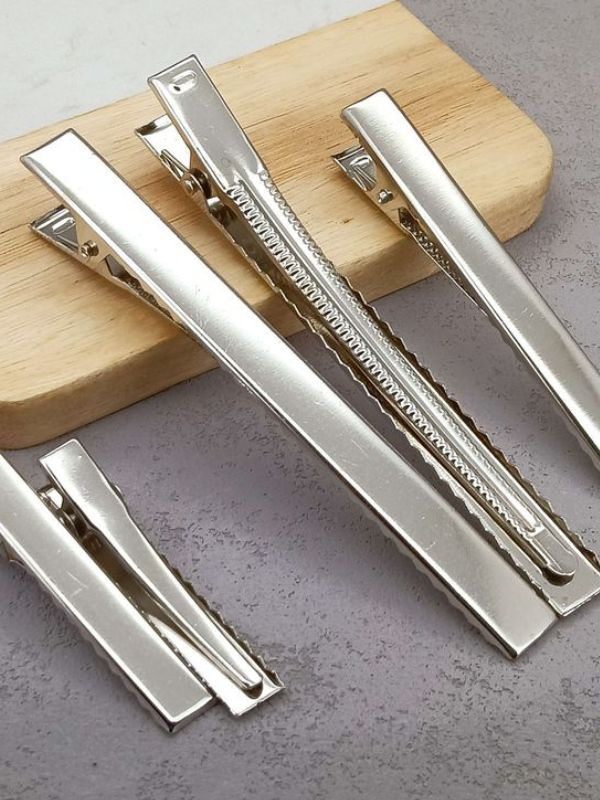
Duckbill clips keep your sections separated while you work, making the installation process faster and more organised.
They are especially helpful if you’re starting your own locs at home.
6. Hair Clips or Elastic Bands
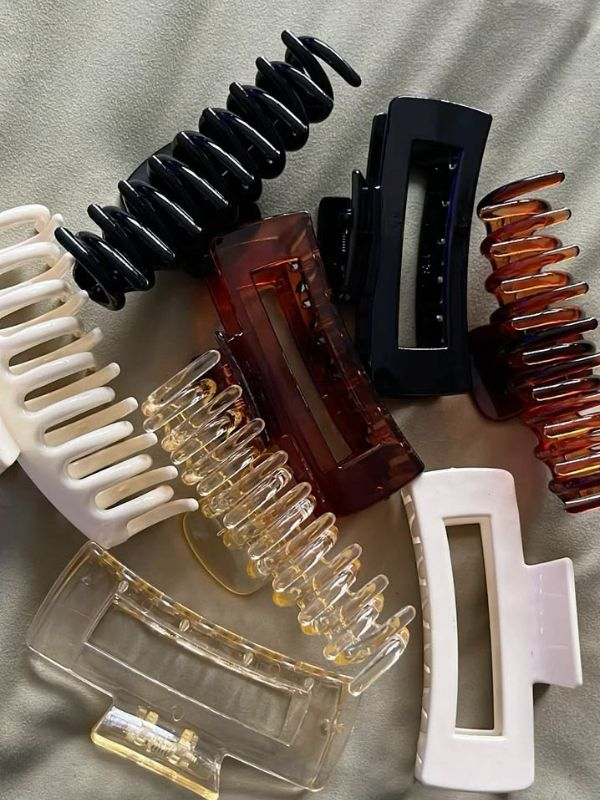
Hair clips or small elastic bands help hold each section in place while you’re parting your hair.
If you use elastic bands, make sure they are gentle and do not pull on your hair.
7. Satin Bonnet or Satin Pillowcase
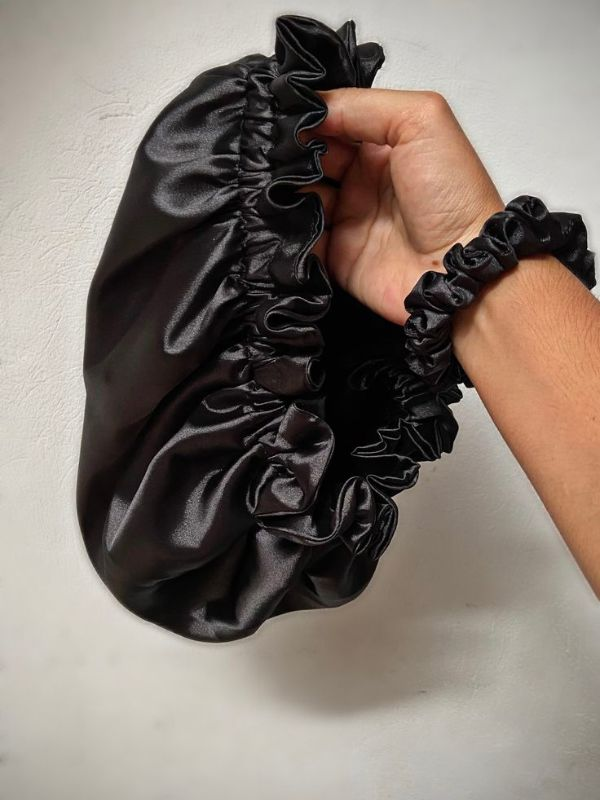
Protecting your starter locs while you sleep is just as important as installing them correctly.
Sleeping with a satin bonnet or on a satin pillowcase helps
- Reduce friction.
- Prevent frizz.
- Retain moisture.
- Protect your starter locs from unravelling.
This simple habit can make a noticeable difference in your loc maintenance.
8. Hooded Dryer or Blow Dryer (Optional)
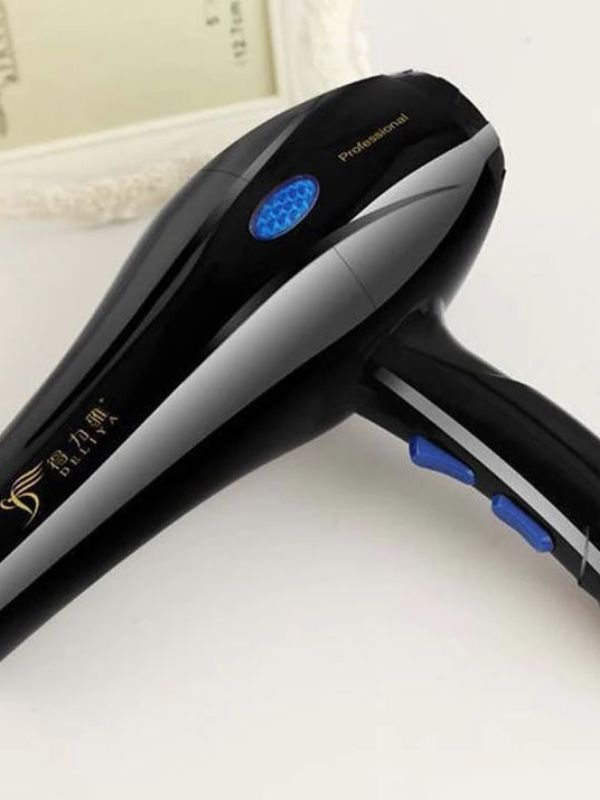
After installing or washing your starter locs, drying them completely helps prevent mildew and keeps your scalp healthy.
A hooded dryer is often the best option because it provides even heat, but a blow dryer on a low heat setting can also work if used carefully.
Remember, healthy locs are created through good technique and consistent care, not by using dozens of products. Starting with these basic tools and keeping your routine simple will make your loc journey much easier and help lay the foundation for strong, healthy locs.
How to Start Locs on Natural Hair Step by Step
Starting locs is more than twisting your hair and waiting for it to lock. Taking your time and following the right steps will help create neat, healthy locs that mature beautifully. Whether you’re starting your locs at home or preparing for a salon appointment, these steps will help you begin your loc journey with confidence.
Step 1: Wash and Clarify Your Hair
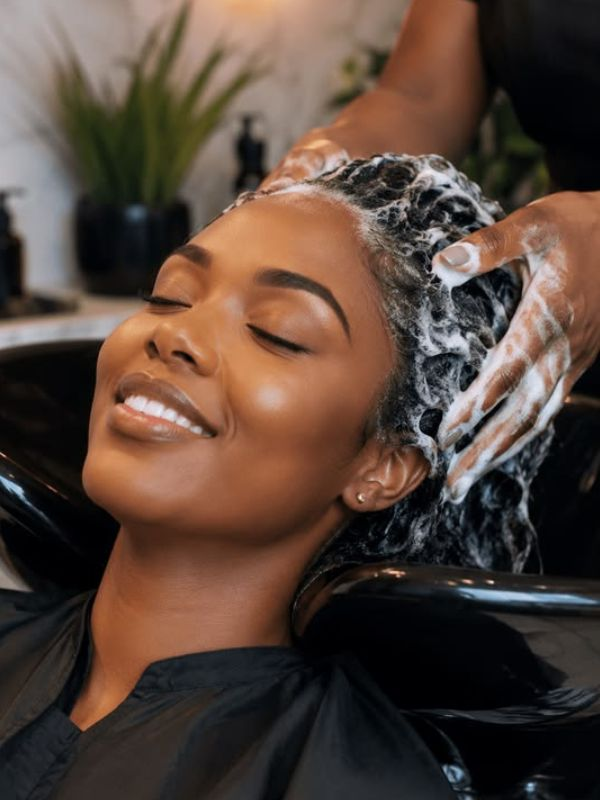
Healthy starter locs begin with a clean scalp and clean hair.
Before installing your locs
- Wash your hair with a clarifying or residue-free shampoo.
- Remove dirt, oil, and product buildup.
- Rinse thoroughly.
- Avoid applying heavy creams or butters afterwards.
Starting with clean hair helps your locs lock more effectively and reduces buildup from the beginning.
Step 2: Moisturise and Stretch Your Hair
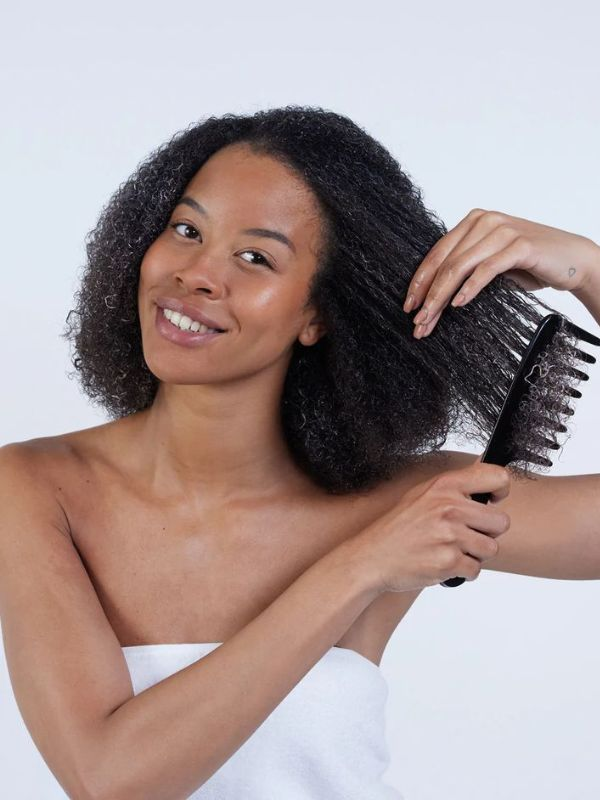
After washing, lightly moisturise your hair with water or a lightweight leave-in conditioner if needed.
Depending on your chosen starter method, you may also stretch your hair by
- Air drying in sections.
- Braiding your hair overnight.
- Using a blow dryer on a low heat setting.
Stretching can make sectioning easier, especially if you have thick or tightly coiled hair.
Step 3: Section Your Hair Evenly
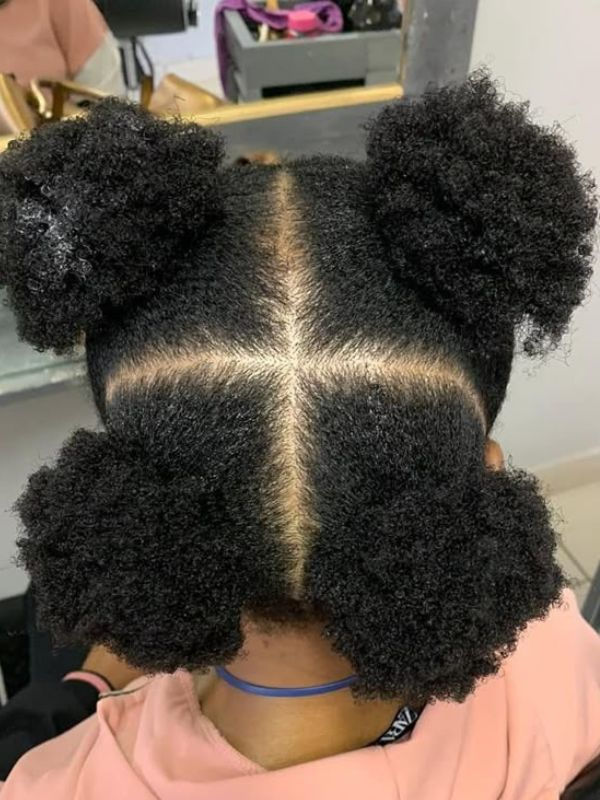
Neat sections are the foundation of beautiful mature locs.
Take your time to
- Decide on the size of your locs.
- Create even sections using a rat-tail comb.
- Secure each section with clips.
- Double-check that the parts are consistent.
Remember, your starter sections will determine the size and appearance of your mature locs.
Step 4: Choose Your Starter Loc Method
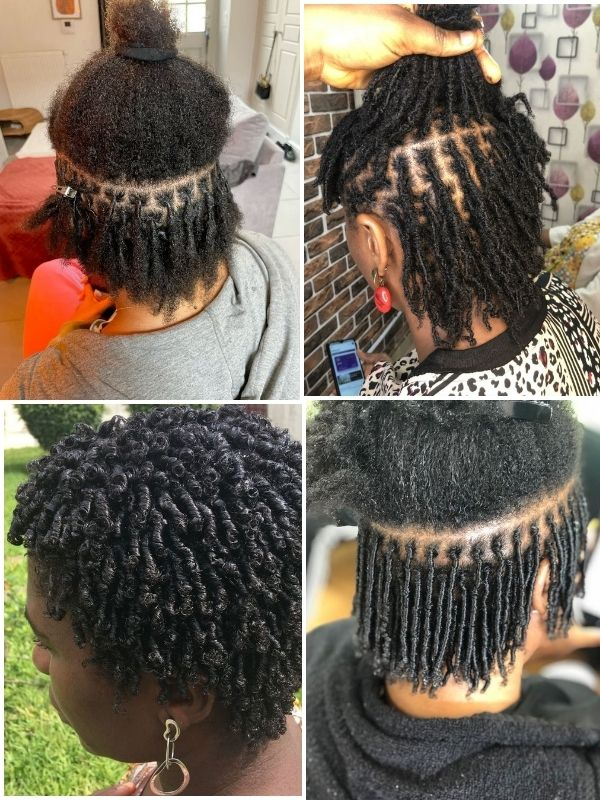
Now it’s time to decide how you want to start your locs.
Popular methods include
- Two-strand twists for beginners and thicker locs.
- Comb coils for short natural hair.
- Finger coils for defined coils.
- Braids for hair that unravels easily.
- Interlocking for active lifestyles.
- Crochet or instant locs for an immediate mature look.
Choose the method that best suits your hair texture, lifestyle, and maintenance preferences.
Step 5: Create Each Starter Loc
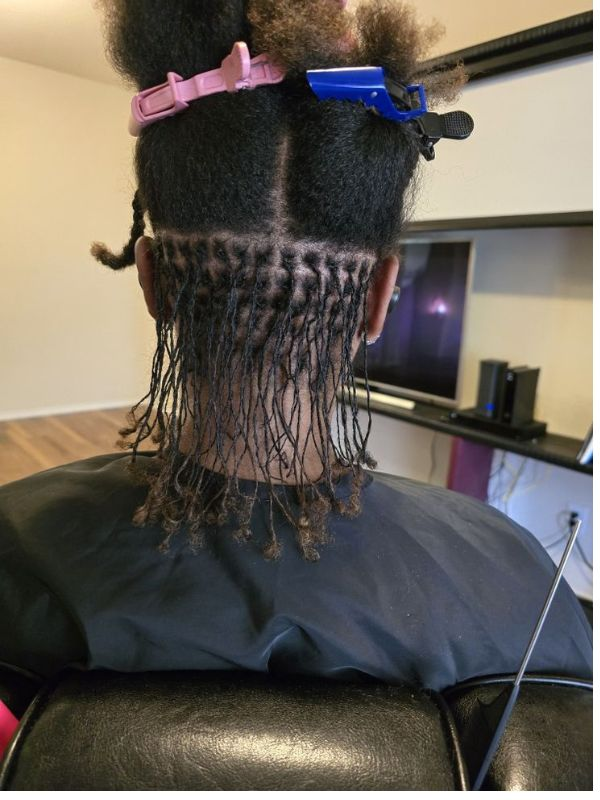
Work through your hair one section at a time.
As you create each loc
- Keep the sections even.
- Avoid twisting too tightly.
- Apply only a small amount of lightweight gel if needed.
- Check that every loc is secure before moving to the next section.
Neat installation now will make maintenance easier later.
Step 6: Dry Your Hair Properly
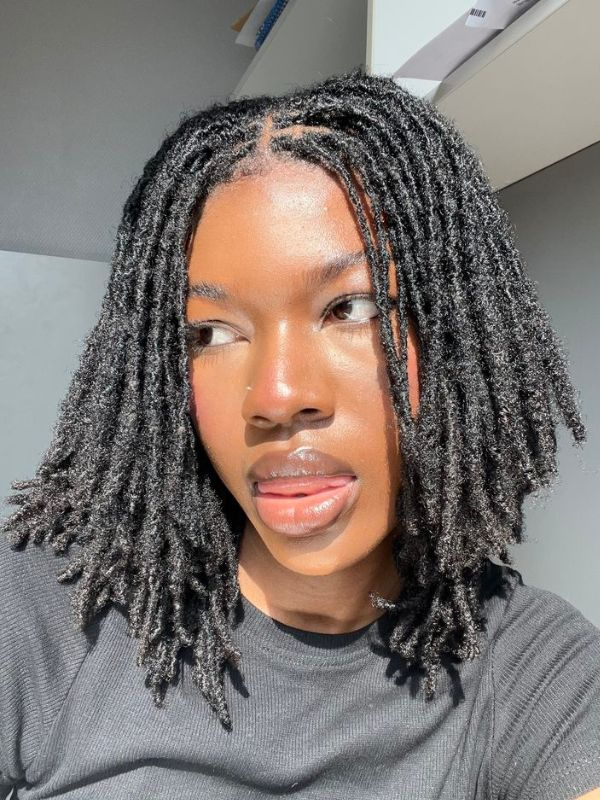
After installing your starter locs, make sure they dry completely.
You can
- Sit under a hooded dryer.
- Allow your hair to air dry if you have enough time.
- Use a blow dryer on a low heat setting if necessary.
Avoid going to bed with damp locs, as trapped moisture can cause unpleasant odours or mildew.
Step 7 Protect Your Starter Locs Overnight
Your loc care routine starts on the very first night.
Before going to bed
- Wear a satin or silk bonnet.
- Or sleep on a satin pillowcase.
- Avoid rough cotton fabrics that create friction.
- Keep your locs loose and comfortable.
Protecting your locs while you sleep helps reduce frizz, retain moisture, and prevent unnecessary unravelling.
Starting locs on natural hair is a journey, not a race. Focus on creating a strong foundation, caring for your scalp, and being patient with the process. With proper maintenance and consistency, your starter locs will gradually transform into healthy, mature locs you’ll be proud of.
Best Methods to Start Locs on Natural Hair
There isn’t one starter loc method that’s perfect for everyone. As a loctician, one of the first things I consider before recommending a method is the client’s hair texture, lifestyle, desired loc size, and maintenance preferences. The best method for you is the one that fits your hair and the look you want to achieve.
Here are the most popular ways to start locs on natural hair.
1. Two Strand Twists
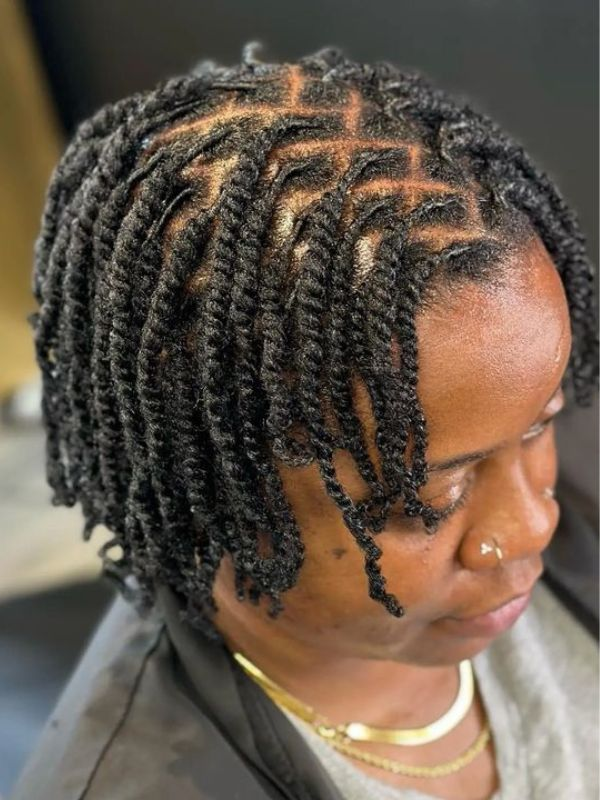
Two-strand twists are one of the most popular starter loc methods, especially for beginners. Two sections of hair are twisted around each other to form each starter loc.
Best for
- Medium to long natural hair
- Type 3 and Type 4 hair
- Medium or thick locs
Pros
- Easy to install
- Comfortable to wear
- Creates fuller-looking locs
- Beginner-friendly
Cons
- Can unravel if not maintained properly
- Takes time to mature
2. Comb Coils
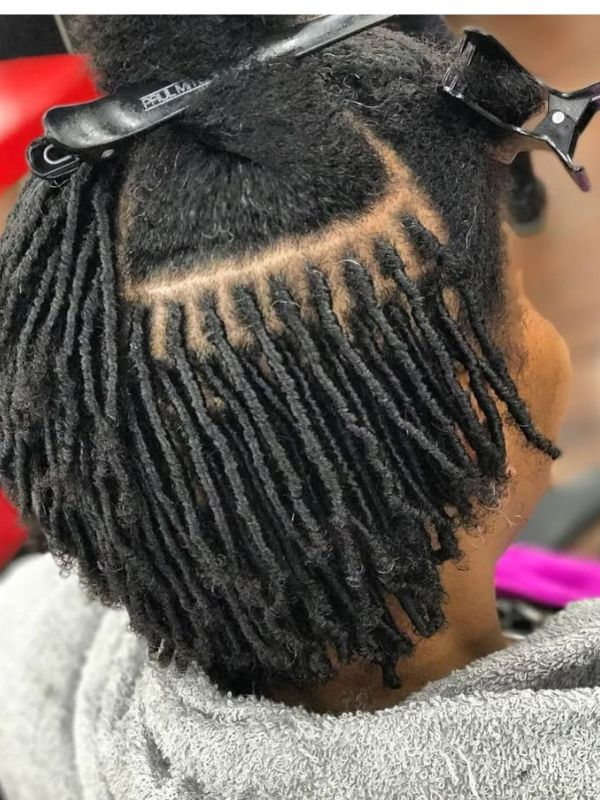
Comb coils are created by wrapping small sections of hair around a comb. This method is a favourite for people with short, tightly coiled natural hair.
Best for
- Short natural hair
- 4A, 4B, and 4C hair
- Small to medium locs
Pros
- Creates neat sections
- Great for shorter hair
- Produces uniform locs
Cons
- Can unravel after washing
- Requires gentle maintenance
3. Finger Coils
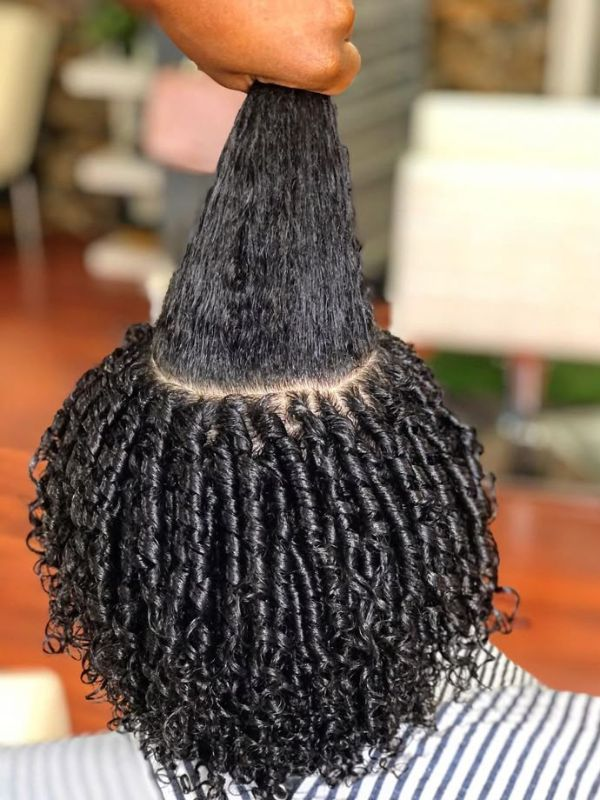
Finger coils are made by twisting each section of hair around your finger until it forms a coil.
Best for
- Short to medium-length natural hair
- Defined curl patterns
Pros
- Simple DIY method
- Creates neat starter locs
- No special tools required
Cons
- May unravel easily on looser textures
- Can take time to install
4. Braids
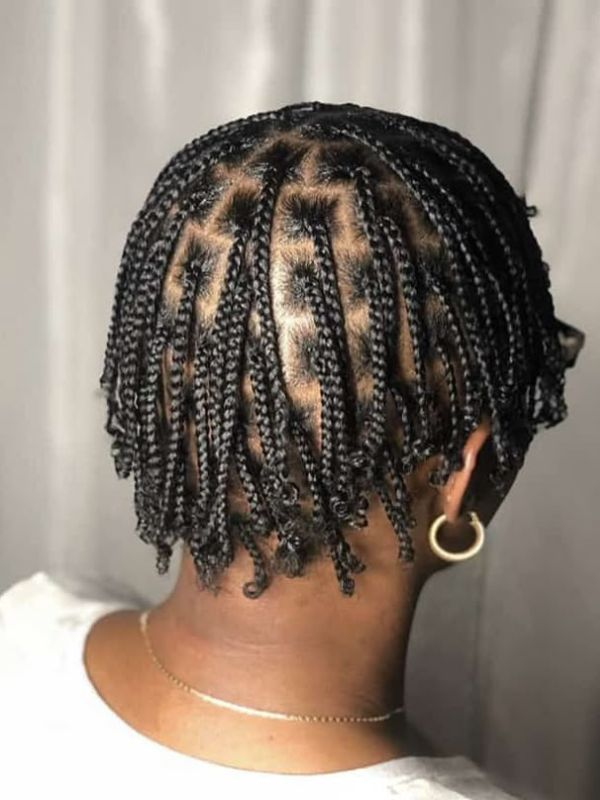
Starter locs can also begin with individual braids, making them a good option for hair that slips or unravels easily.
Best for
- Softer curl patterns
- Active lifestyles
- Medium to long hair
Pros
- Very secure
- Less likely to unravel
- Easy to maintain
Cons
- Braid pattern may remain visible for several months
- Takes longer to develop a fully rounded loc
5. Interlocking
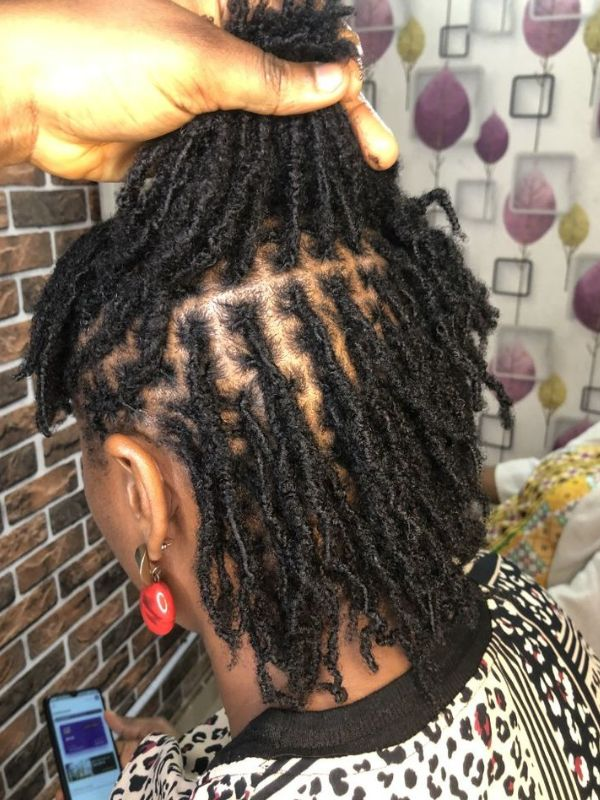
Interlocking involves pulling the end of the loc through the root to tighten the new growth without twisting.
Best for
- Active people
- Frequent swimmers
- Fine hair
- People who wash their hair often
Pros
- Very secure
- Resists unraveling
- Longer-lasting maintenance
Cons
- Requires proper technique
- Best done by an experienced loctician
6. Instant Locs
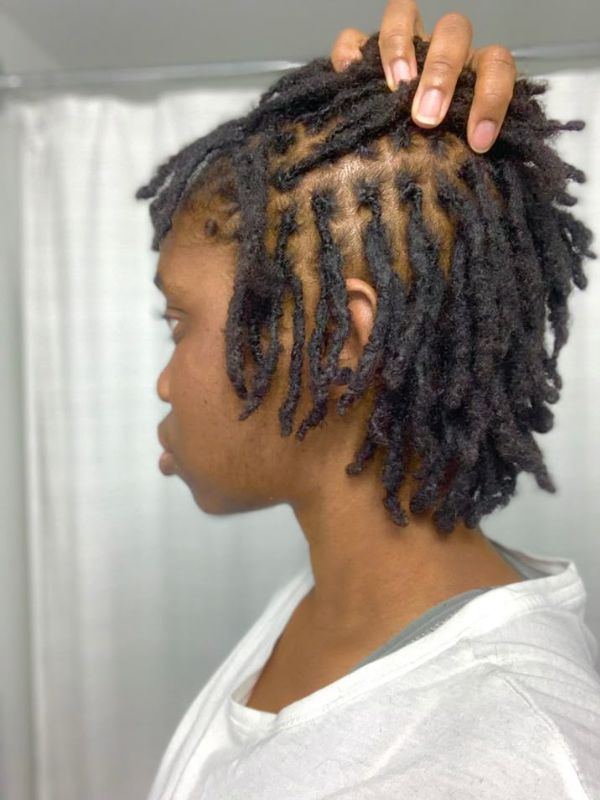
Instant locs use a crochet tool to create the appearance of mature locs immediately, rather than waiting months for the locking process to take effect.
Best for
- People who want an instant mature look
- Medium to long natural hair
Pros
- Immediate results
- Less unraveling
- Can be styled sooner
Cons
- Usually costs more
- Requires an experienced professional
7. Crochet Starter Locs
Crochet starter locs are created by using a small crochet hook to pull loose hairs into each loc, forming a compact starter loc from the beginning.
Best for
- People who want neat locs quickly
- Hair that unravels easily
Pros
- Neat appearance
- Stronger starter locs
- Minimal unraveling
Cons
- Time-consuming
- Should be done by a skilled loctician
Starter Loc Method Comparison
| Method | Best For | Difficulty | Maintenance | Locking Time |
|---|---|---|---|---|
| Two-strand twists | Beginners, medium to long hair | Easy | Moderate | Medium |
| Comb coils | Short 4A to 4C hair | Easy | High | Fast |
| Finger coils | Short natural hair | Easy | Moderate | Medium |
| Braids | Hair that unravels easily | Easy | Low | Slower |
| Interlocking | Active lifestyles and frequent washing | Moderate | Low | Medium |
| Instant locs | Immediate mature look | Professional | Low | Instant appearance |
| Crochet starter locs | Long-lasting neat results | Professional | Low | Instant appearance |
The best starter loc method depends on your hair goals, not what works for someone else. If you’re unsure which option to choose, consult an experienced loctician who can recommend the method that best suits your natural hair texture, lifestyle, and long-term loc goals.
See how to remove buildup in Locs
Starter Loc Care Routine
A good starter loc care routine is just as important as choosing the right starter method. As a loctician, I often remind my clients that healthy locs are built through consistent care during the first few months. How you treat your starter locs now will influence how they mature later.
The good news is that caring for starter locs doesn’t have to be complicated. A simple routine focused on cleanliness, moisture, and gentle handling is usually all you need.
1. When to Wash Starter Locs
One of the biggest myths about starter locs is that you shouldn’t wash them. In reality, a clean scalp is essential for healthy hair growth.
To wash your starter locs safely.
- Use a residue-free shampoo.
- Gently massage your scalp with your fingertips.
- Avoid scrubbing the locs aggressively.
- Rinse thoroughly to remove all Shampoo.
- Dry your locs completely after washing.
If you’re worried about unravelling, ask your loc tician when it’s best to schedule your first wash, based on your hair type and starter method.
2. How to Moisturise Starter Locs
Starter locs need moisture to stay healthy, but too much product can cause buildup.
Keep your routine simple by
- Lightly misting your locs with water when they feel dry.
- Using a lightweight loc spray if needed.
- Applying a small amount of lightweight oil to seal in moisture.
- Avoiding heavy creams, waxes, and thick butters.
Your locs should feel hydrated, not greasy.
3. Sleeping With Starter Locs
Protecting your locs while you sleep helps reduce frizz and prevents unnecessary unravelling.
Before bed
- Wear a satin or silk bonnet.
- Or sleep on a satin pillowcase.
- Tie longer locs loosely if necessary.
- Never go to bed with soaking wet locs.
This simple habit helps your starter locs stay neat for longer.
4. How Often to Retwist
Retwisting too often can weaken your roots, while waiting too long may make your locs harder to maintain.
A healthy approach is to
- Retwist only when there is enough new growth.
- Avoid tight retwists that cause pain.
- Let your loctician determine the best schedule for your hair.
- Focus on healthy locs rather than perfectly neat roots.
Remember, a little frizz is a normal part of the loc journey.
5. Products to Avoid
Using the wrong products is one of the quickest ways to create buildup and slow your loc journey.
Avoid products such as
- Heavy waxes.
- Thick creams.
- Sticky gels that leave residue.
- Excessive oils.
- Products containing ingredients that coat the hair.
Choosing lightweight, residue-free products will help keep your starter locs clean and healthy.
The best starter loc care routine is simple and consistent. Keep your scalp clean, moisturise your locs without overloading them with products, protect them while you sleep, and avoid unnecessary manipulation. With patience and proper care, your starter locs will gradually develop into strong, healthy, and beautiful mature locs.
What to Expect During the Loc Journey
One of the biggest surprises for first-time loc wearers is how much their hair changes over time. Your locs won’t look the same from month to month, and that’s completely normal. As a loctician, I always remind my clients that every stage has a purpose. The frizz, swelling, and budding are all signs that your hair is gradually locking.
Understanding what to expect can help you enjoy the process rather than worry that something is wrong.
1. Budding Stage
The budding stage is when your hair starts forming small, puffy bumps along the length of each loc. This is one of the first signs that your hair is beginning to lock.
During this stage, you may notice
- Small bumps forming inside your locs.
- Hair becoming thicker in some areas.
- More frizz than before.
- Locs starting to hold their shape.
Avoid pulling the buds apart or trying to smooth them down. They are a natural part of the locking process.
2. Frizzy Stage
Many people become discouraged when their starter locs become frizzy, but frizz is actually a good sign. Loose hairs are wrapping around each other to create stronger locs.
During this stage
- Your locs may look messy at times.
- Loose hairs will stick out.
- Some locs may unravel slightly after washing.
- Your hair may not look the same every day.
Resist the urge to retwist or constantly apply heavy products to control frizz.
3. Swelling Stage
As your locs mature, they often become thicker before tightening into their final shape.
You may notice
- Locs feeling softer and fuller.
- Some sections becoming wider than others.
- Hair shrinking as it locks.
- Your locs becoming more compact over time.
This stage is temporary and helps create strong, healthy mature locs.
4. Mature Loc Stage
The mature stage is when your locs are fully formed and much stronger than they were in the beginning.
At this point, your locs typically.
- Feel firm and compact.
- Hold their shape well.
- Require less frequent maintenance.
- Have less unravelling.
- Offer more styling options.
Reaching this stage takes time, and everyone’s journey is different. Some people see mature locs within a year, while others may take longer depending on their hair texture, starter method, and maintenance routine.
The most important thing to remember is that every loc journey is unique. Try not to compare your progress with others. Be patient, follow a consistent care routine, and trust the process. The time and care you invest during the early stages will be rewarded with healthy, beautiful locs that continue to improve as they mature.
Common Starter Loc Mistakes to Avoid
The first few months of your loc journey are exciting, but they can also be the easiest time to make mistakes. As a loctician, I’ve seen many beginners unintentionally slow down their progress by following bad advice or trying to make their starter locs look perfect. The truth is, healthy locs develop through patience and proper care, not constant manipulation.
Avoid these common mistakes to give your starter locs the best chance of maturing into strong, healthy locs.
1. Starting on Dirty Hair
Healthy locs begin with a clean scalp and clean hair. Installing starter locs on hair with product buildup can make it harder for your hair to lock properly.
Before starting your locs
- Wash your hair with a residue-free shampoo.
- Remove oils and heavy styling products.
- Make sure your scalp is clean and healthy.
A clean foundation helps your locs develop more naturally.
2. Retwisting Too Often
Many beginners believe frequent retwists will make their locs lock faster, but the opposite is often true.
Retwisting too often can
- Weaken your roots.
- Cause unnecessary tension.
- Lead to thinning over time.
- Increase the risk of breakage.
Allow enough new growth before each retwist, and don’t worry if your roots become a little frizzy.
3. Using Heavy Products
Applying too many products is one of the biggest mistakes new loc wearers make.
Avoid
- Heavy waxes.
- Thick creams.
- Excessive oils.
- Sticky gels that leave residue.
Instead, keep your routine simple with water, lightweight moisturisers, and residue-free products.
4. Constantly Touching Your Locs
It can be tempting to twist, pull, or inspect your new locs every day, especially when you’re excited about your journey.
However, constantly handling your locs can
- Cause frizz.
- Slow the locking process.
- Increase unravelling.
- Transfer dirt and oils from your hands.
The less you manipulate your starter locs, the better.
5. Comparing Your Journey to Others
Social media is full of beautiful loc transformations, but every head of hair is different.
Your loc journey will depend on
- Your hair texture.
- The starter loc method you choose.
- Your maintenance routine.
- Your hair’s natural locking speed.
Focus on your own progress instead of trying to match someone else’s timeline.
6- Washing Too Aggressively
Some beginners scrub their starter locs too hard during wash day, causing unnecessary unravelling.
Instead
- Gently massage your scalp with your fingertips.
- Let the shampoo run through your locs.
- Rinse thoroughly.
- Dry your locs completely after washing.
Gentle washing keeps your scalp healthy while protecting your starter locs.
Remember, the goal isn’t to have perfect-looking starter locs. It’s to create healthy locs that will mature beautifully over time. By avoiding these common mistakes and following a simple, consistent routine, you’ll set yourself up for a successful and enjoyable loc journey.
How Long Does It Take for Starter Locs to Lock?
One of the most common questions I hear as a loctician is, “How long will it take for my starter locs to lock?” The honest answer is that there isn’t a timeline that fits everyone. Some people notice their locs locking within a few months, while others may wait a year or longer. Your hair texture, starter loc method, and maintenance routine all play a role in how quickly your locs mature.
The most important thing is to be patient and trust the process. Healthy locs develop gradually, and rushing the process can cause unnecessary damage.
1. Factors That Affect Locking Time
Several factors determine how quickly your starter locs will mature.
These include
- Hair texture. Tightly coiled hair, such as 4B and 4C hair, usually locks faster than looser curl patterns.
- Starter loc method. Comb coils, two-strand twists, braids, interlocking, and instant locs all mature at different rates.
- Hair length. Both short and long hair can form locs, but the process may vary depending on the method used.
- Maintenance routine. Proper washing, moisturising, and gentle handling support healthy locking.
- Lifestyle. Frequent swimming, excessive manipulation, or using heavy products can affect how your locs develop.
2. Average Timeline
Although everyone’s journey is unique, here’s a general timeline you can expect.
- 0 to 3 months: Starter locs begin to settle. You may notice frizz, unravelling, and shrinkage.
- 3 to 6 months: Budding usually begins, and your locs start becoming firmer.
- 6 to 12 months: Many locs become more defined and continue tightening.
- 12 to 18 months: Most people have well-formed, mature locs, although some hair types may take longer.
Remember, these are general estimates. Your journey may be shorter or longer depending on your hair.
3. Signs Your Locs Are Maturing Properly
Instead of focusing only on the timeline, look for signs that your locs are progressing.
Healthy starter locs often show these changes.
- They become firmer and hold their shape better.
- Buds or small knots form inside the locs.
- Frizz gradually blends into the loc.
- The locs feel more compact and less likely to unravel.
- They become easier to style as they mature.
Try not to compare your progress with someone else’s. Two people can start their loc journey on the same day and have completely different results. The best way to achieve healthy, mature locs is to follow a consistent care routine, avoid over-manipulation, and give your hair the time it needs to lock naturally.
Can You Start Locs Yourself, or Should You Visit a Loctician?
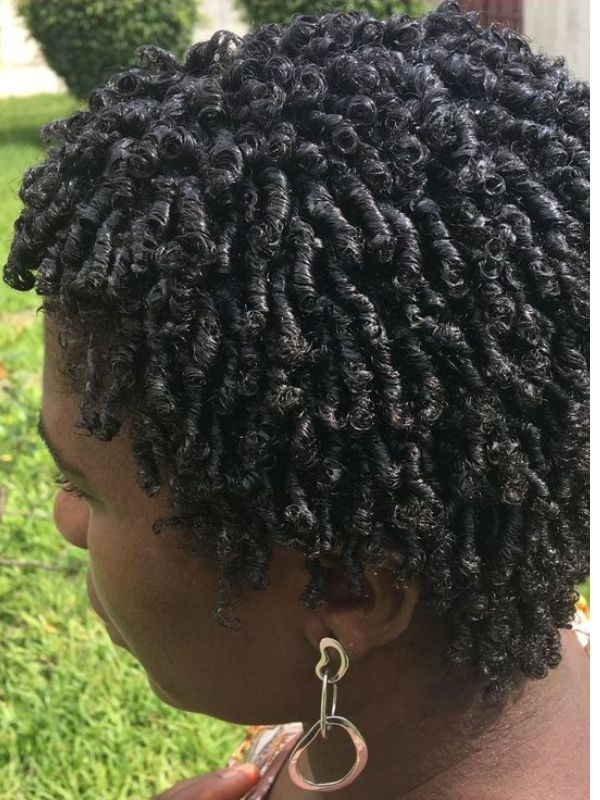
If you’re thinking about starting locs, you may be wondering whether you should do them yourself or book an appointment with a loctician. The good news is that both options can work. The best choice depends on your experience, budget, hair type, and the results you want.
As a loctician, I’ve met clients who successfully started their locs at home and others who were glad they trusted a professional from the beginning. Understanding the pros and cons of each option will help you make the right decision.
Benefits of DIY Starter Locs
Starting your locs yourself can be a rewarding experience, especially if you enjoy doing your own hair.
Some advantages include
- It costs less than visiting a salon.
- You can work at your own pace.
- You have complete control over your loc size and parting.
- You learn more about your hair and how to care for it.
- It’s convenient because you can start whenever you’re ready.
DIY starter locs work best if you’re comfortable sectioning hair evenly and following the correct techniques.
Benefits of Visiting a Professional Loctician
A professional loctician has the training and experience to build a strong foundation for your loc journey.
A loctician can help you
- Choose the best starter loc method for your hair texture.
- Create clean, even sections.
- Recommend the right loc size for your goals.
- Answer your questions and explain what to expect.
- Develop a maintenance routine that suits your hair.
Starting with a professional can give you extra confidence, especially if it’s your first set of locs.
Which Option Is Best for Beginners?
If you’ve never installed locs before, visiting a loctician is usually the better choice. A professional can help you avoid common mistakes, such as uneven sections, overly tight twists, or choosing the wrong starter method for your hair.
However, if you’ve done plenty of research, have experience styling natural hair, and feel confident in your skills, starting your own locs at home can also be a great option.
Whichever path you choose, remember that healthy locs are built through proper installation, patience, and consistent care. Whether your starter locs are created in a salon or at home, following a good maintenance routine will have the biggest impact on how your locs mature over time.
Common Questions First-Time Loc Wearers Ask
Starting your first set of locs comes with plenty of questions, and that is normal. Most beginners worry about the same things, from hair growth to washing and colouring. Here are answers to some of the most common questions first-time loc wearers ask.
1. Will My Locs Get Thicker?
Yes, in most cases, your locs will become thicker as they mature. During the first few months, your starter locs go through budding and swelling stages, making them appear fuller before settling into their final shape.
Keep in mind that the thickness of your mature locs also depends on
- The size of your starter sections.
- Your natural hair density.
- Your hair texture.
- How well you maintain your locs.
2. Can I Colour My Starter Locs?
It’s best to wait until your locs are fully mature before colouring them. Bleaching or colouring starter locs too early can weaken the hair, cause dryness, and increase the risk of breakage.
If you plan to colour your locs
- Wait until they are mature.
- Deeply moisturise your locs afterwards.
- Have the colour applied by an experienced professional whenever possible.
Healthy locs should always come before trendy colours.
3. Can I Exercise With Starter Locs?
Absolutely. You don’t have to stop working out because you have starter locs.
After exercising
- Allow your scalp to dry if you’ve been sweating.
- Clean your scalp as needed.
- Wear a sweatband if it helps keep sweat away from your face.
- Protect your locs with a satin bonnet while sleeping.
A healthy lifestyle supports healthy hair growth.
4. Can I Swim With Starter Locs?
Yes, but you’ll need to take a few extra precautions.
Before swimming
- Tie your locs back if they’re long enough.
- Wear a swim cap for added protection if possible.
After swimming
- Rinse your locs thoroughly with clean water.
- Wash your hair if you’ve been in chlorinated or salt water.
- Dry your locs completely to prevent mildew or unpleasant odours.
With proper care, swimming doesn’t have to interfere with your loc journey.
Frequently Asked Questions
1. What is the best way to start locs on natural hair?
The best way depends on your hair texture, lifestyle, and desired loc size. Two-strand twists, comb coils, finger coils, braids, and interlocking are all excellent methods. If you’re unsure, consult a loctician who can recommend the best option for your hair.
2. What is the easiest starter loc method for beginners?
Two-strand twists are often considered the easiest method because they are simple to install, easy to maintain, and suitable for most natural hair textures.
3. Can I start locs on 4C natural hair?
Yes. In fact, 4C hair is one of the best hair types for starting locs because its tight curl pattern helps the hair lock more easily. Popular methods for 4C hair include comb coils, two-strand twists, finger coils, and interlocking.
4. How much hair do you need to start locs?
Most loc practitioners recommend having 3 to 5 inches of natural hair for easier installation. However, locs can also be started on shorter hair using methods like comb coils or interlocking.
5. How often should I retwist starter locs?
Avoid retwisting too frequently. Most people wait until there is enough new growth before retwisting. Your ideal schedule depends on your hair type, starter method, and how quickly your hair grows.
6. Can I wash my starter locs?
Yes. Washing your starter locs is important for maintaining a clean, healthy scalp. Use a residue-free shampoo, wash gently, and dry your locs completely afterwards.
7. How do I keep starter locs from unravelling?
You can reduce unravelling by sleeping with a satin bonnet or pillowcase, avoiding excessive touching, following your loctician’s maintenance schedule, and choosing a starter method that works well with your hair texture.
8. Can I use regular hair products on starter locs?
It’s best to use lightweight, residue-free products designed for locs. Heavy creams, waxes, and thick oils can cause buildup and slow the locking process.
9. How long does it take for starter locs to mature?
For most people, starter locs mature within 12 to 18 months. However, the timeline varies depending on your hair texture, starter loc method, maintenance routine, and lifestyle.
10. Should I start my locs myself or go to a loctician?
If it’s your first time, visiting a loctician is usually the best option because they can create even sections and recommend the most suitable starter method. If you have experience with natural hair and feel confident, you can also start your locs at home.
Conclusion
Learning how to start locs on natural hair step by step is the first step toward building healthy, beautiful locs you’ll enjoy for years to come. While the process may seem overwhelming at first, choosing the right starter loc method, properly preparing your hair, and following a consistent care routine will set you up for success.
Remember that every loc journey is unique. Your hair may lock faster or slower than someone else’s, and that’s completely normal. Instead of focusing on having perfect-looking starter locs, focus on keeping your scalp healthy, protecting your hair, and trusting the process.
Whether you decide to start your locs at home or visit a professional loctician, patience is your greatest tool. With proper care and realistic expectations, your starter locs will gradually mature into strong, healthy locs that reflect your personal style.
Your loc journey is more than a hairstyle. It’s a commitment to caring for your natural hair, embracing every stage of the process, and enjoying the transformation along the way.