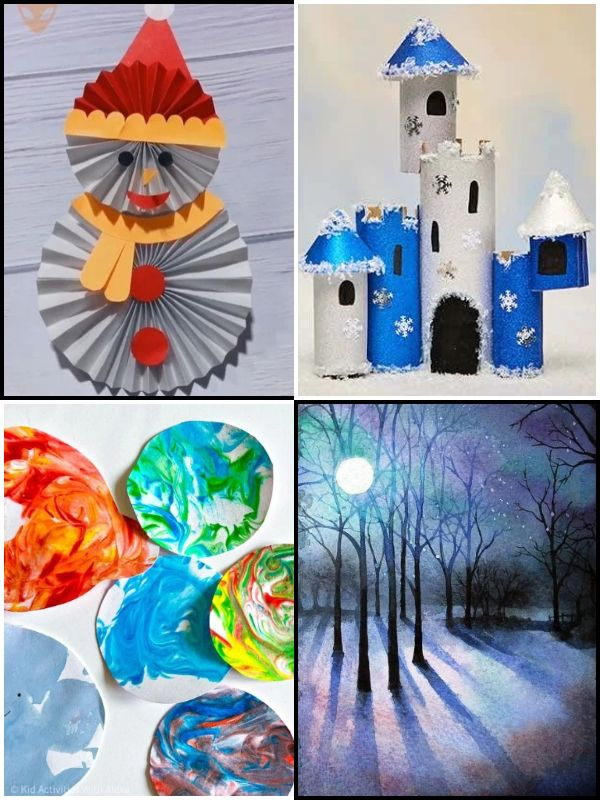
Winter crafts ideas for kids are a wonderful way to keep little hands busy while encouraging creativity, imagination, and practical skills. Whether children are spending time at home, enjoying a school holiday, or participating in classroom activities, winter-themed crafts offer plenty of opportunities to learn while having fun.
The best part is that children do not need expensive supplies to create beautiful projects. Everyday materials such as paper, cardboard, cotton wool, yarn, pinecones, and recycled containers can become exciting winter decorations and artwork.
In this collection, you will find 50 creative winter crafts for children of different ages. Each idea includes the materials needed, simple instructions, and a helpful tip to make the activity easier. From paper projects and recycled creations to winter animals, nature crafts, and painting activities, there is something for every little artist.
See 20 unique winter bucket list ideas to have a fun fill winter
Child Safety Tips for Winter Crafts
Before starting any winter craft activity, prepare a safe and comfortable workspace for children. Choose materials that suit their ages and supervise activities that involve small objects, sharp tools, or messy materials.
Here are some simple safety tips to follow.
- Choose age-appropriate materials. Use child-friendly scissors, washable paints, non-toxic glue, and materials that children can handle safely.
- Supervise the use of sharp tools. Adults should handle craft knives, needles, and other sharp objects. Help younger children cut cardboard or thick paper.
- Be careful with small craft materials. Items such as beads, buttons, bottle caps, and small decorative pieces can pose choking risks for young children. Keep them away from toddlers.
- Use non-toxic products. Check paint, glue, clay, and other craft supplies before use. Avoid materials with strong fumes or harmful chemicals.
- Take care with hot materials. Adults should handle hot glue guns, heated water, and other hot equipment. Children should not use them without close adult supervision.
- Keep the workspace clean. Clear away scraps, spills, and unused materials to prevent slips and accidental swallowing.
- Check natural materials before use. Clean twigs, pinecones, stones, and leaves. Avoid materials with sharp edges, mould, insects, or dirt.
- Encourage handwashing. Ask children to wash their hands after using paints, glue, clay, natural materials, or sensory craft supplies.
With these simple precautions in place, children can enjoy making their winter crafts while developing their creativity and practical skills.
See 30 winter photoshoot ideas you will love to recreate
Easy Paper Winter Crafts for Kids
Paper crafts are among the easiest winter activities for children because they require simple materials and encourage creativity. Children can practise cutting, folding, tearing, colouring, and arranging shapes while making attractive winter decorations and artwork. These projects are suitable for home activities, school lessons, and classroom craft sessions.
1. 3D Paper Snowflake Craft
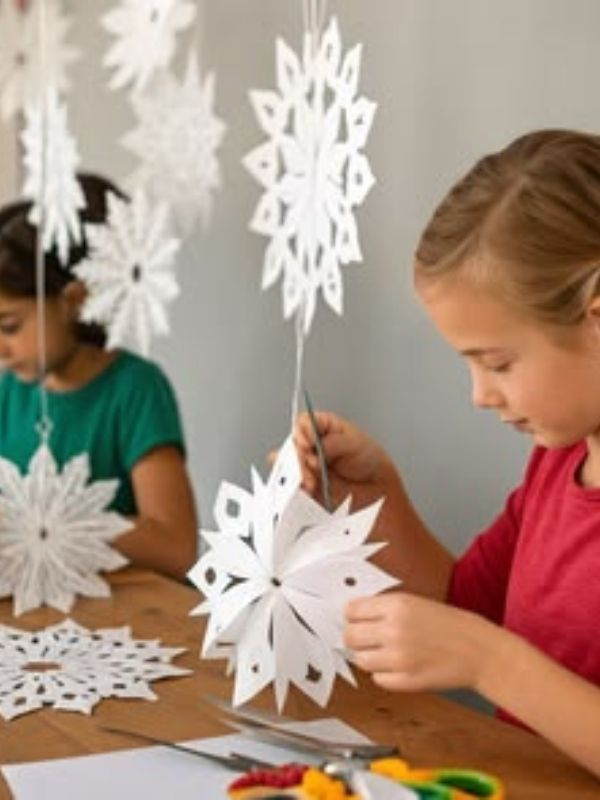
A 3D paper snowflake is a beautiful winter decoration that children can create using ordinary paper. Unlike flat snowflakes, this project combines several folded sections to produce a raised design.
Materials Needed
- White or blue paper
- Scissors
- Glue or stapler
- Pencil
- String
How to Make
- Cut six equal squares from your chosen paper.
- Fold each square diagonally into a triangle.
- Make several small cuts along the folded side without cutting through the opposite edge.
- Open each square carefully.
- Bring the inner cut sections together and secure them with glue.
- Repeat with the remaining squares.
- Join the six sections at their ends to form a complete snowflake.
- Attach a string for hanging.
Helpful Tip: Use different shades of blue and white paper to create a layered effect.
2. Paper Mitten Pair Craft
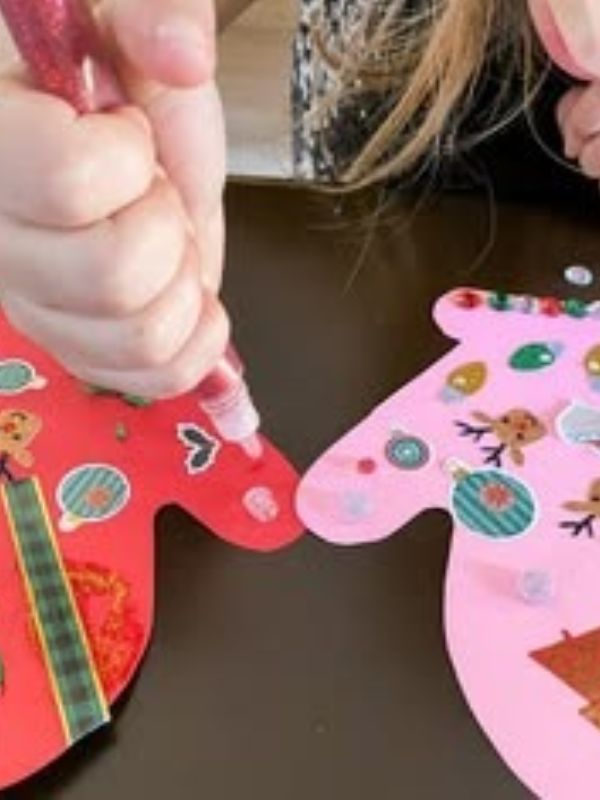
Paper mittens are a simple winter craft that allows children to experiment with colours, shapes, and patterns. They can create matching mittens or decorate each one differently.
Materials Needed
- Coloured construction paper
- Pencil
- Child-safe scissors
- Glue
- Crayons or markers
- Yarn or ribbon
How to Make
- Fold a sheet of construction paper in half.
- Draw a mitten shape against the folded edge.
- Cut around the outline and open the paper.
- Repeat with another colour if you want a layered design.
- Decorate the mittens with stripes, dots, hearts, or zigzag patterns.
- Connect the mittens with a strip of yarn or ribbon.
Helpful Tip: Encourage children to create different patterns on each mitten to make their designs more personal.
3. Winter Paper Landscape

A winter paper landscape allows children to create their own snowy scenery using layers of coloured paper. They can include mountains, trees, houses, and snowy hills to make a complete picture.
Materials Needed
- Blue construction paper
- White paper
- Brown and green paper
- Glue stick
- Scissors
- Pencil
- Cotton wool
How to Make
- Use blue construction paper as the background.
- Cut white paper into uneven shapes to represent snowy hills.
- Arrange the hills along the bottom and glue them down.
- Cut brown paper into tree trunks.
- Add triangular green or white shapes for the trees.
- Make small houses using coloured paper.
- Arrange and glue the trees and houses onto the landscape.
- Add cotton wool to represent clouds or falling snow.
Helpful Tip: Use different sizes of trees and houses to make the landscape more interesting.
4. Accordion Paper Snowman
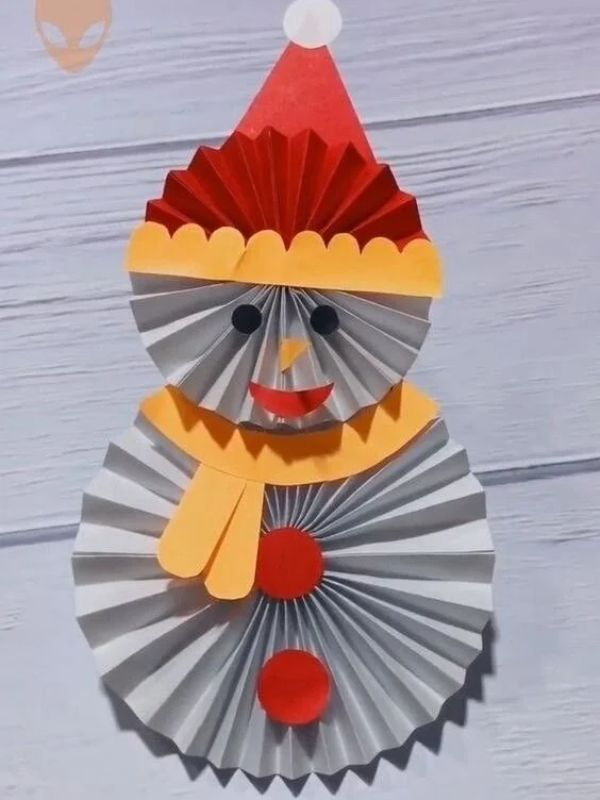
This craft uses folded paper to create a standing snowman with a raised, accordion-style body. It is a good activity for children who enjoy folding and assembling different shapes.
Materials Needed
- White paper
- Orange paper
- Black paper
- Coloured paper for the scarf
- Glue
- Scissors
- Black marker
How to Make
- Cut two or three strips of white paper.
- Fold each strip back and forth like a fan.
- Join the ends of each folded strip to create circular accordion shapes.
- Flatten and glue the circles onto a piece of cardboard.
- Arrange them vertically to form the snowman’s body.
- Cut a small orange triangle for the nose.
- Add black paper eyes and buttons.
- Finish with a paper hat and scarf.
Helpful Tip: Use thicker paper for the accordion sections so the snowman holds its shape.
5. Paper Icicle Garland
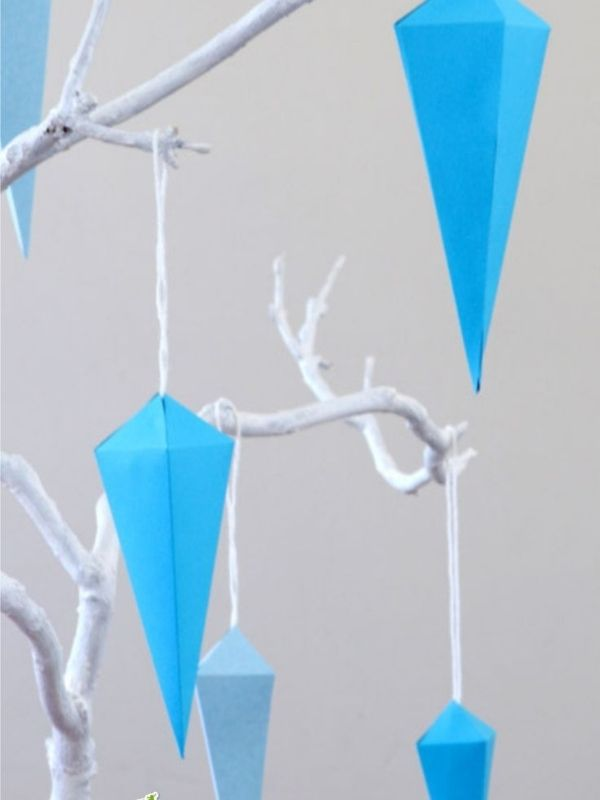
Paper icicle garlands are simple decorations that children can make to give a room or classroom a winter atmosphere. The pointed shapes resemble icicles hanging from rooftops.
Materials Needed
- White, silver, and light blue paper
- Scissors
- Pencil
- Glue
- String
- Tape
How to Make
- Draw long, pointed icicle shapes on white and blue paper.
- Cut out the shapes carefully.
- Make the icicles in different lengths.
- Arrange them along a piece of string.
- Glue or tape the top of each icicle to the string.
- Leave small spaces between the shapes.
- Hang the garland across a window or wall.
Helpful Tip: Vary the lengths of the icicles to create a more natural hanging effect.
6. Origami Winter Penguin
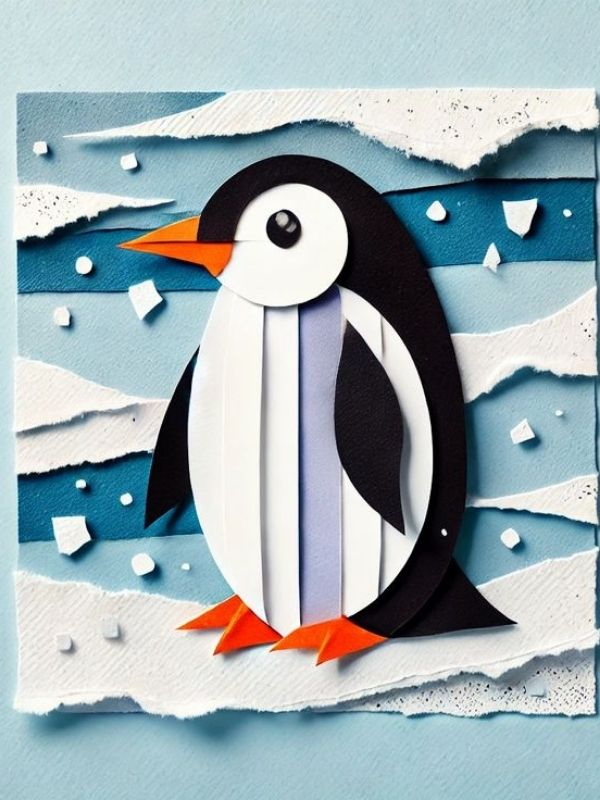
An origami penguin introduces children to basic paper-folding techniques. The finished penguin can become a decoration or a character in a winter story.
Materials Needed
- Black origami paper
- White paper
- Orange paper
- Glue
- Black marker
- Child-safe scissors
How to Make
- Place a square piece of black origami paper on a flat surface.
- Fold the paper diagonally to create a triangle, then unfold it.
- Fold the corners towards the centre to form the penguin’s body.
- Adjust the top and bottom folds to create the head and body.
- Cut a small white oval for the belly.
- Add two small eyes.
- Cut an orange triangle for the beak.
- Glue the facial details onto the penguin.
Helpful Tip: Use a simple origami template for younger children who are still learning paper-folding techniques.
7. Paper Cup Winter Village
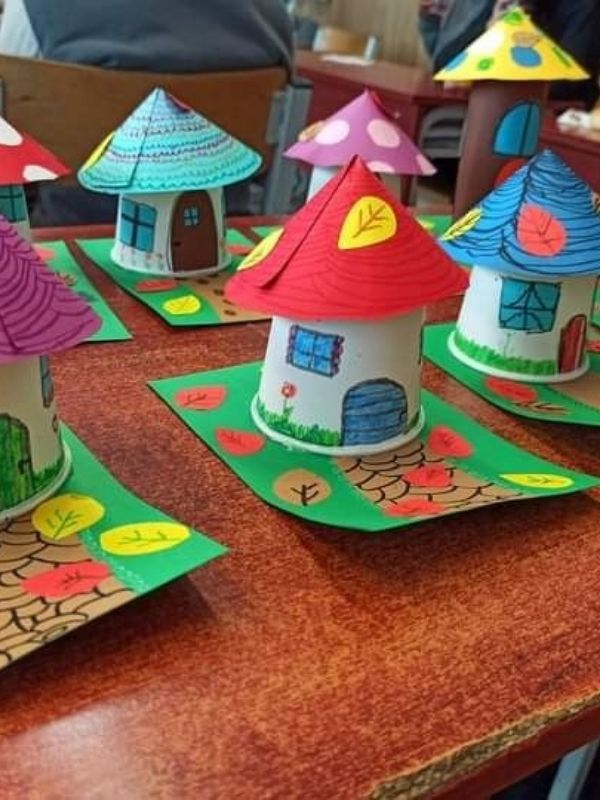
Children can create a miniature winter village using paper cups as small houses. They can design different buildings and arrange them into their own little community.
Materials Needed
- Small paper cups
- Coloured construction paper
- White paint
- Glue
- Scissors
- Markers
- Cotton wool
How to Make
- Turn a paper cup upside down.
- Paint it with a colour of your choice and allow it to dry.
- Cut a cone-shaped roof from construction paper.
- Glue the roof onto the bottom of the cup.
- Add windows and doors using small paper shapes.
- Place cotton wool around the base to represent snow.
- Repeat with more cups to create several houses.
- Arrange the houses together to form a winter village.
Helpful Tip: Use cups of different sizes to give the village a more realistic appearance.
8. Torn Paper Snowy Mountain Art
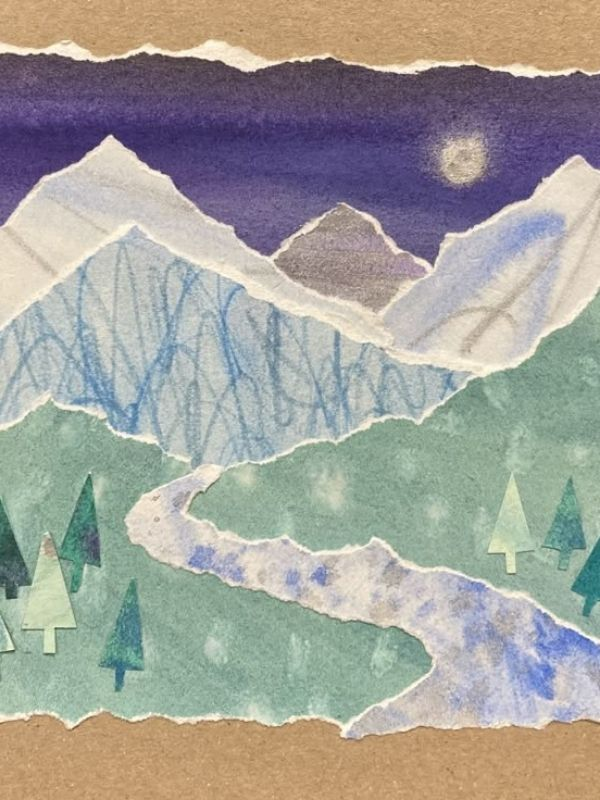
Torn paper art is a creative activity that allows children to make a winter landscape without cutting every shape with scissors. The uneven edges create interesting mountain and snow patterns.
Materials Needed
- Blue construction paper
- White paper
- Light grey paper
- Glue stick
- Cotton wool
- Crayons
How to Make
- Place a blue sheet of paper on a flat surface.
- Tear white paper into large, uneven pieces.
- Arrange the pieces along the bottom to create snowy hills.
- Tear grey paper into triangular shapes for mountains.
- Add white paper to the mountain tops.
- Glue all the pieces into place.
- Use crayons to add birds, trees, or clouds.
Helpful Tip: Let children tear the paper themselves to create different shapes and textures.
9. Paper Winter Bird Feeder Craft
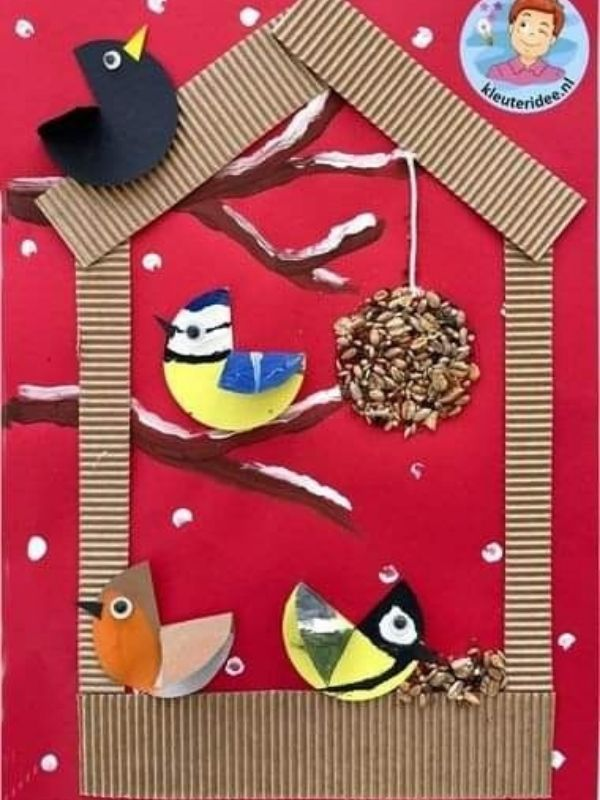
This activity introduces children to caring for birds during colder weather. They can decorate a feeder design before an adult helps prepare a suitable outdoor feeding station.
Materials Needed
- Thick cardboard
- Coloured paper
- Glue
- Child-safe scissors
- String
- Birdseed
- Suitable bird feeder
How to Make
- Draw a simple birdhouse or feeder design on cardboard.
- Cut out the shapes needed for the decoration.
- Cover the cardboard with coloured paper.
- Add a roof, windows, and other decorative details.
- Ask an adult to prepare a suitable outdoor bird feeder.
- Place appropriate birdseed inside the feeder.
- Position it somewhere safe where children can observe visiting birds.
Helpful Tip: Keep the decorative paper separate from the actual birdseed and feeder so it does not become wet or contaminate the food.
10. Winter Paper Lantern
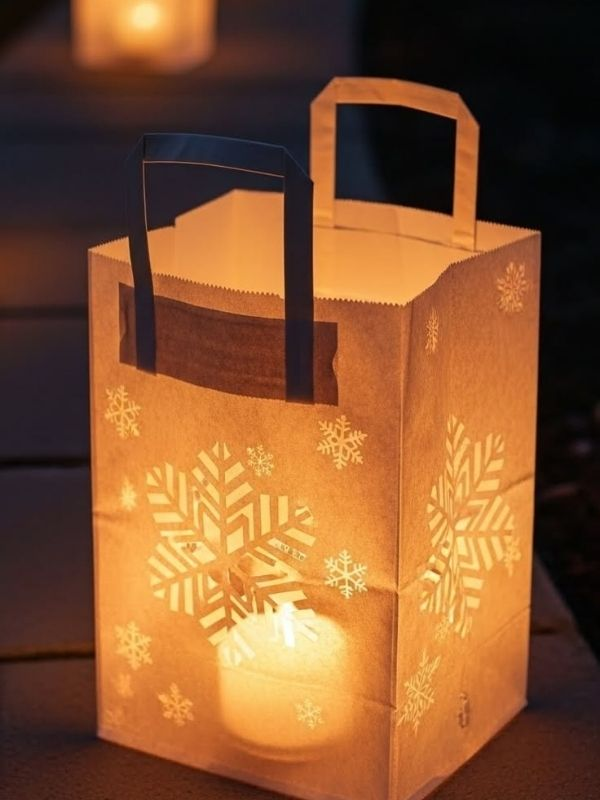
A winter paper lantern makes a lovely decoration for children’s rooms and classroom displays. Children can personalise their lanterns with snowflakes, stars, and other winter patterns.
Materials Needed
- Coloured construction paper
- Pencil
- Ruler
- Scissors
- Glue or tape
- Extra paper for decorations
- Battery-operated tea light
How to Make
- Fold a rectangular sheet of paper in half lengthwise.
- Draw several straight lines from the folded edge towards the open edge.
- Cut along the lines, leaving a small border uncut.
- Open the paper carefully.
- Roll it into a cylinder and secure the edges.
- Cut a narrow strip of paper for the handle.
- Attach the handle to the top.
- Decorate the lantern with paper snowflakes or stars.
- Place a battery-operated light inside.
Helpful Tip: Use dark blue paper with white decorations to create a winter night effect.
Recycled Winter Crafts for Kids
Recycled winter crafts help children understand how everyday materials can be reused instead of discarded. Cardboard, plastic bottles, jars, and old fabric can become interesting craft supplies. These projects also encourage problem-solving, resourcefulness, and environmental awareness while showing children that creativity does not depend on expensive materials.
1. Cardboard Tube Winter Village
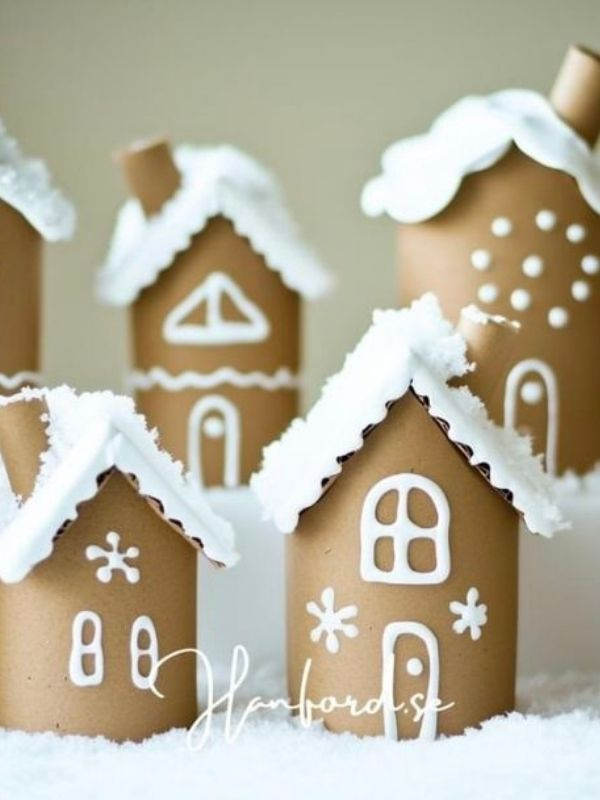
Empty cardboard tubes can become small winter houses with colourful roofs and snowy surroundings. Children can make several houses and arrange them into a miniature village.
Materials Needed
- Empty toilet paper or kitchen roll tubes
- Coloured paper
- White paint
- Glue
- Scissors
- Markers
- Cotton wool
How to Make
- Cut the cardboard tubes into different heights.
- Paint each tube with a chosen colour.
- Cut small rectangles for windows and doors.
- Glue the shapes onto the tubes.
- Make cone-shaped roofs using coloured paper.
- Attach the roofs to the tubes.
- Add cotton wool around the base to create a snowy setting.
- Arrange the houses together.
Helpful Tip: Use different tube heights to make the village look more interesting.
2. Egg Carton Penguin
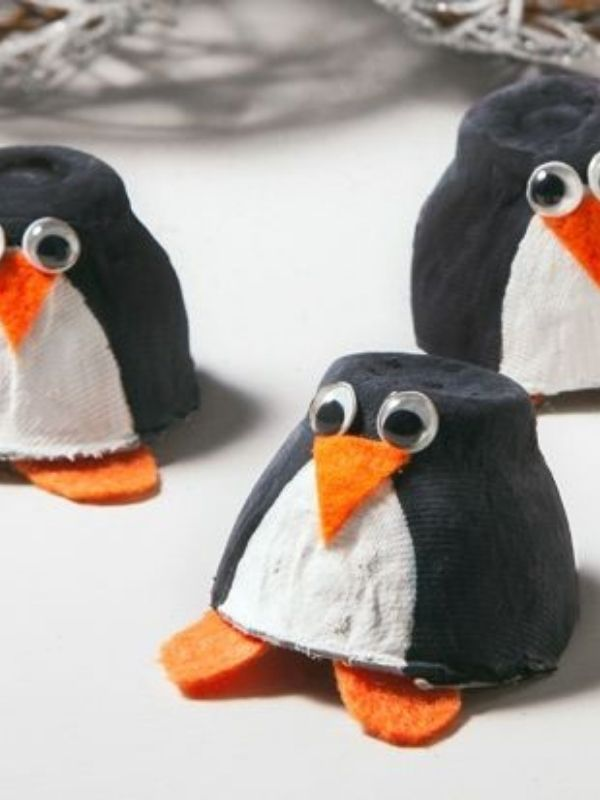
An egg carton penguin is a fun way to reuse cardboard packaging. Children can turn individual egg carton sections into small penguin characters.
Materials Needed
- Clean cardboard egg carton
- Black and white paint
- Orange construction paper
- Paintbrush
- Glue
- Scissors
- Googly eyes
How to Make
- Cut individual cups from the egg carton.
- Trim the edges so each section has a neat base.
- Paint each cup black and allow it to dry.
- Cut a small white oval for the penguin’s belly.
- Glue the white shape onto the front.
- Cut a small orange triangle for the beak.
- Add googly eyes and orange paper feet.
- Allow the glue to dry completely.
Helpful Tip: Make several penguins in different sizes to create a small penguin family.
3. Plastic Bottle Snowman
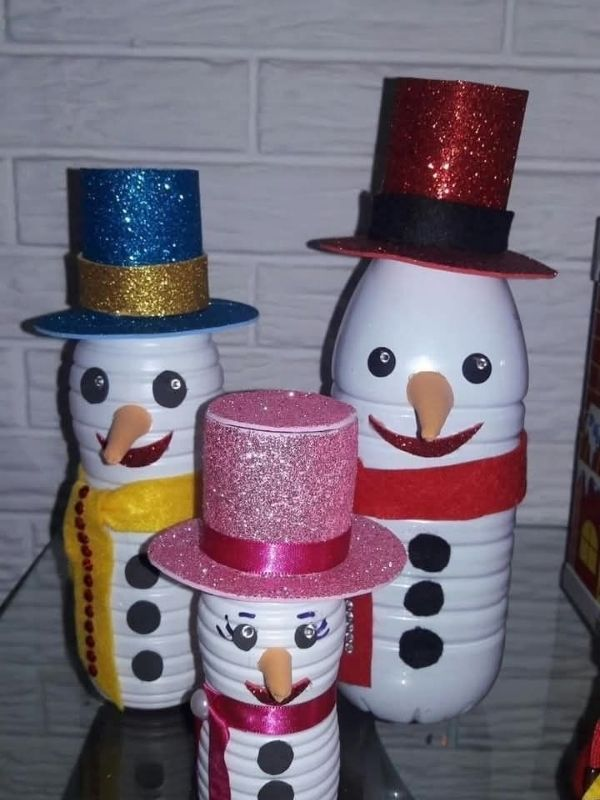
A plastic bottle can be transformed into a standing snowman with a little paint and creativity. This craft helps children explore how recycled containers can become decorative objects.
Materials Needed
- Clean, empty plastic bottle
- White paint
- Black and orange paper
- Fabric scraps
- Glue
- Paintbrush
- Markers
How to Make
- Remove the bottle label and wash the bottle.
- Dry it completely.
- Paint the outside white and allow it to dry.
- Cut small black circles for the eyes and buttons.
- Cut an orange triangle for the nose.
- Glue the facial details onto the bottle.
- Wrap a fabric strip around the neck to create a scarf.
- Add a paper hat to complete the snowman.
Helpful Tip: Choose a bottle with a wide, stable base so the snowman can stand without falling over.
4. Tin Can Winter Pencil Holder
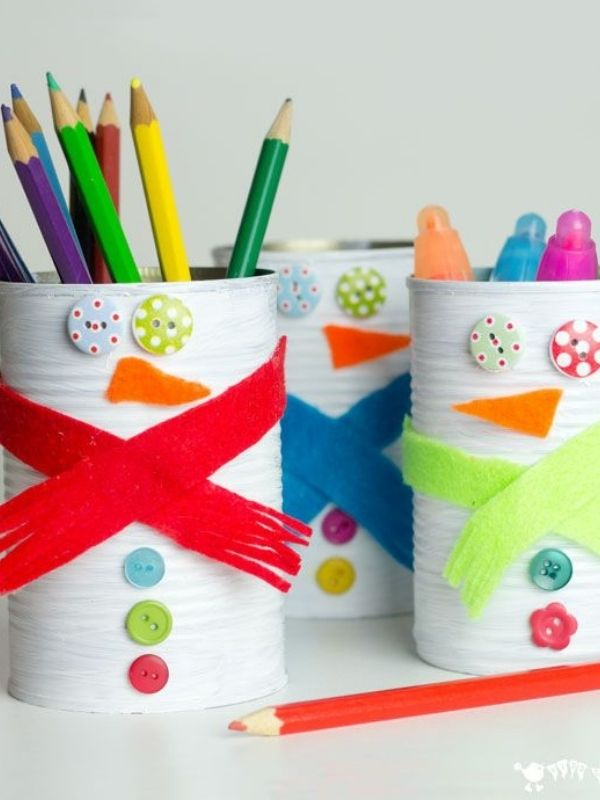
Children can turn a clean tin can into a useful pencil holder with a winter-inspired design. This craft combines decoration with an everyday practical purpose.
Materials Needed
- Clean tin can with no sharp edges
- Coloured paper
- Glue
- Cotton wool
- Markers
- Ribbon
- Scissors
How to Make
- Ask an adult to prepare the tin can by removing any sharp edges.
- Measure and cut coloured paper to fit around the can.
- Glue the paper around the outside.
- Draw winter patterns such as snowflakes, stars, or trees.
- Add cotton wool around the bottom or top edge.
- Tie a ribbon around the can.
- Allow everything to dry before placing pencils inside.
Helpful Tip: Use a plastic container instead of a tin can when working with very young children.
5. Cardboard Winter Castle
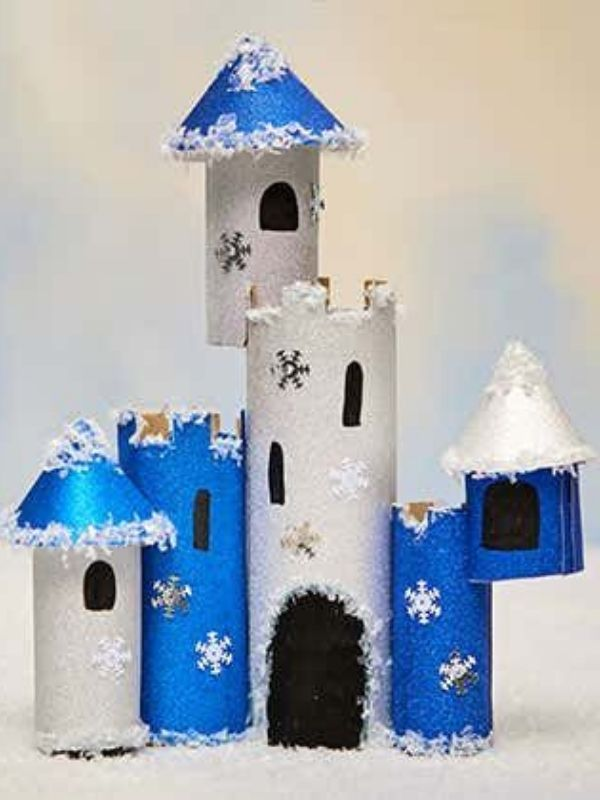
A cardboard winter castle gives children an opportunity to build a structure using their imagination. They can create towers, walls, windows, and snowy rooftops.
Materials Needed
- Small cardboard boxes
- Cardboard sheets
- White and blue paint
- Glue
- Child-safe scissors
- Paintbrushes
- Markers
How to Make
- Collect cardboard boxes of different sizes.
- Arrange the boxes to create the basic castle structure.
- Cut smaller cardboard pieces to form towers and battlements.
- Glue the pieces together.
- Paint the castle white or light blue.
- Add windows, doors, and other details.
- Paint the rooftops white to represent snow.
- Allow the structure to dry before displaying it.
Helpful Tip: Let children plan the castle layout before gluing the boxes together.
6. Bottle Cap Winter Mosaic
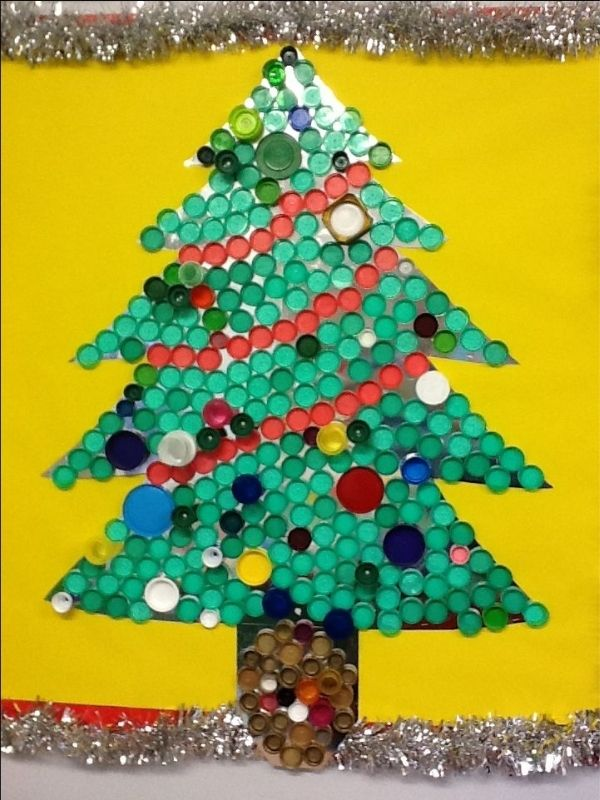
Bottle cap mosaics allow children to arrange small recycled objects into colourful winter pictures. They can create geometric snowflakes, trees, or other simple patterns.
Materials Needed
- Clean plastic bottle caps
- Thick cardboard
- Suitable craft glue
- Pencil
- Paint
- Paintbrush
How to Make
- Draw a simple winter design on cardboard.
- Arrange the bottle caps along the outline.
- Fill the inside of the design with more caps.
- Use different colours to create patterns.
- Glue each bottle cap onto the cardboard.
- Leave the artwork to dry completely.
- Display the finished mosaic.
Helpful Tip: Sort the bottle caps by colour before starting. This makes it easier for children to follow their designs.
7. Old Sock Winter Gnome
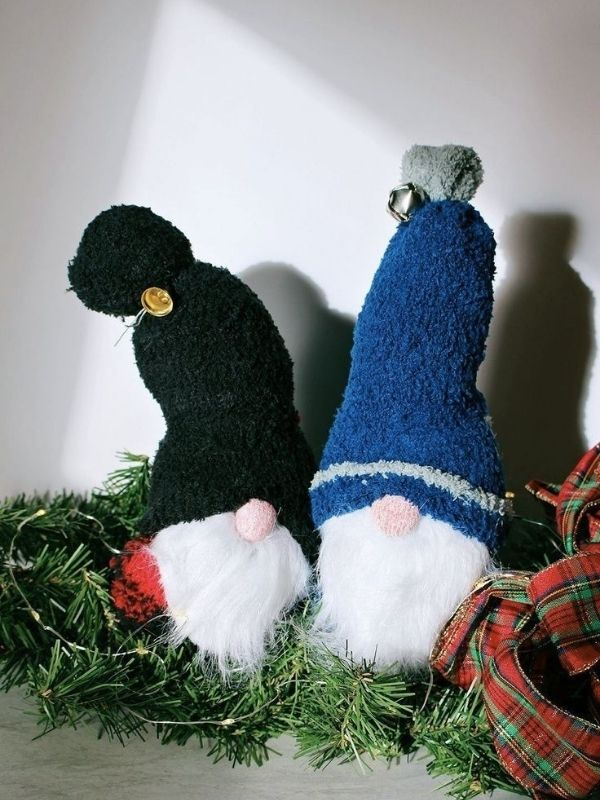
An old sock can become a cute winter gnome with a soft body, a pointed hat, and a decorative beard. This activity introduces children to simple fabric crafts.
Materials Needed
- Clean old sock
- A small amount of stuffing or fabric scraps
- Felt or coloured fabric
- Yarn or cotton wool
- Glue
- Scissors
How to Make
- Fill the sock with stuffing or clean fabric scraps.
- Tie the open end securely with string.
- Cut a piece of felt into a cone shape.
- Roll and glue the felt into a hat.
- Attach the hat to the top of the sock.
- Add yarn or cotton wool below the hat to create a beard.
- Attach a small, round piece of fabric as the nose.
- Allow the glue to dry.
Helpful Tip: Choose soft fabric in winter colours such as grey, white, red, and green.
8. Newspaper Winter Tree Sculpture
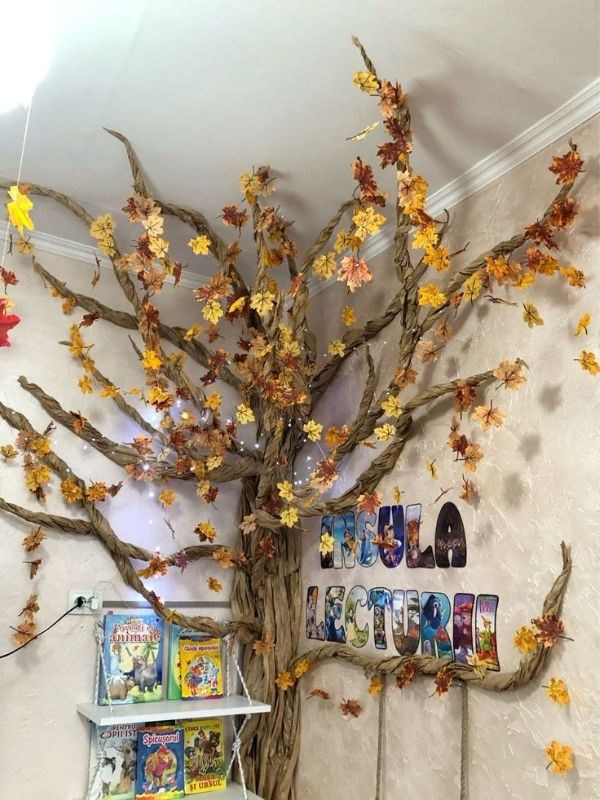
Old newspapers can be rolled and shaped into a small tree sculpture. This project gives children an opportunity to explore three-dimensional art.
Materials Needed
- Old newspapers
- Masking tape
- Cardboard base
- Glue
- Brown paint
- White paint
- Paintbrush
How to Make
- Roll several sheets of newspaper tightly to create the tree trunk.
- Secure the rolls with masking tape.
- Twist smaller newspaper strips to create branches.
- Attach the branches to the trunk using tape.
- Fix the tree to a cardboard base.
- Paint the trunk and branches brown.
- Add white paint to create a snowy effect.
- Leave the sculpture to dry.
Helpful Tip: Use several layers of newspaper for the trunk so the tree can support its branches.
9. Cardboard Tube Winter Telescope
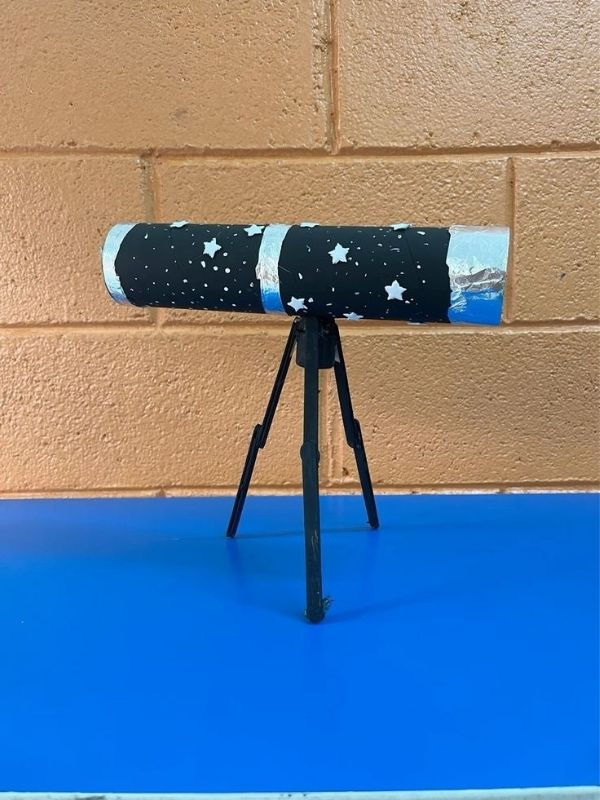
This pretend telescope is a simple recycled craft for children who enjoy imaginative play. They can decorate it and use it to pretend they are winter explorers searching for animals and snowy landscapes.
Materials Needed
- Empty cardboard tube
- Coloured paper
- Glue
- Scissors
- Markers
- Stickers
- Ribbon
How to Make
- Clean the cardboard tube and check that it has no rough edges.
- Cut coloured paper to fit around the tube.
- Glue the paper in place.
- Draw stars, snowflakes, or winter patterns around the tube.
- Add stickers for extra decoration.
- Attach a ribbon around one end if desired.
- Allow the decoration to dry before using the telescope for pretend play.
Helpful Tip: Give children a winter explorer challenge. Ask them to describe three things they imagine seeing through their telescope.
10. Jar Lid Winter Scene
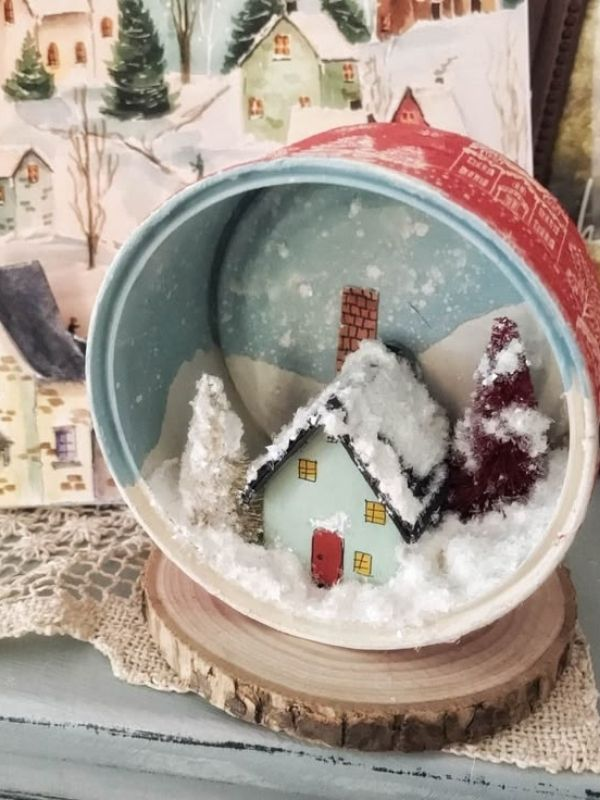
A jar lid can become the base for a small winter scene. Children can arrange miniature paper trees, houses, and snowy hills to create a decorative display.
Materials Needed
- Clean, wide jar lid
- Cardboard
- Coloured paper
- Cotton wool
- Glue
- Scissors
- Markers
How to Make
- Place the jar lid on cardboard and trace around it.
- Cut out the cardboard circle.
- Glue the circle inside the lid.
- Cut small trees and houses from coloured paper.
- Attach the shapes to the cardboard base.
- Add small pieces of cotton wool to represent snow.
- Draw extra details such as windows, pathways, or fences.
- Allow the scene to dry.
Helpful Tip: Keep the paper decorations small, so they fit neatly inside the lid.
Winter Animal Crafts for Kids
Winter animal crafts introduce children to creatures that live in cold regions. They can explore animal features such as fur, feathers, flippers, and long ears while practising different art techniques. These projects also create opportunities to discuss animal habitats and how animals survive in cold environments.
1. Moving Paper Polar Bear
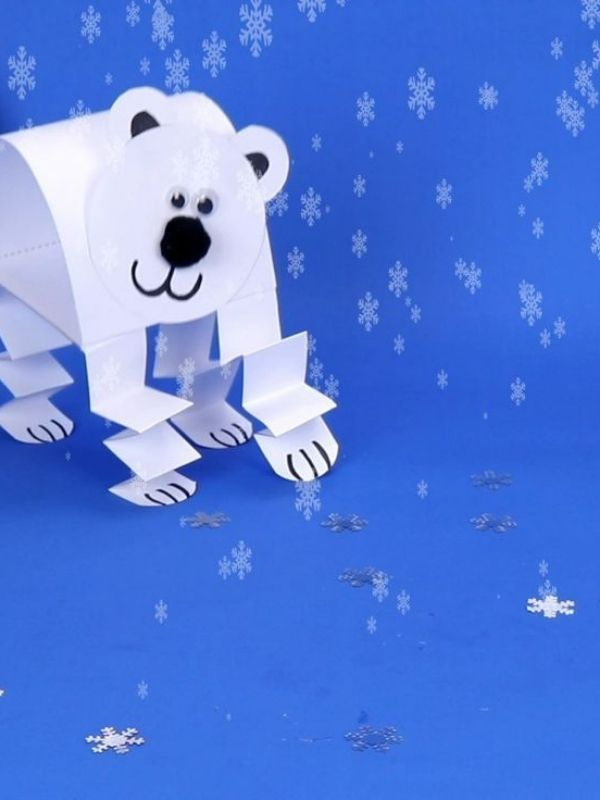
A moving paper polar bear is a fun craft that allows children to create an animal with movable arms and legs. It can also become a character for storytelling and pretend play.
Materials Needed
- White and black construction paper
- Pencil
- Scissors
- Paper fasteners
- Glue
- Black marker
How to Make
- Draw the polar bear’s head, body, arms, and legs on white paper.
- Cut out each section.
- Add the eyes, nose, and mouth using black paper or a marker.
- Position the arms and legs against the body.
- Make small holes where the body parts meet.
- Connect the pieces using paper fasteners.
- Move the arms and legs gently to test the joints.
Helpful Tip: Use thick paper or light cardboard to make the bear stronger and easier to handle.
2. Paper Bag Arctic Fox Puppet
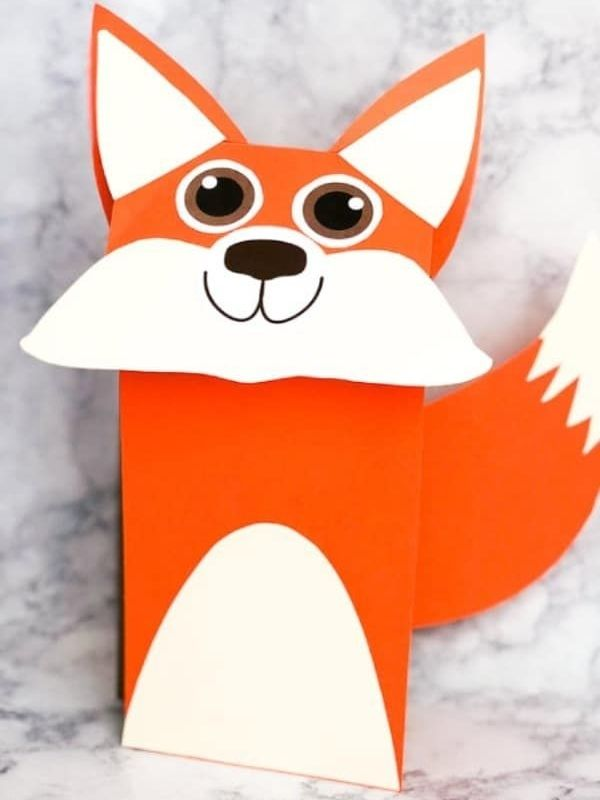
Children can turn an ordinary paper bag into an Arctic fox puppet. The finished character can be used for storytelling, classroom performances, or imaginative play.
Materials Needed
- White paper bag
- Orange, white, and black paper
- Glue
- Scissors
- Markers
- Googly eyes
How to Make
- Place the paper bag flat with the folded flap facing upwards.
- Cut two pointed ears from white or orange paper.
- Glue the ears to the top of the bag.
- Cut an oval shape for the fox’s face.
- Add triangular cheek shapes and a small black nose.
- Attach the eyes.
- Cut a bushy tail from paper and glue it to the back.
- Allow the puppet to dry before using it.
Helpful Tip: Ask children to give their fox a name and create a short winter adventure story.
3. Clay Arctic Seal
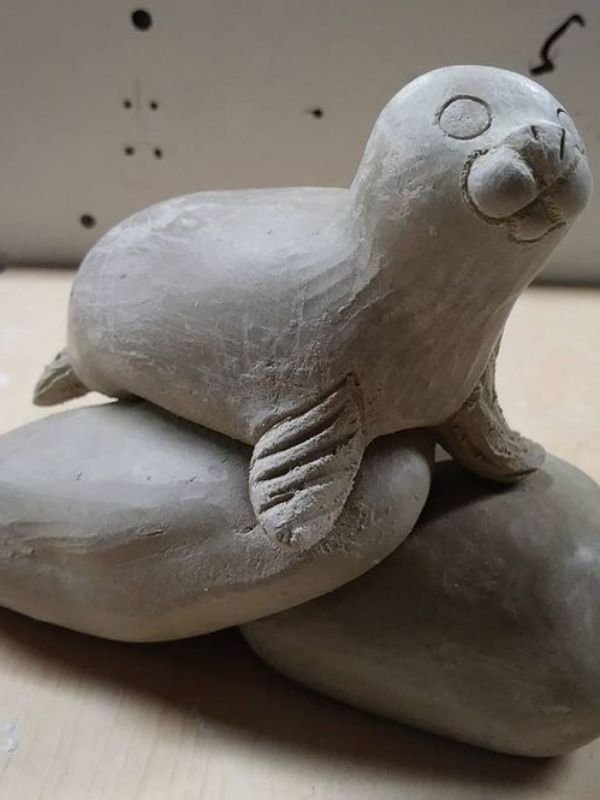
A clay seal is a simple modelling activity that helps children develop their hand strength and coordination. They can shape the seal’s rounded body and flippers before adding facial details.
Materials Needed
- Air-dry clay
- Modelling mat
- Plastic modelling tools
- Black and grey paint
- Paintbrush
- Small amount of water
How to Make
- Take a small piece of air-dry clay.
- Roll it into an oval shape for the seal’s body.
- Shape another small piece into a rounded head.
- Join the head and body carefully.
- Create two small flippers and attach them to the sides.
- Use a modelling tool to add the eyes, nose, and mouth.
- Leave the seal to dry according to the clay instructions.
- Paint it grey or brown when completely dry.
Helpful Tip: Keep a little water nearby to smooth rough areas before the clay dries.
4. Pinecone Snowy Owl
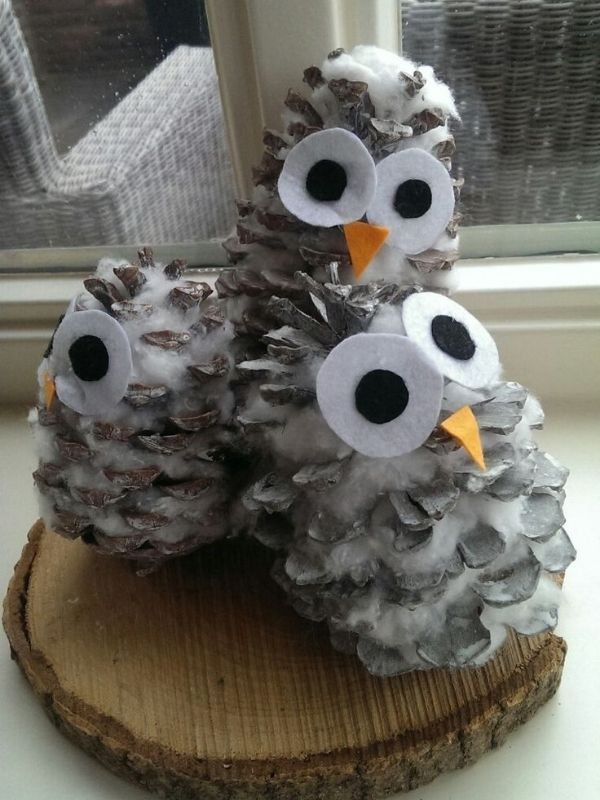
A pinecone can become the body of a small snowy owl. Children can use paper and cotton wool to add wings, eyes, and other features.
Materials Needed
- Clean, dry pinecone
- White cotton wool
- White and brown paper
- Googly eyes
- Glue
- Scissors
- Orange paper
How to Make
- Apply small amounts of glue to the pinecone.
- Attach cotton wool pieces between the scales.
- Cut two wing shapes from white or brown paper.
- Glue the wings to the sides.
- Cut a small orange triangle for the beak.
- Attach two large eyes near the top.
- Allow the owl to dry before displaying it.
Helpful Tip: Choose a pinecone with a wide base so the owl can stand upright.
5. Handprint Reindeer Craft
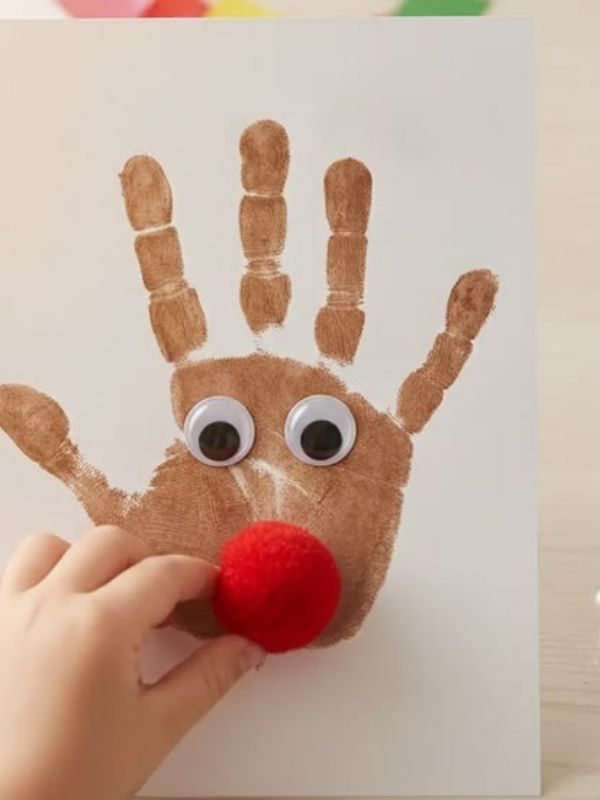
Handprint reindeer art turns children’s hand outlines into antlers. It is a simple activity that also creates a lovely keepsake for parents.
Materials Needed
- Brown construction paper
- Pencil
- Scissors
- Glue
- Googly eyes
- Red or black paper
- Markers
How to Make
- Place a child’s hand on brown paper.
- Trace around the hand and cut out the shape.
- Turn the handprint upside down so the fingers look like antlers.
- Cut a rounded face shape from brown paper.
- Glue the handprint behind the face.
- Add two eyes and a round nose.
- Draw the mouth and decorate the antlers.
Helpful Tip: Write the child’s name and date on the back to turn the craft into a memorable keepsake.
6. Paper Plate Walrus
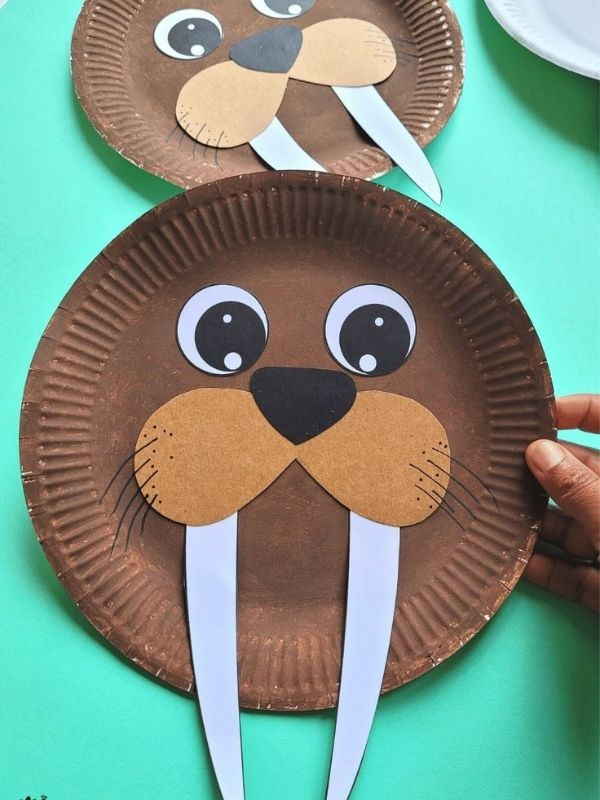
A paper plate walrus is a fun animal-face project that helps children explore shapes and facial features. Its large tusks and whiskers make the finished craft easy to recognise.
Materials Needed
- Paper plate
- Brown paint
- Paintbrush
- White paper
- Black paper
- Glue
- Scissors
- Googly eyes
How to Make
- Paint the paper plate brown and allow it to dry.
- Cut two long tusks from white paper.
- Cut several thin strips from black paper for the whiskers.
- Glue the tusks near the bottom of the plate.
- Attach the whiskers beside the tusks.
- Add two googly eyes.
- Cut a small brown oval for the nose and glue it in place.
Helpful Tip: Use a large paper plate if children want to create an oversized walrus face for a classroom display.
7. Yarn-Wrapped Winter Hedgehog
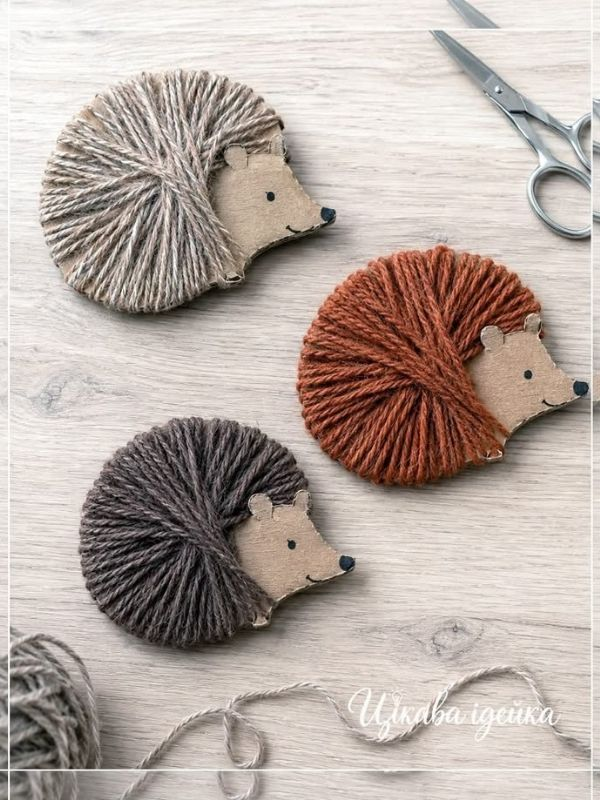
This hedgehog craft uses yarn to create a textured back that resembles the animal’s spines. Children can practise wrapping, threading, and arranging materials.
Materials Needed
- Brown cardboard
- Brown or grey yarn
- Pencil
- Scissors
- Glue
- Googly eye
- Black paper
How to Make
- Draw a hedgehog outline on cardboard.
- Cut out the shape.
- Leave the face area uncovered.
- Apply glue to the back section of the hedgehog.
- Wrap yarn around the glued area until it forms a thick covering.
- Cut a small black circle for the nose.
- Attach the nose and googly eye.
- Allow the glue to dry.
Helpful Tip: Use thick yarn because it covers the cardboard more quickly and creates a fuller appearance.
8. Finger-Puppet Arctic Hare
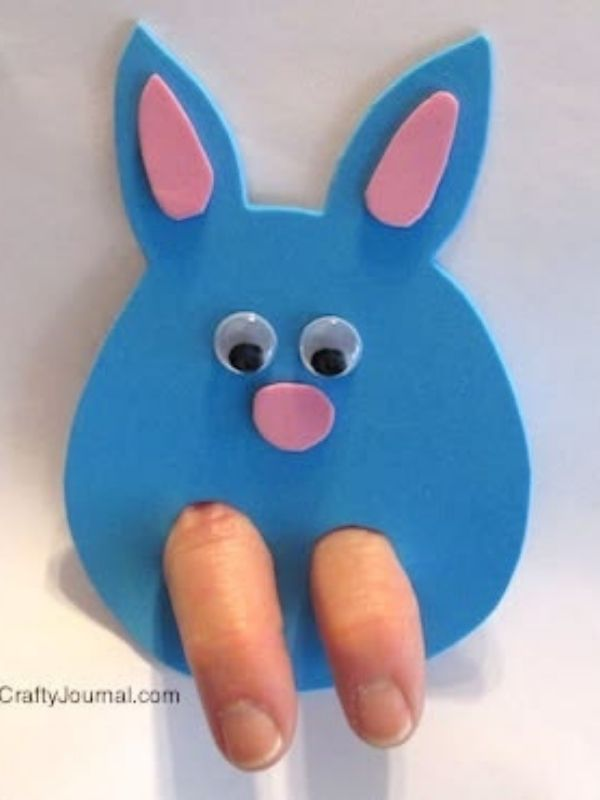
An Arctic hare finger puppet is a small character that children can use during storytelling and pretend play. Its long ears and white body help children recognise the animal.
Materials Needed
- White felt or thick paper
- Pink paper
- Glue
- Scissors
- Googly eyes
- Black marker
How to Make
- Cut two matching oval shapes from white felt.
- Cut two long ears from white felt.
- Cut smaller pink shapes for the inner ears.
- Glue the pink pieces onto the white ears.
- Attach the ears to one oval body piece.
- Glue the two body pieces together around the edges, leaving the bottom open.
- Add eyes, a small nose, and a mouth.
- Allow the puppet to dry before slipping it over a finger.
Helpful Tip: Make the puppet slightly larger for younger children so they can use it comfortably.
9. Salt Dough Winter Fox
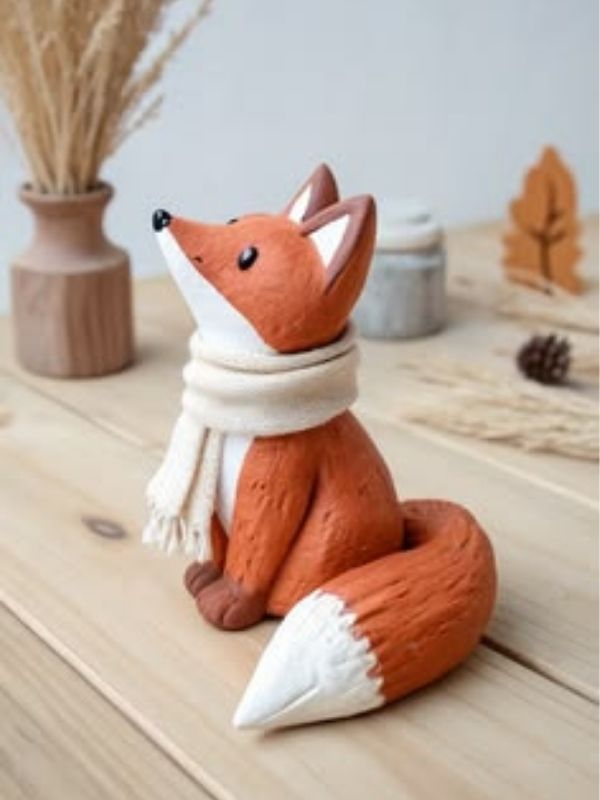
Salt dough allows children to model a small fox using their hands and simple shaping tools. Once dry, the figure can be painted and displayed as a winter decoration.
Materials Needed
- 2 cups plain flour
- 1 cup salt
- ¾ cup water
- Mixing bowl
- Rolling pin
- Plastic modelling tools
- Orange, white, and black paint
How to Make
- Mix the flour and salt in a bowl.
- Gradually add water and mix until a firm dough forms.
- Knead the dough until smooth.
- Shape an oval body and a smaller head.
- Make four small legs and a bushy tail.
- Join the pieces carefully using a little water.
- Add eyes, a nose, and other details.
- Allow the figure to air-dry completely.
- Paint the fox orange, white, and black.
Helpful Tip: Make the parts similar in thickness so they dry more evenly. Children should not taste the dough.
10. Winter Animal Footprint Art
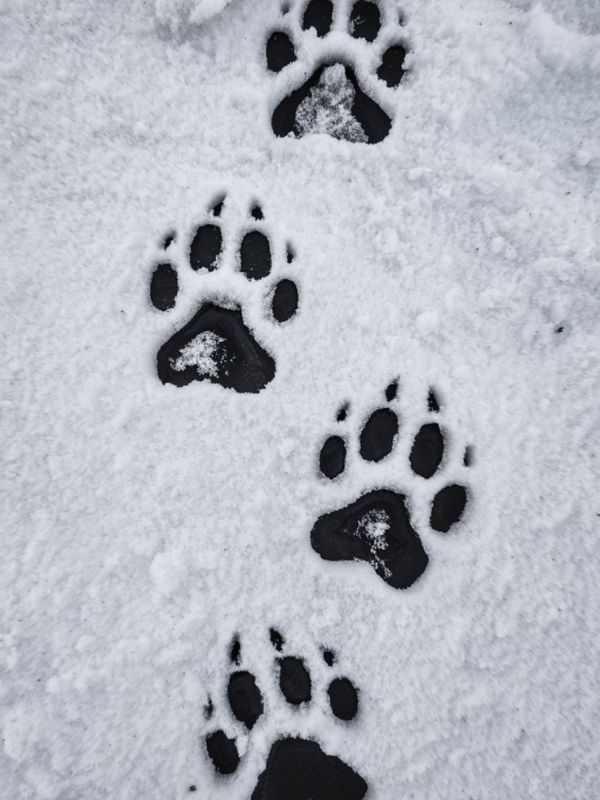
Children can create a picture showing different animal tracks across a snowy landscape. This activity combines art with an introduction to animal movement and footprints.
Materials Needed
- White or light blue paper
- Brown and black paint
- Cotton buds or small sponges
- Animal footprint reference pictures
- Paintbrush
- Markers
How to Make
- Paint a light blue background on the paper.
- Allow it to dry.
- Look at pictures of different animal footprints.
- Use cotton buds or small sponges to recreate the shapes.
- Arrange the footprints in trails across the paper.
- Use markers to add snow-covered trees or other background details.
- Label the tracks with the names of the animals.
Helpful Tip: Introduce two or three animal tracks at a time so younger children can identify and compare their shapes.
Winter Craft Ideas for Toddlers and Preschoolers
These winter crafts are suitable for young children who enjoy simple, hands-on activities. They use easy-to-find materials and focus on painting, gluing, colouring, and creating.
1. Cotton Wool Snowman Craft
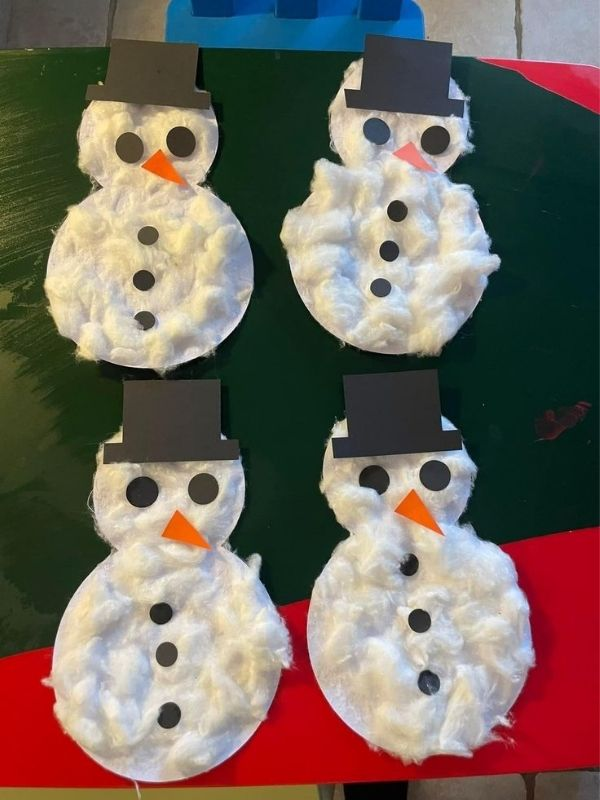
Create a soft, fluffy snowman using cotton wool and simple craft materials. This activity helps young children practise sticking and arranging objects.
Materials Needed
-
Cotton wool
-
Blue or white construction paper
-
Glue
-
Black paper
-
Orange paper
-
Googly eyes
How to Make It
-
Draw two or three connected circles on the paper.
-
Help the child spread glue inside the circles.
-
Let them cover the circles with cotton wool.
-
Add googly eyes, a paper nose, and small black buttons.
-
Finish with a paper hat and scarf.
Helpful Tip: Use a larger sheet of paper so toddlers have enough space to arrange the cotton wool.
2. Winter Mitten Painting
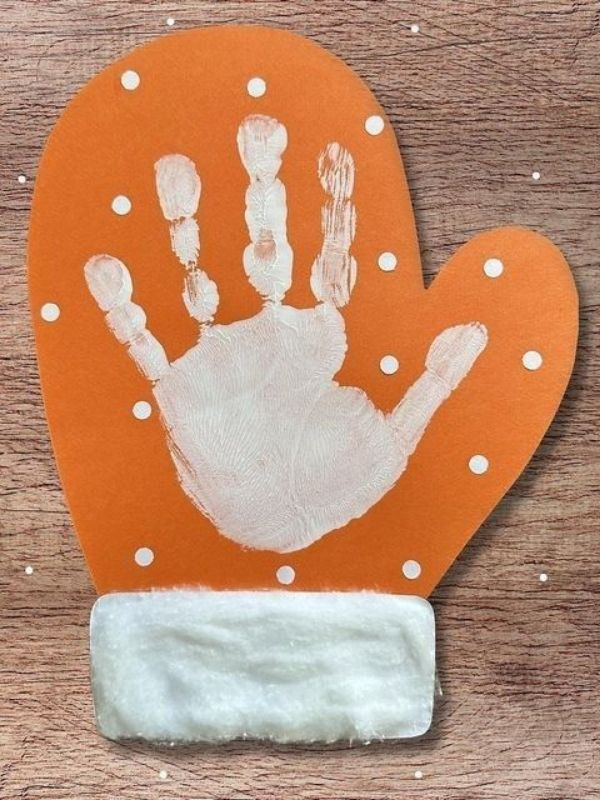
Children can decorate mitten shapes using paint, fingerprints, or sponges. It is a simple way to explore colours and patterns.
Materials Needed
-
Mitten-shaped paper cutouts
-
Washable paint
-
Paintbrushes or sponges
-
Crayons
-
Glue
How to Make It
-
Cut out large mitten shapes from construction paper.
-
Give each child different paint colours.
-
Let them paint or stamp patterns on the mittens.
-
Allow the paint to dry.
-
Add small paper shapes or cotton wool for decoration.
Helpful Tip: Use washable paint and offer only two or three colours at a time to keep the activity simple.
3. Paper Plate Snowman Face
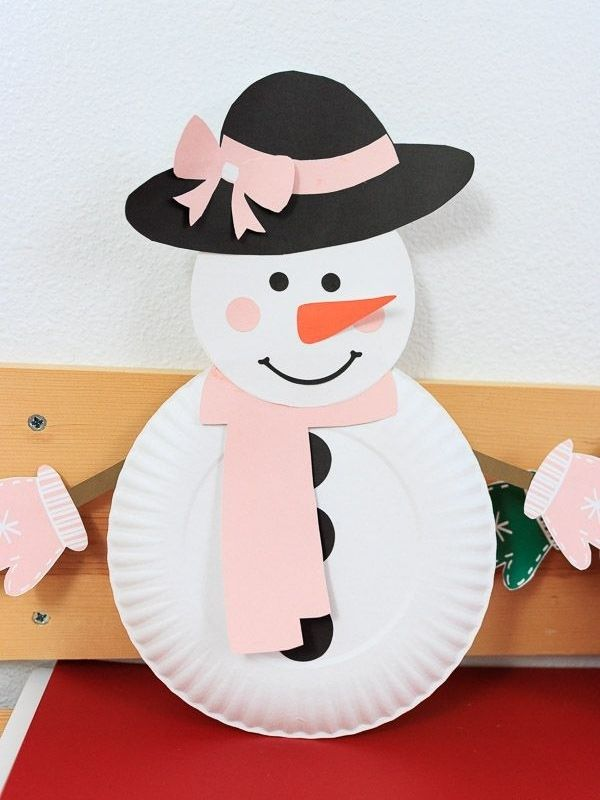
Turn an ordinary paper plate into a cheerful snowman face. This craft encourages creativity while helping children practise placing and gluing shapes.
Materials Needed
-
White paper plate
-
Orange construction paper
-
Black paper
-
Googly eyes
-
Glue
-
Scissors
How to Make It
-
Give each child a white paper plate.
-
Help them glue on two googly eyes.
-
Cut a small orange triangle for the nose.
-
Add black paper circles for the mouth.
-
Decorate the top with a paper hat.
Helpful Tip: Prepare the paper shapes before the activity so younger children can focus on decorating.
4. Sponge-Printed Snowfall
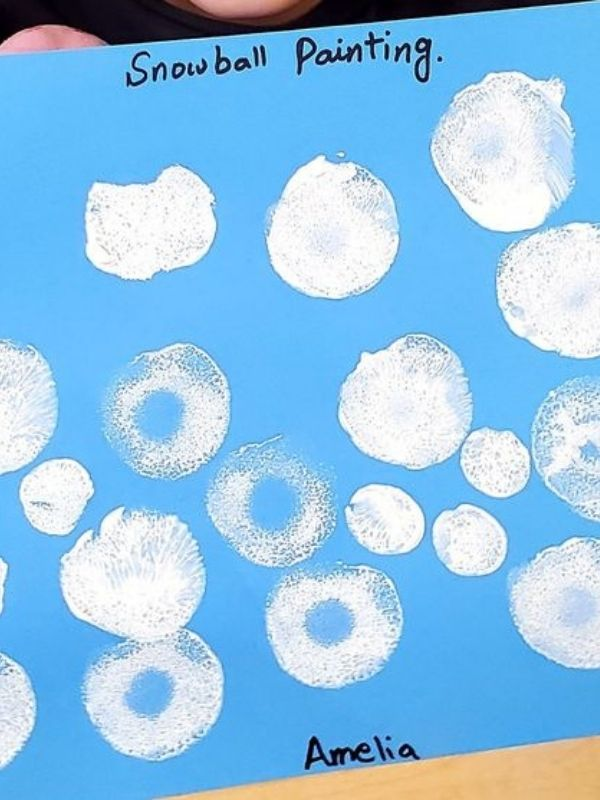
Children can create their own snowy winter scene by stamping white paint onto blue paper. The activity introduces simple printing techniques.
Materials Needed
-
Blue construction paper
-
White washable paint
-
Small clean sponges
-
Paper plate
How to Make It
-
Pour a little white paint onto a paper plate.
-
Give each child a small sponge.
-
Show them how to dip the sponge lightly into the paint.
-
Let them stamp white dots across the blue paper.
-
Add simple paper trees or snowmen to complete the scene.
Helpful Tip: Encourage children to make snowflakes in different sizes by using different sponge shapes.
5. Paper Cup Snowman
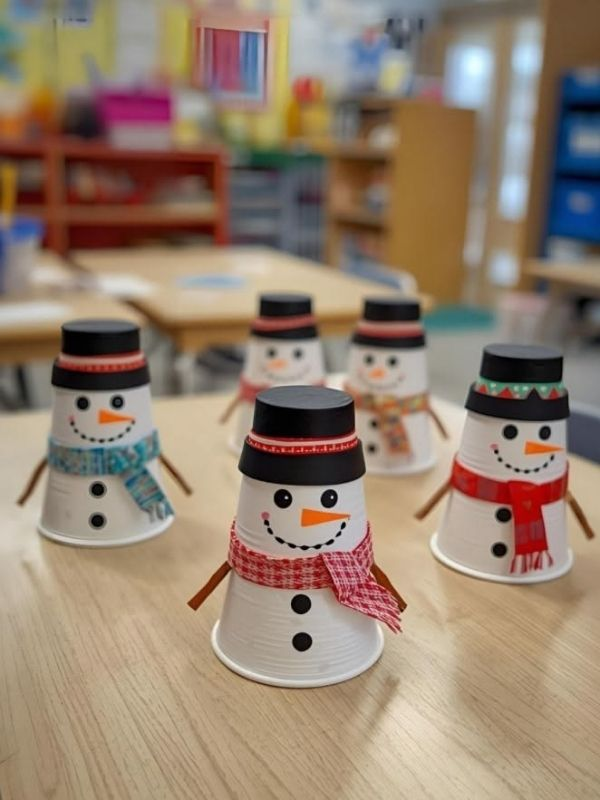
Transform a white paper cup into a small snowman decoration. Children can practise placing facial features and adding simple decorations.
Materials Needed
-
White paper cup
-
Googly eyes
-
Orange paper
-
Black paper
-
Glue
-
Ribbon or coloured paper
How to Make It
-
Turn the paper cup upside down.
-
Glue two googly eyes near the top.
-
Add a small orange paper nose.
-
Attach black paper buttons.
-
Wrap a strip of coloured paper around the cup as a scarf.
Helpful Tip: Use lightweight paper cups that children can decorate without struggling to hold them.
6. Paper Plate Winter Penguin
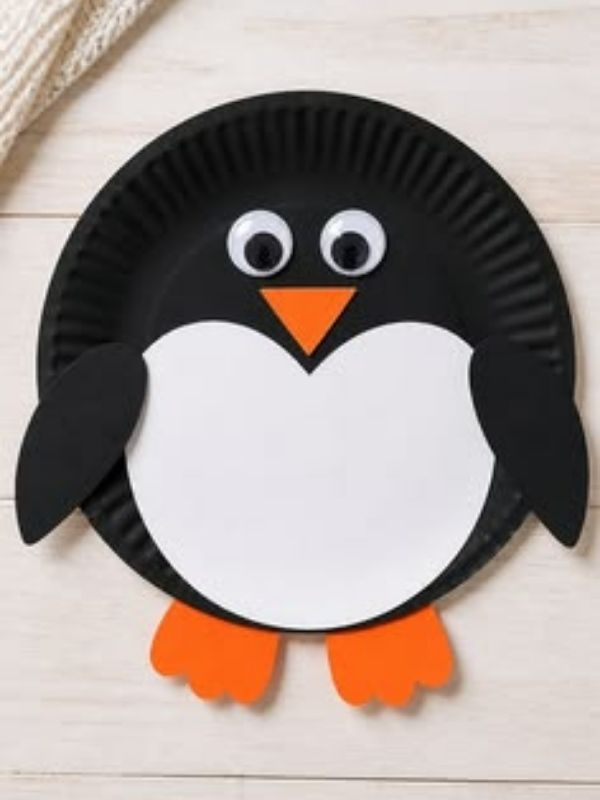
Make a cute winter penguin using a paper plate and black and white paper. Children can learn about winter animals while developing their cutting and gluing skills.
Materials Needed
-
Paper plate
-
Black construction paper
-
White paper
-
Orange paper
-
Glue
-
Googly eyes
How to Make It
-
Cut a large black oval for the penguin’s body.
-
Glue it onto the paper plate.
-
Add a white oval to the centre.
-
Attach googly eyes and an orange paper beak.
-
Add orange feet at the bottom.
Helpful Tip: Prepare the shapes in advance for toddlers, while preschoolers can practise cutting simple shapes with child-safe scissors.
7. Winter Tree Finger Painting
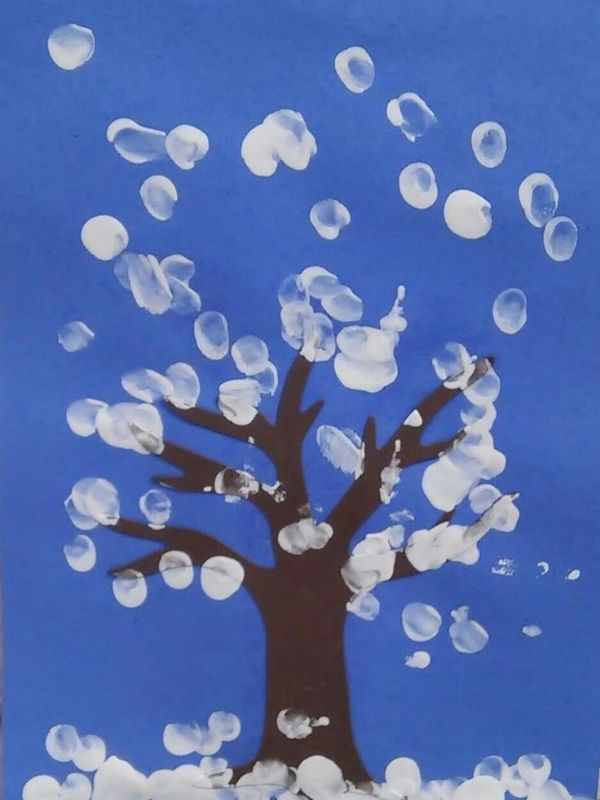
Let children paint a winter tree using their fingers. This sensory activity allows them to explore paint while creating a simple snowy picture.
Materials Needed
-
Blue construction paper
-
Brown washable paint
-
White washable paint
-
Paint tray
-
Wet wipes
How to Make It
-
Draw or paint a simple brown tree trunk with branches.
-
Pour a little white paint into a tray.
-
Ask children to dip their fingers into the paint.
-
Let them make white fingerprints around the branches.
-
Add more fingerprints to create snow on the ground.
Helpful Tip: Show children how to use one finger at a time to make neat snow marks.
8. 3D Paper Winter House
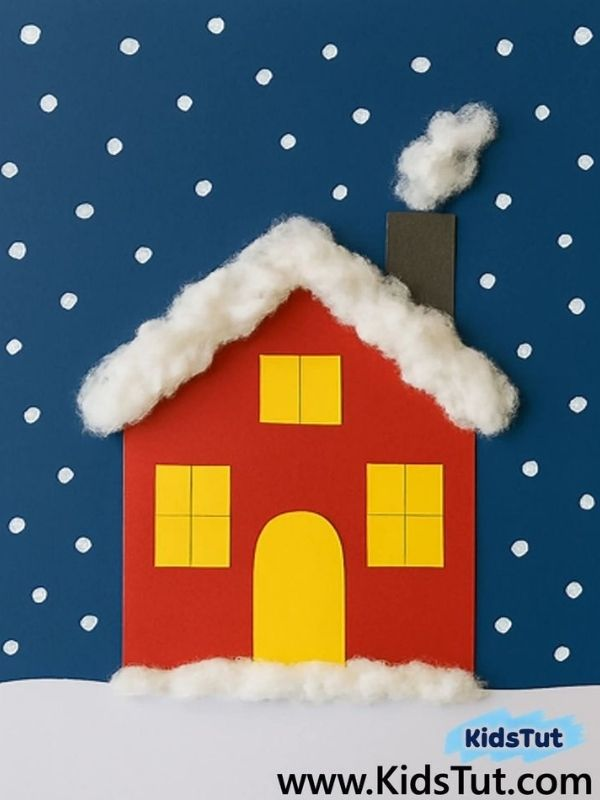
Children can create a little winter house using folded paper and simple decorations. This activity introduces basic shapes and helps develop hand coordination.
Materials Needed
-
Coloured construction paper
-
White paper
-
Glue
-
Crayons
-
Cotton wool
-
Child-safe scissors
How to Make It
-
Fold a rectangular sheet of paper into a simple house shape.
-
Help children attach a triangular roof.
-
Draw windows and a door.
-
Add cotton wool to the roof to represent snow.
-
Decorate the house with crayons and small paper shapes.
Helpful Tip: Prepare the folded house shapes beforehand for toddlers. Preschoolers can help with folding and decorating.
9. Winter Penguin Handprint Art
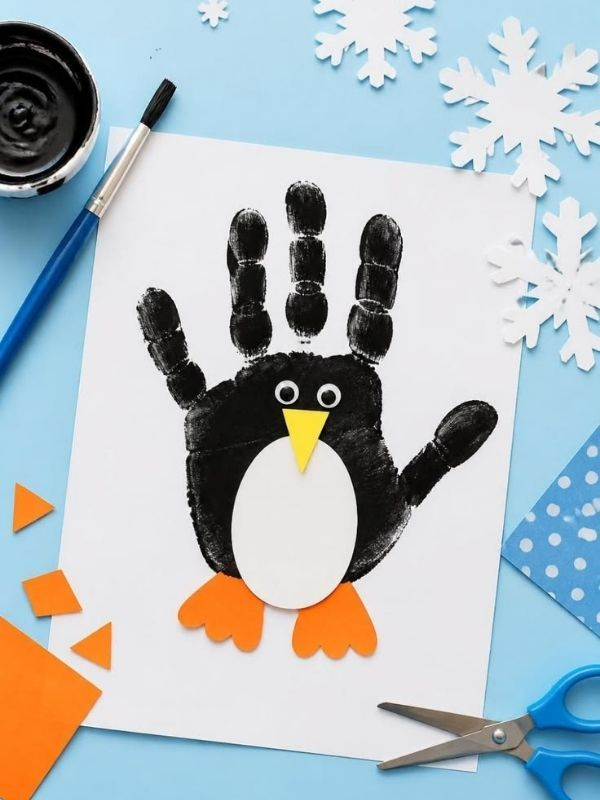
Use a child’s handprint to create a memorable penguin picture. It is an enjoyable activity that combines painting with a little winter animal learning.
Materials Needed
-
White paper
-
Black washable paint
-
Orange paint or paper
-
Paintbrush
-
Googly eyes
-
Wet wipes
How to Make It
-
Paint the child’s palm and fingers with black paint.
-
Press the hand firmly onto the paper.
-
Allow the print to dry.
-
Add two googly eyes near the thumb area.
-
Draw or attach an orange beak and feet.
Helpful Tip: Write the child’s name and date beside the handprint to keep it as a winter keepsake.
10. Winter Snow Globe Paper Craft
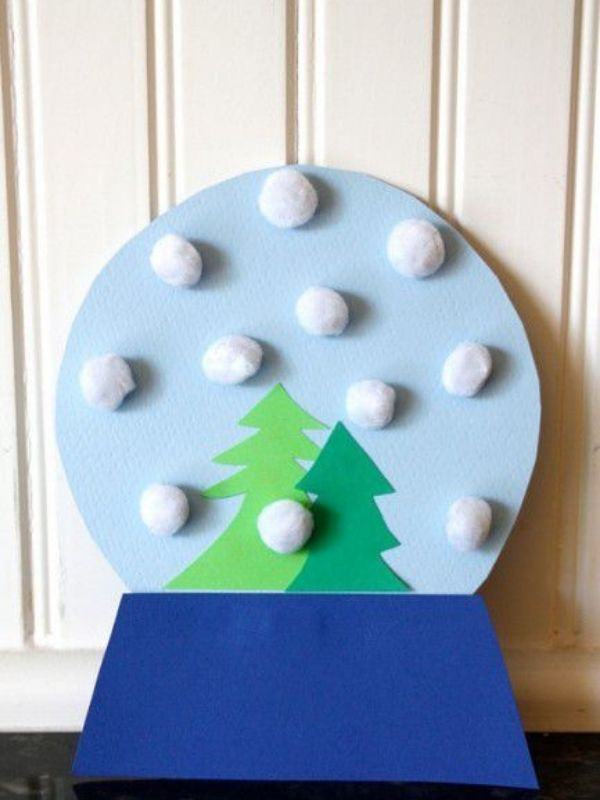
Create a pretend snow globe using paper, glue, and simple winter decorations. Children can design their own snowy scene without needing a real glass globe.
Materials Needed
-
Blue or white paper
-
Paper plate or circular paper cutout
-
Cotton wool
-
Glue
-
Crayons
-
Small paper snowflakes
How to Make It
-
Draw or cut out a large circle for the snow globe.
-
Let children colour the background blue.
-
Add a small snowman, tree, or winter house.
-
Glue cotton wool and paper snowflakes inside the circle.
-
Attach a rectangular paper base beneath the circle.
Helpful Tip: Let children choose their own winter scene so each snow globe looks different.
Winter Painting, Sensory, and Creative Crafts for Kids
Painting and sensory crafts allow children to experiment with textures, colours, and unusual materials. These activities encourage creativity and help develop hand control, observation, and problem-solving skills. They are especially suitable for younger children who enjoy exploring different ways to create artwork. Children can also learn about simple scientific ideas such as melting, colour mixing, and light while making their projects.
1. Bubble Wrap Snowflake Printing
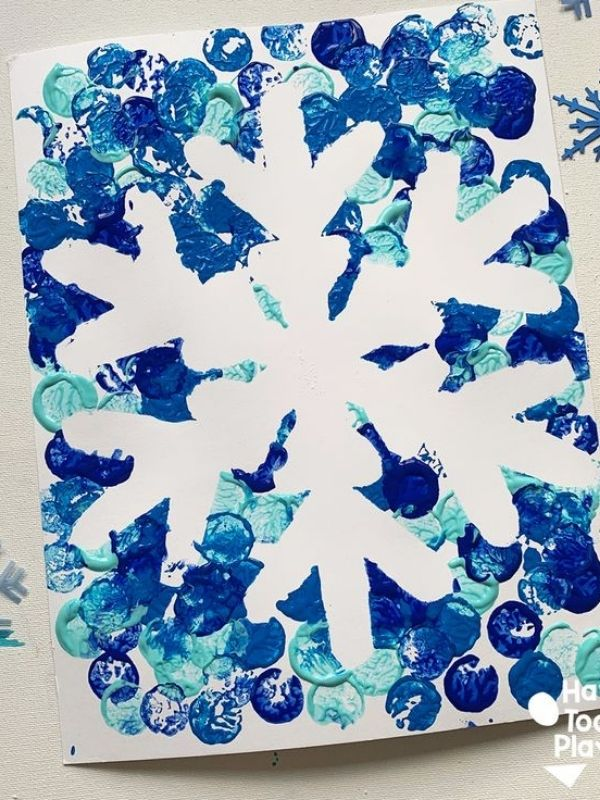
Bubble wrap printing creates interesting patterns that resemble the texture of snowflakes. Children can use this simple technique to make winter-themed artwork without drawing every detail themselves.
Materials Needed
- Bubble wrap
- White and blue washable paint
- Paintbrush
- Thick paper
- Paint tray
- Scissors
How to Make
- Cut a small piece of bubble wrap.
- Apply a thin layer of washable paint to the raised side.
- Place the bubble wrap carefully onto the paper.
- Press gently with both hands.
- Lift the bubble wrap to reveal the printed pattern.
- Repeat with different colours and positions.
- Allow the artwork to dry.
Helpful Tip: Avoid applying too much paint. A thin layer produces clearer prints.
2. Salt Painting Winter Art
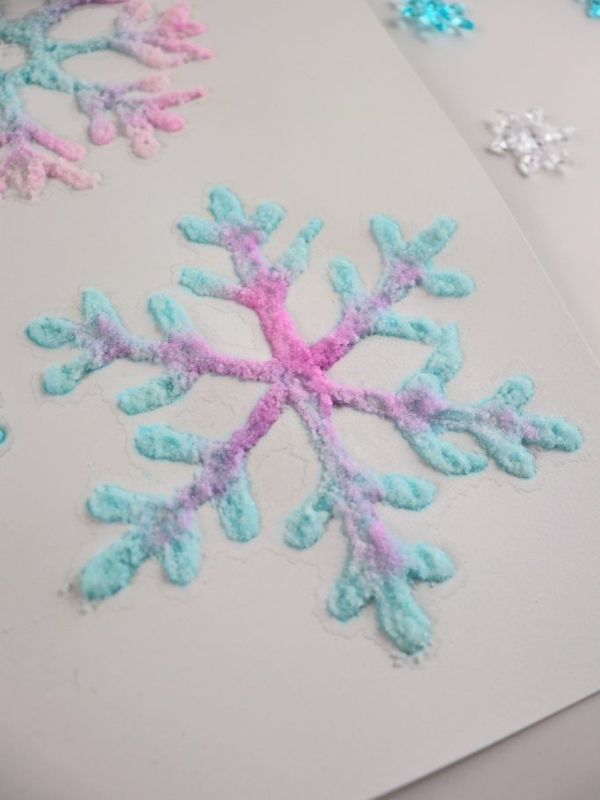
Salt painting creates raised, textured lines that children can colour using diluted paint. It is a creative way to make winter shapes such as stars, snowflakes, and trees.
Materials Needed
- Thick paper or cardboard
- White school glue
- Table salt
- Watercolour paint
- Paintbrush
- Small tray
How to Make
- Draw a winter design using white glue.
- Sprinkle salt over the wet glue until the lines are covered.
- Shake off the extra salt into a tray.
- Allow the glue to settle slightly.
- Dip a paintbrush into diluted watercolour paint.
- Touch the brush gently against the salt lines.
- Watch the colour spread along the design.
- Leave the artwork flat until completely dry.
Helpful Tip: Use thick paper to prevent the artwork from bending as it dries. Children should avoid rubbing the salt lines.
3. Cotton Swab Snowfall Painting
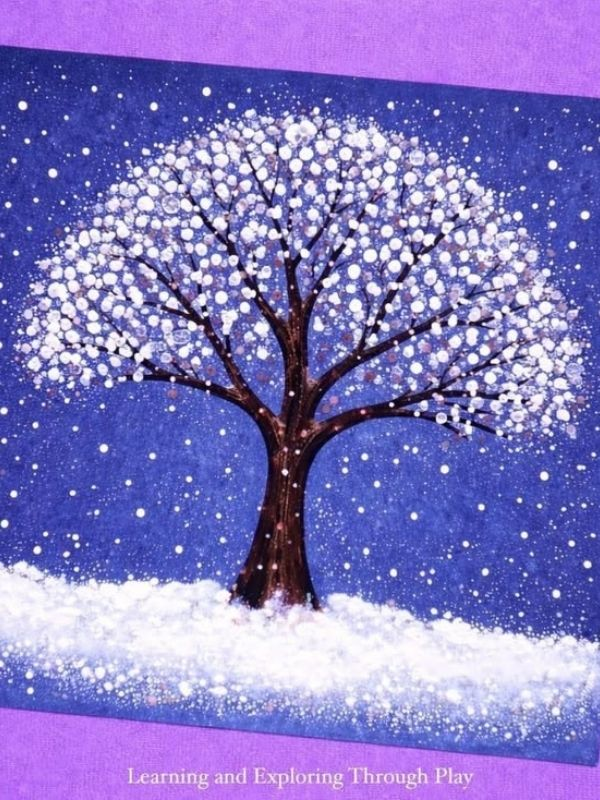
This activity allows children to create a snowy scene by making small paint dots with cotton swabs. It is particularly useful for practising hand control and creating repeated patterns.
Materials Needed
- Blue construction paper
- White washable paint
- Cotton swabs
- Paint tray
- Black and brown markers
- Protective covering
How to Make
- Draw a simple winter background on blue paper.
- Use markers to add trees, houses, or mountains.
- Pour a small amount of white paint into a tray.
- Dip a cotton swab into the paint.
- Press it gently onto the paper to create small dots.
- Repeat across the background to represent falling snow.
- Add more dots around the trees and rooftops.
- Leave the picture to dry.
Helpful Tip: Use a new cotton swab when changing colours to keep the paint clean.
4. Ice Cube Watercolour Painting
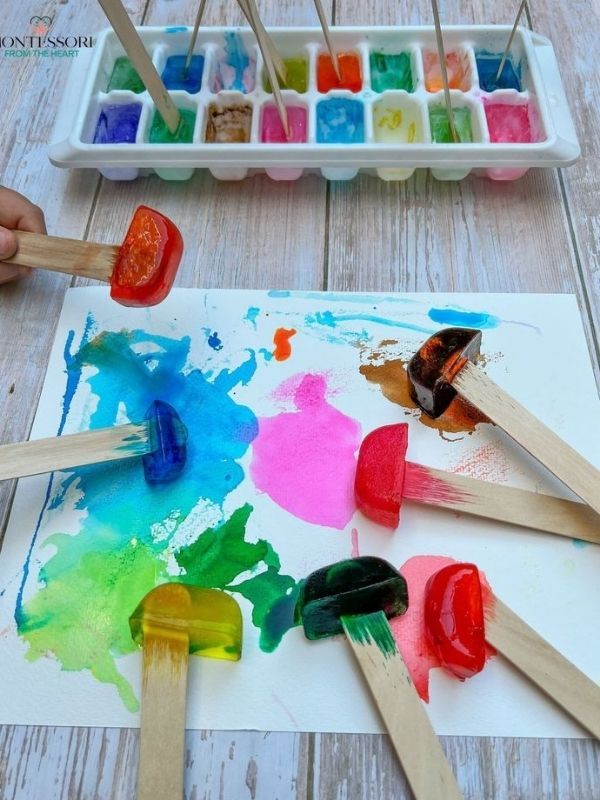
Ice cube painting gives children an opportunity to explore how frozen colours change as they melt. It combines art with a simple observation of melting and temperature.
Materials Needed
- Ice cube tray
- Water
- Washable liquid watercolour or child-safe paint
- Craft sticks
- Thick paper
- Freezer
How to Make
- Pour water into the sections of an ice cube tray.
- Add a small amount of different washable colours to each section.
- Mix gently.
- Place a craft stick in each section.
- Freeze until the coloured cubes become solid.
- Remove the cubes with adult assistance.
- Let children hold the craft sticks and move the coloured ice across thick paper.
- Allow the artwork to dry.
Helpful Tip: Use one colour at a time at first so children can observe how each colour spreads before mixing them.
5. Winter Texture Rubbing Art
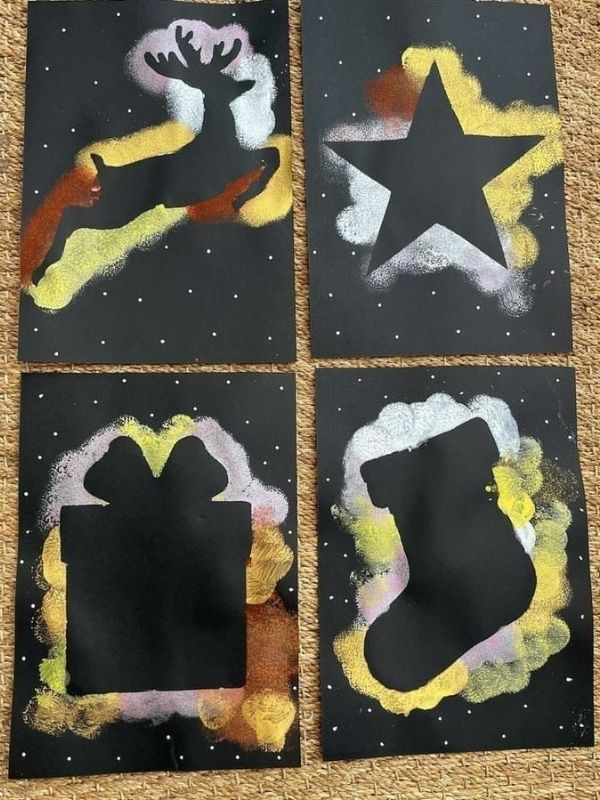
Texture rubbing helps children discover patterns in everyday objects. They can use crayons and paper to capture interesting textures and combine them into a winter picture.
Materials Needed
- White paper
- Crayons
- Textured craft sheets or safe textured objects
- Blue and grey paper
- Glue
- Scissors
How to Make
- Place a textured object or craft sheet under a piece of paper.
- Remove the crayon wrapper.
- Hold the crayon sideways.
- Rub the crayon gently over the paper.
- Repeat with different textures and colours.
- Cut the textured paper into shapes.
- Arrange the shapes into a winter picture.
- Glue the pieces onto a larger sheet of paper.
Helpful Tip: Use flat, clean surfaces with noticeable patterns. Avoid sharp or unstable objects.
6. DIY Winter Sensory Bottle
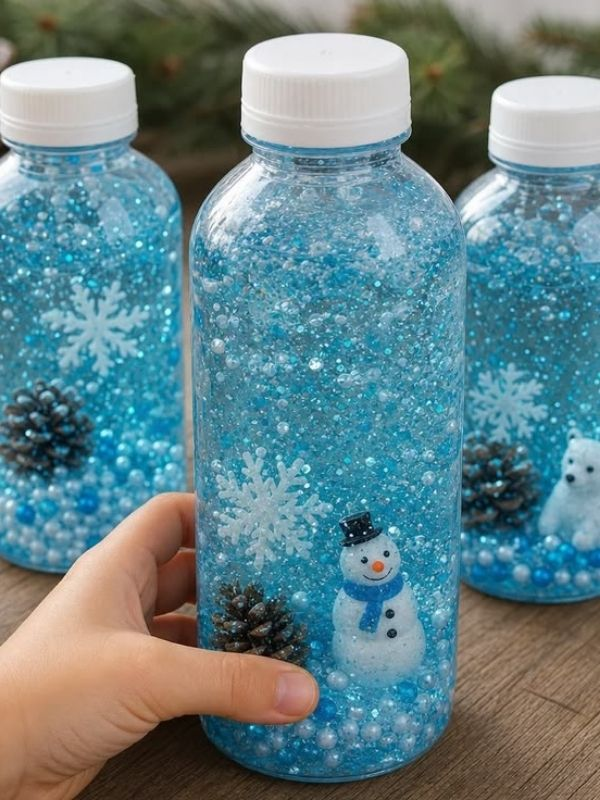
A winter sensory bottle is a clear container filled with water and decorative materials. When children turn it gently, the floating decorations move around like a miniature snow scene.
Materials Needed
- Clear plastic bottle
- Water
- Glitter
- Small plastic snowflake decorations
- Clear liquid glue
- Funnel
- Strong adhesive for sealing the lid
How to Make
- Wash and dry the plastic bottle.
- Add a small amount of glitter and plastic snowflake decorations.
- Fill the bottle with water, leaving a little space at the top.
- Add a small amount of clear glue if you want the glitter to move more slowly.
- Close the lid tightly.
- Ask an adult to secure the lid with suitable adhesive.
- Turn the bottle gently to watch the decorations move.
Helpful Tip: Use a sturdy plastic bottle instead of glass. An adult should prepare and seal the bottle before younger children handle it.
7. Snowy Salt Dough Ornaments
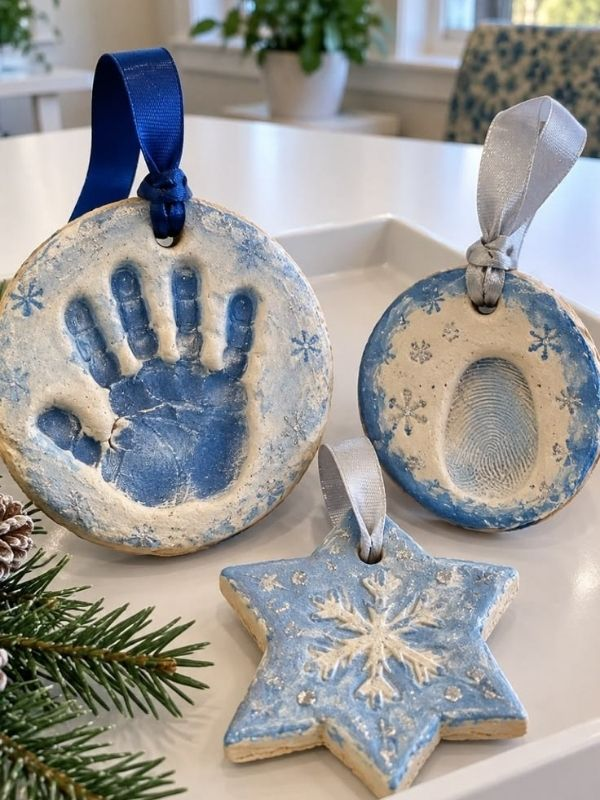
Salt dough ornaments allow children to create personalised decorations using simple ingredients. They can shape stars, trees, hearts, and other winter designs before painting them.
Materials Needed
- 2 cups plain flour
- 1 cup salt
- ¾ cup water
- Mixing bowl
- Rolling pin
- Cookie cutters
- Drinking straw
- Paint
- Ribbon
How to Make
- Mix the flour and salt in a bowl.
- Add water gradually and stir until a dough forms.
- Knead the dough until smooth.
- Roll it out on a flat surface.
- Use cookie cutters to make different shapes.
- Use a drinking straw to make a small hole near the top of each shape.
- Allow the ornaments to air-dry completely, turning them occasionally.
- Paint the dried ornaments.
- Thread ribbon through the holes once the paint has dried.
Helpful Tip: Keep the ornaments fairly thin so they dry more evenly. Children should not taste the dough.
8. Winter Watercolour Resist Art
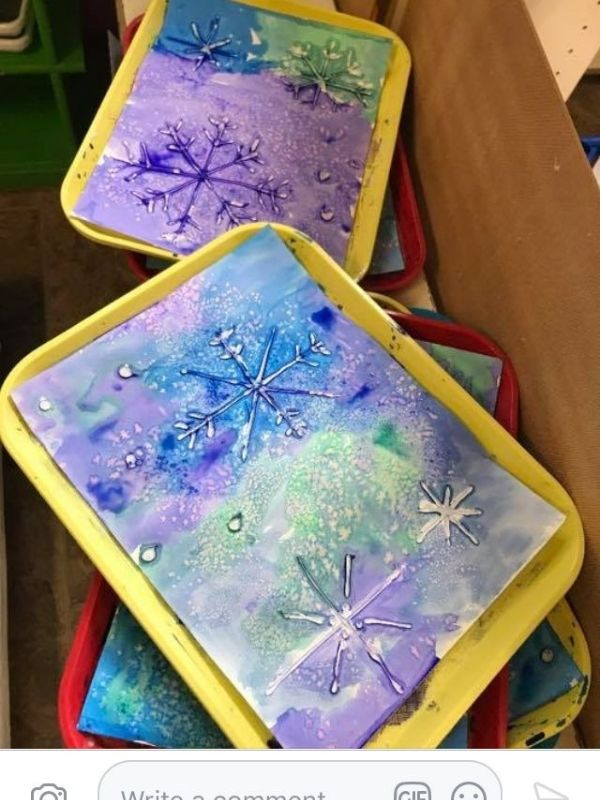
Watercolour resist art uses white crayon drawings that become visible when children paint over them. It creates an exciting surprise as hidden winter patterns appear on the paper.
Materials Needed
- White paper
- White crayon
- Blue watercolour paint
- Paintbrush
- Water container
- Paint tray
How to Make
- Give each child a sheet of white paper.
- Use a white crayon to draw snowflakes, stars, or other winter patterns.
- Prepare blue watercolour paint.
- Brush the paint across the paper.
- Watch as the white crayon drawings become visible.
- Add more colours if desired.
- Leave the artwork to dry.
Helpful Tip: Press firmly when drawing with the white crayon so the hidden patterns show clearly when painted over.
9. Shaving Cream Winter Print
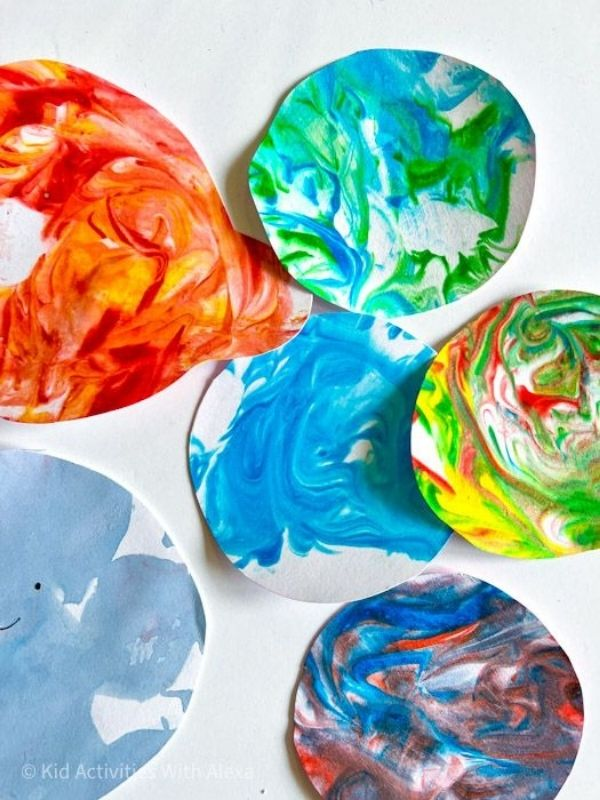
Shaving cream printing creates colourful, marble-like patterns that can be used for winter artwork. Children can explore how colours mix and spread across a surface.
Materials Needed
- Shaving cream
- Washable liquid paint
- Shallow tray
- Thick paper
- Craft stick
- Scraper or stiff card
- Protective covering
How to Make
- Cover the bottom of a shallow tray with shaving cream.
- Add small drops of washable paint.
- Use a craft stick to swirl the colours gently.
- Place a sheet of paper on top of the mixture.
- Press lightly so the paper touches the surface.
- Lift the paper carefully.
- Use a scraper or stiff card to remove the extra shaving cream.
- Allow the print to dry.
Helpful Tip: Use only a few drops of paint at a time. Too much paint can make the design look muddy. This activity requires close adult supervision.
10. Winter Shadow Drawing

Winter shadow drawing introduces children to light, shapes, and observation. They can use small objects to create shadows and turn the outlines into imaginative winter scenes.
Materials Needed
- White paper
- Pencil
- Crayons or coloured pencils
- Small winter-themed objects
- Desk lamp or suitable light source
How to Make
- Place a small object on a flat surface.
- Position a light source so the object creates a clear shadow.
- Place paper beside or beneath the shadow.
- Trace the shadow outline carefully.
- Remove the object.
- Turn the outline into a winter picture using crayons or coloured pencils.
- Add details such as snow, trees, houses, or animals.
- Repeat with other objects to create a collection of shadow drawings.
Helpful Tip: Try different light positions and object sizes. Ask children how the shadows change when the light moves closer or farther away.
Frequently Asked Questions About Winter Crafts for Kids
1. What are some easy winter crafts for kids?
Some easy winter crafts include paper mittens, cotton swab snowfall painting, paper lanterns, cardboard tube houses, and pinecone decorations. These projects use simple materials and have straightforward instructions.
2. What materials are commonly used for winter crafts?
Children can use paper, cardboard, cotton wool, glue, scissors, paint, yarn, pinecones, twigs, plastic bottles, and other recycled materials. Many winter crafts do not require expensive supplies.
3. What winter crafts are suitable for toddlers and preschoolers?
Toddlers and preschoolers can enjoy simple painting, paper collage, sponge printing, and large-shape decorating activities. Choose projects that match their abilities and use age-appropriate materials.
4. How can teachers use winter crafts in the classroom?
Teachers can connect winter crafts to lessons about seasons, weather, animals, shapes, colours, and recycling. They can also ask children to explain their finished projects to develop speaking and communication skills.
5. How can kids make winter crafts with recycled materials?
Children can reuse cardboard tubes, egg cartons, plastic bottles, old newspapers, bottle caps, and fabric scraps. These materials can become decorations, animal figures, miniature buildings, and useful storage items.
6. How do you display children’s winter crafts?
You can display finished crafts on classroom boards, shelves, windows, and walls. Hanging decorations and miniature displays also work well. Another idea is to organise a small winter craft exhibition where children explain how they made their projects.
7. How can I make winter crafts more educational?
Connect each activity to a learning objective. For example, paper snowflakes can introduce symmetry, winter animal crafts can teach children about habitats, and recycled crafts can encourage environmental awareness.
Conclusion
Winter crafts ideas for kids provide an enjoyable way to combine creativity, learning, and hands-on activities. With simple materials such as paper, cardboard, pinecones, paint, and recycled containers, children can create beautiful decorations, animal figures, artwork, and imaginative projects.
Choose crafts that suit the children’s ages and abilities. Give them room to experiment, make their own decisions, and explore different materials.
Most importantly, let children enjoy the creative process. Their finished projects do not have to look perfect. The real value comes from what they learn and the fun they have while making them.